How to build and customize databases in Airtable


%2520(1).webp)
Airtable is a cloud-based platform that acts as a spreadsheet/database hybrid for anyone to build and customize relational databases. You don't need experience (or coding skills) to get started, but if you're building your first database, you've come to the right place.
This article looks at three ways to build a database in Airtable:
- How to build a database in Airtable from a template
- How to build a database in Airtable from scratch
- How to build an application on top of Airtable with Softr
{{cta-1}}
How Airtable databases work
Before we dive in, it helps to understand the terminology behind the core building blocks of an Airtable database. These include:
- Bases: A base is just how Airtable refers to a database as a whole. You can think of it as the entire system that holds all your information across multiple tables. For example, you might have a base for your CRM, a project tracker, or a content calendar that contains all the different tables, records, and views for that specific system.
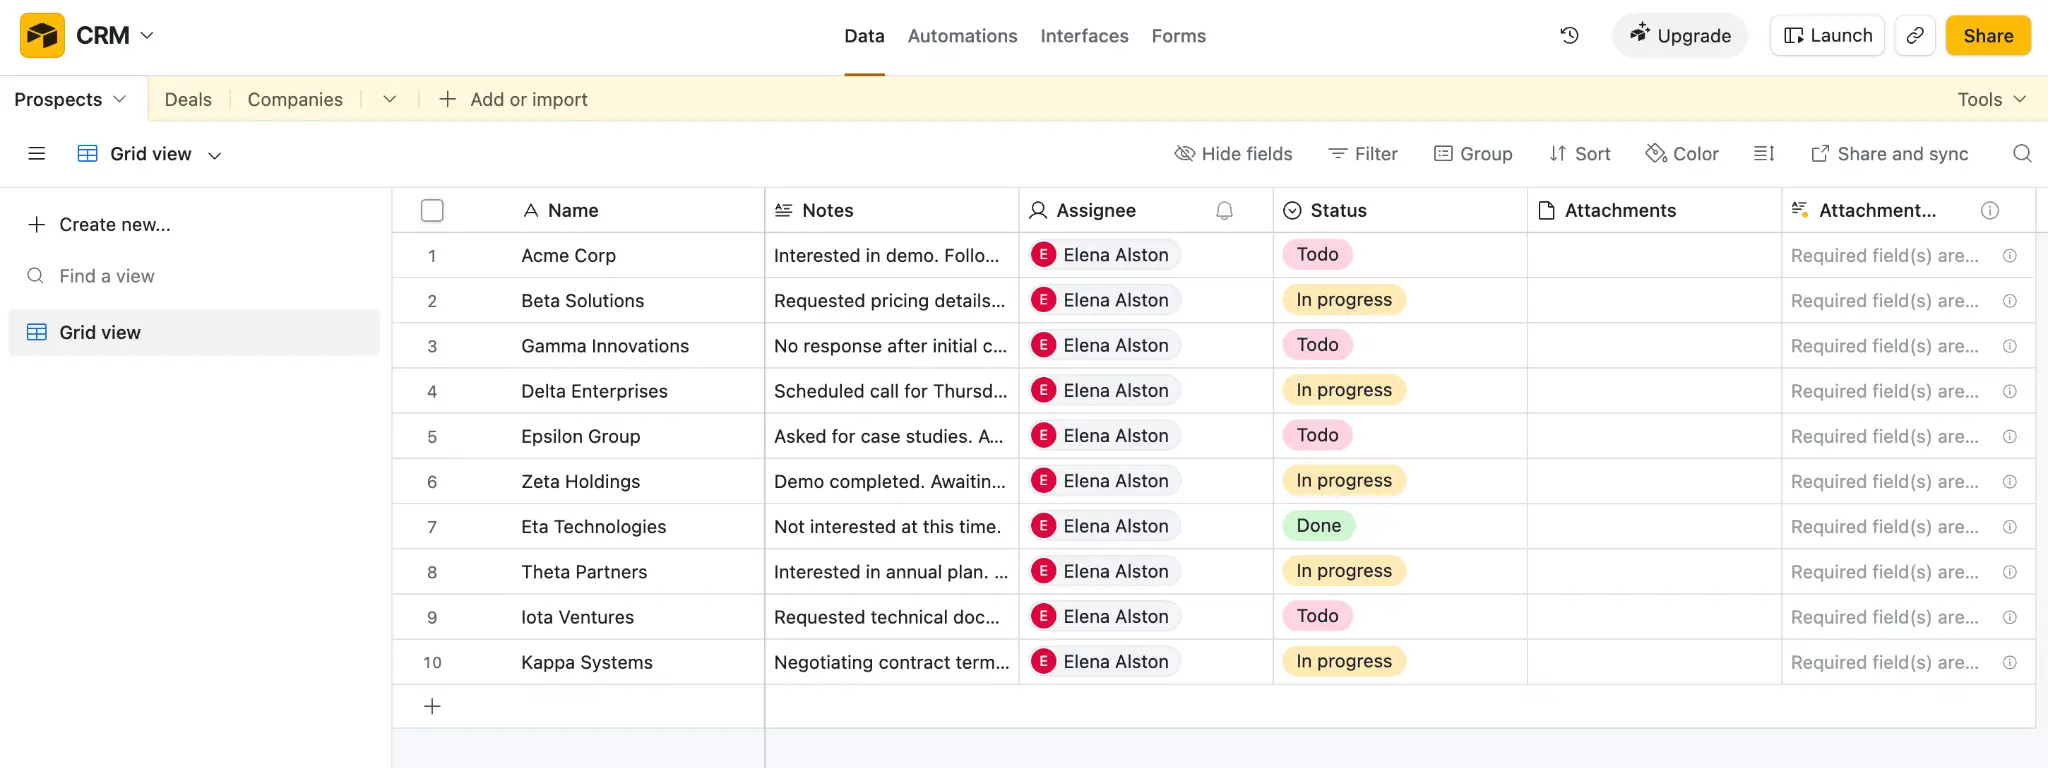
- Tables: Each base is made up of one or more tables, which list items of the same type. For example, in a CRM, you might have separate tables for prospects, contracts, and deals, with each table storing related records.
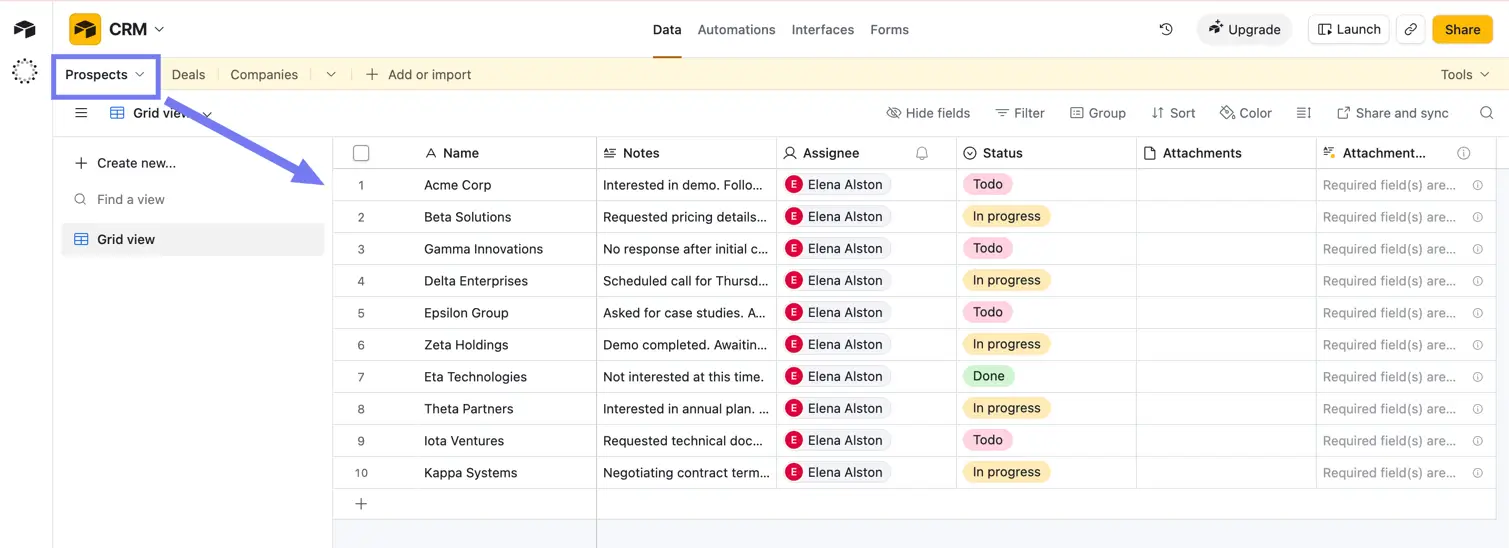
- Fields: Fields are the columns inside a table that define what type of information each record contains. For example, a Contacts table might include fields like “Name” or “Email” and “Status”. Airtable supports many different field types—including text, numbers, dates, attachments, checkboxes, formulas, and linked records—which makes it much more powerful than a traditional spreadsheet.
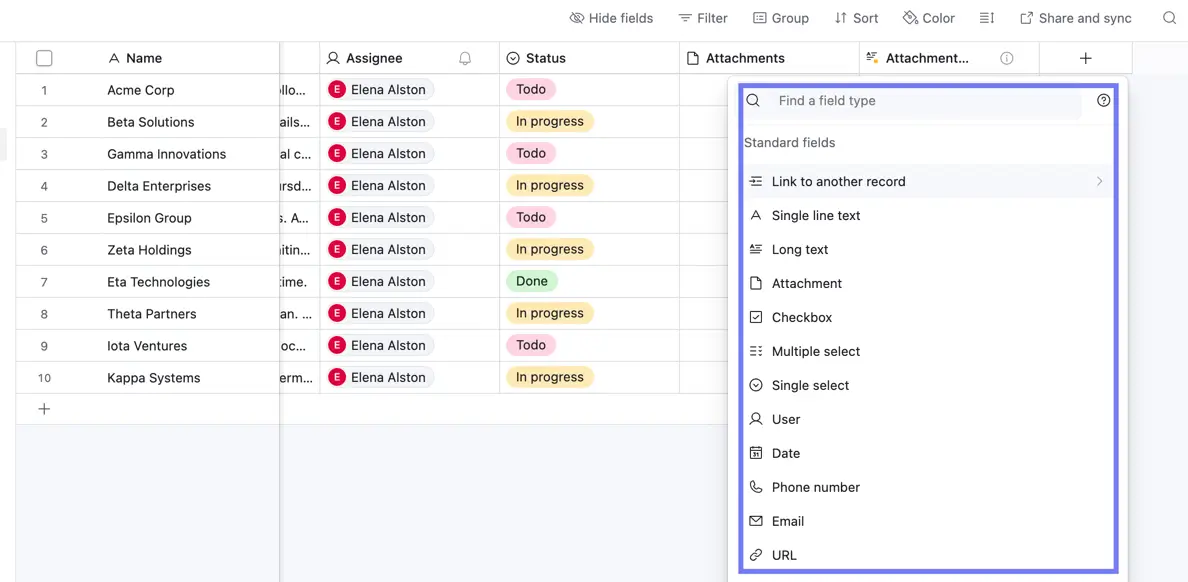
- Linked records: Linked records are a field type, but perhaps Airtable’s most important one. Linked records connect information between tables, allowing Airtable to function more like a relational database than a spreadsheet. For example, you can link contacts to companies, tasks to projects, or deals to sales reps to keep related information connected across your base.
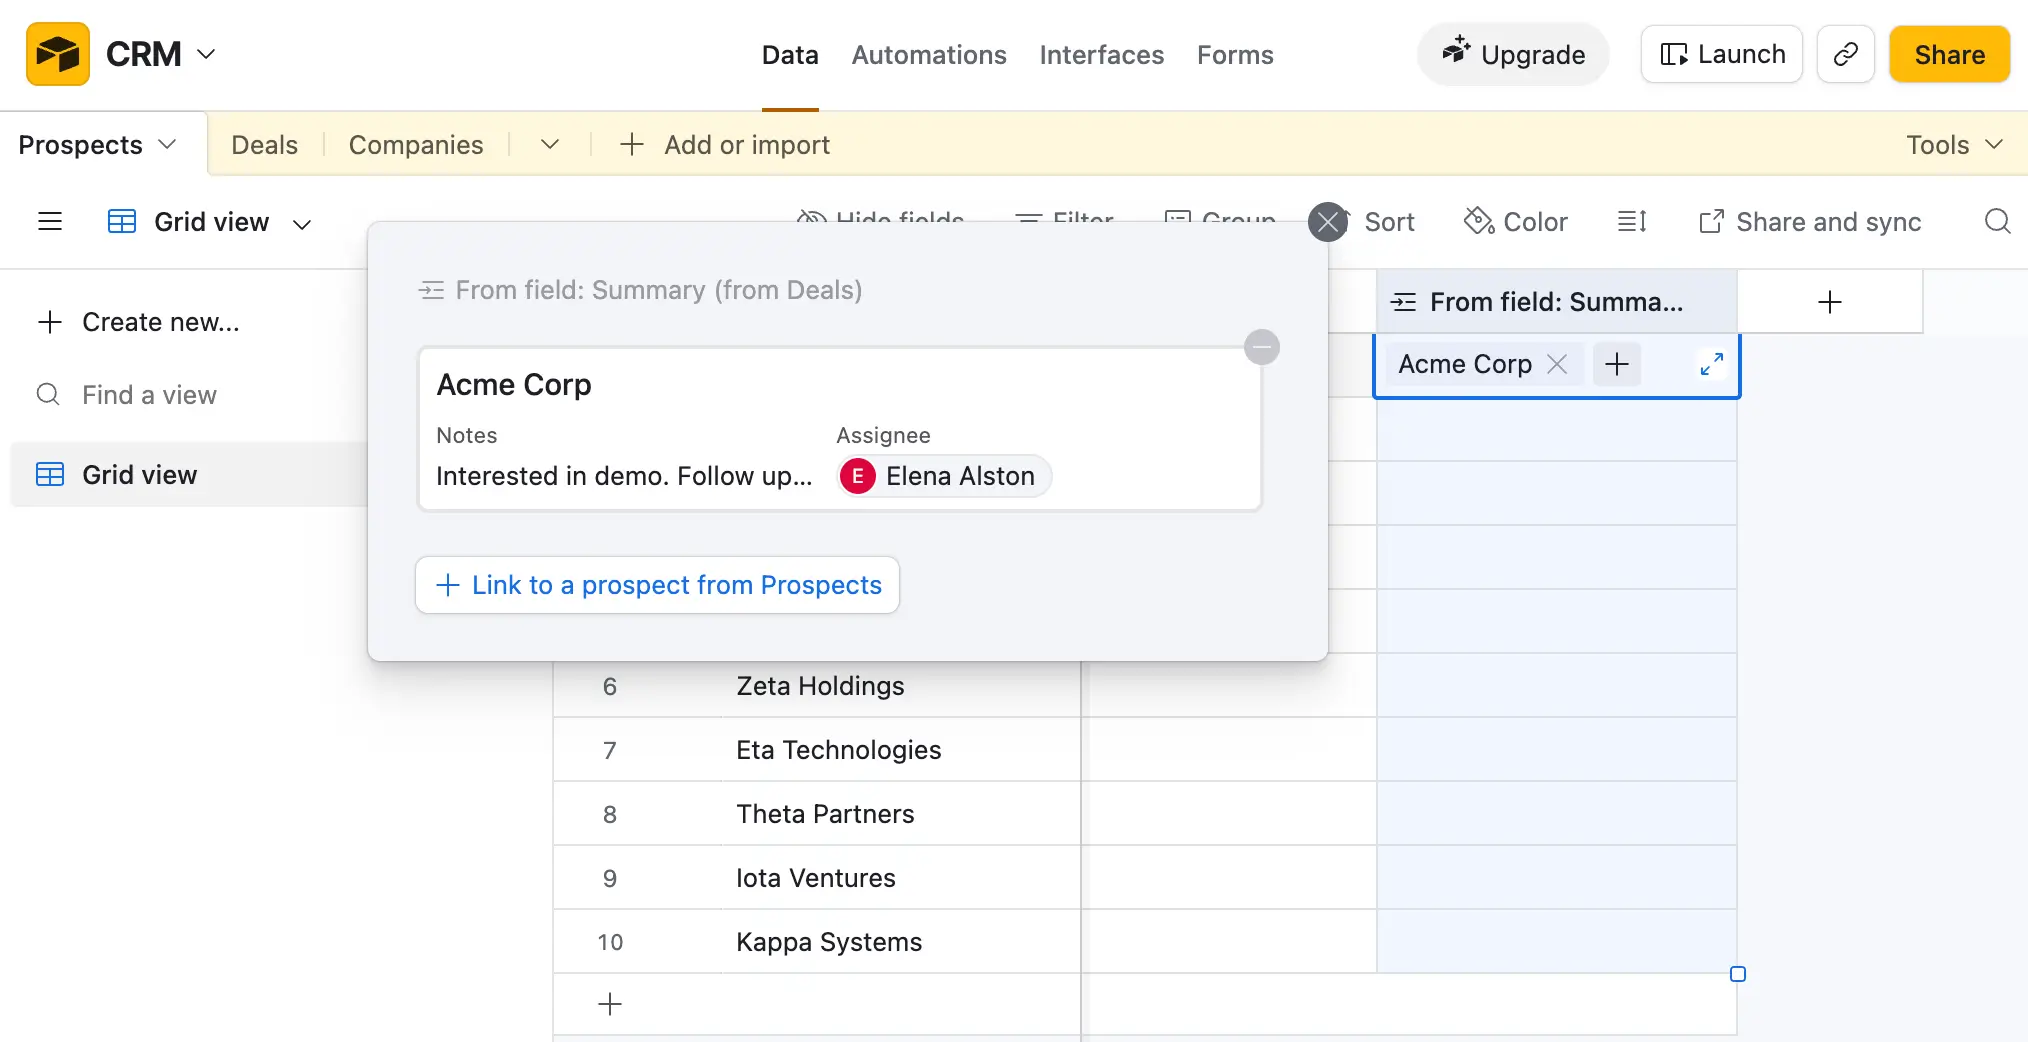
- Records: A record is a single item inside a table. In a Companies table, each row represents one company record containing all the information related to that business.
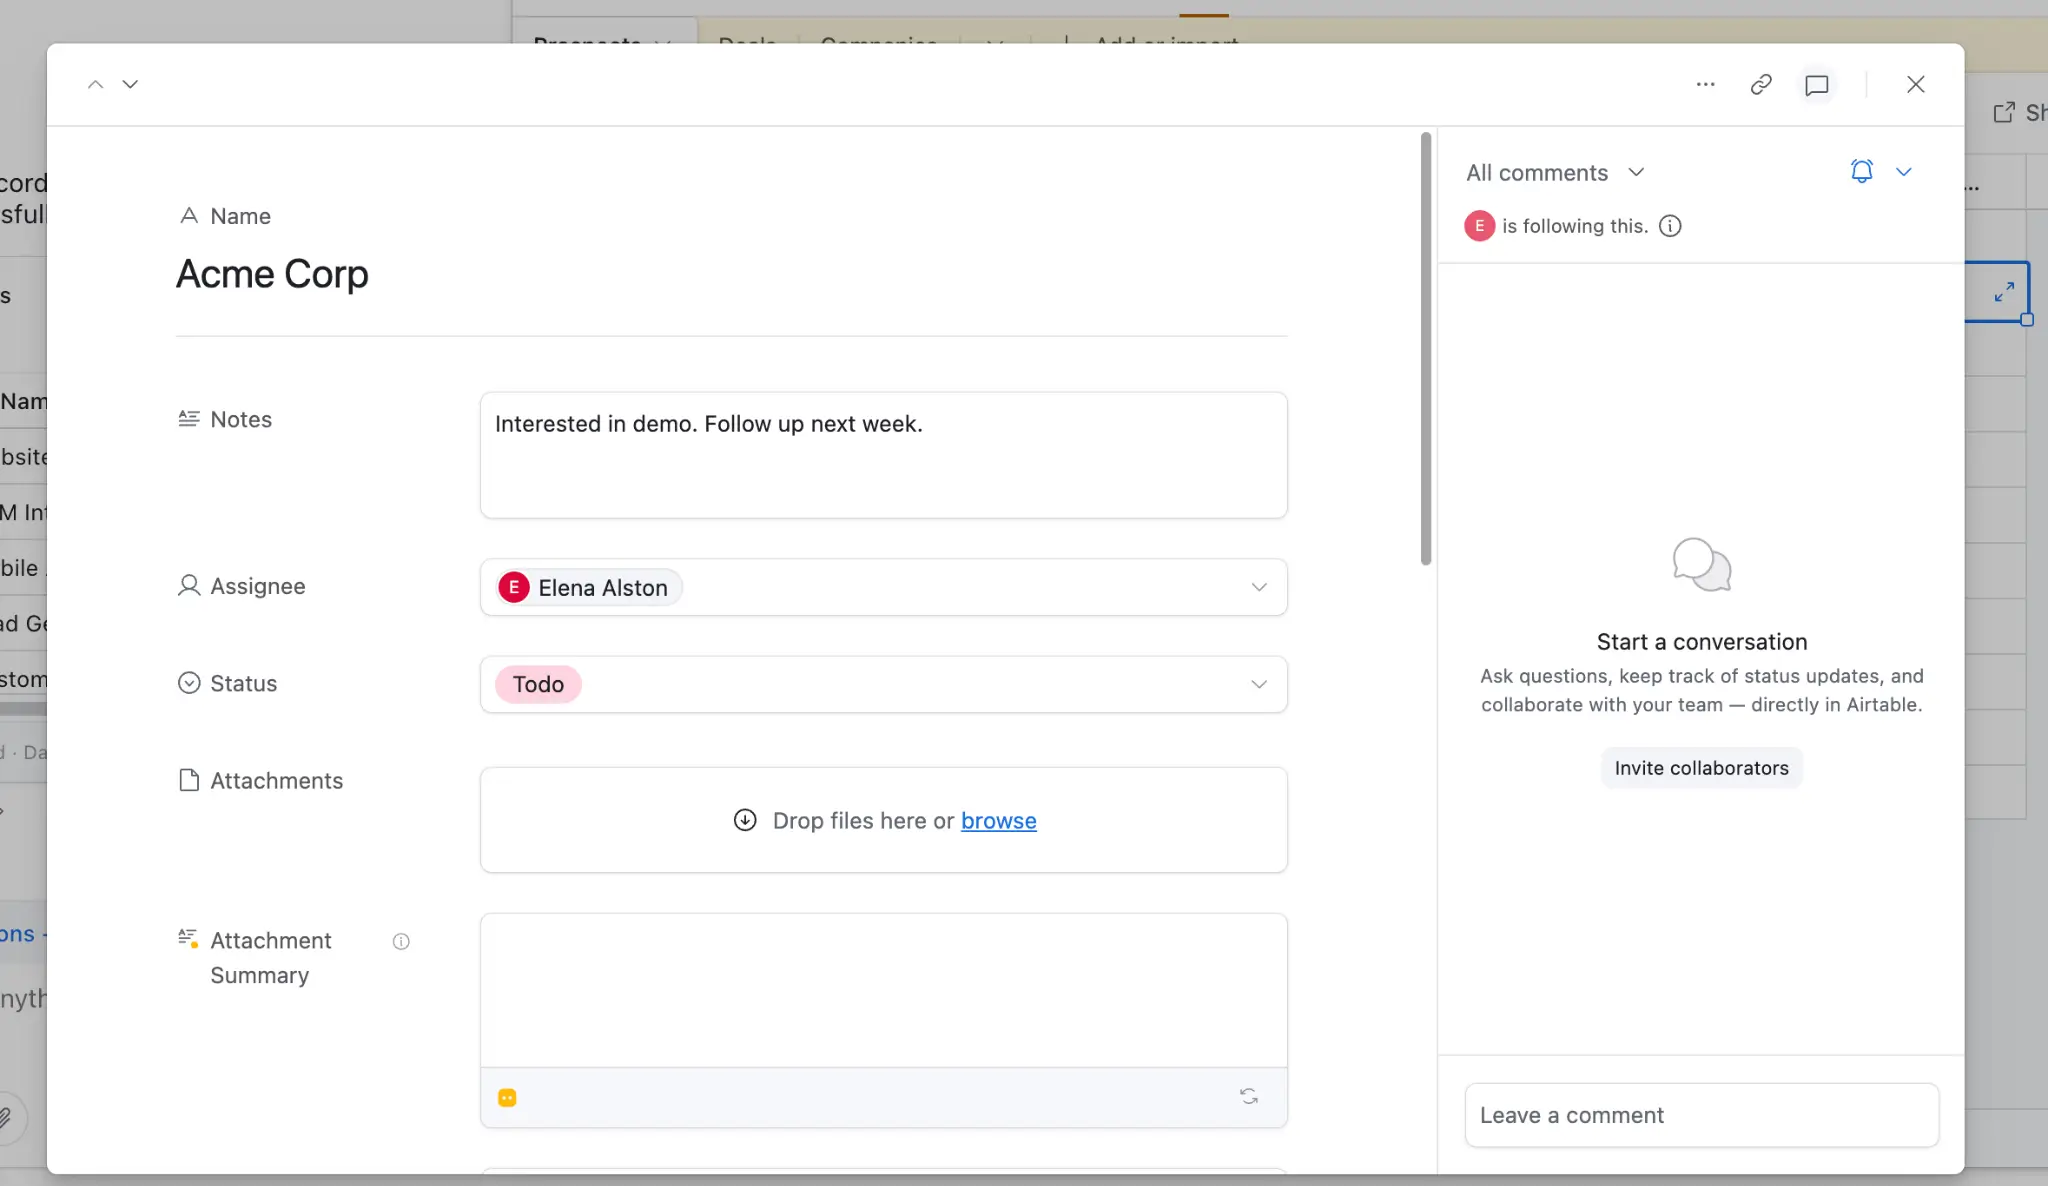
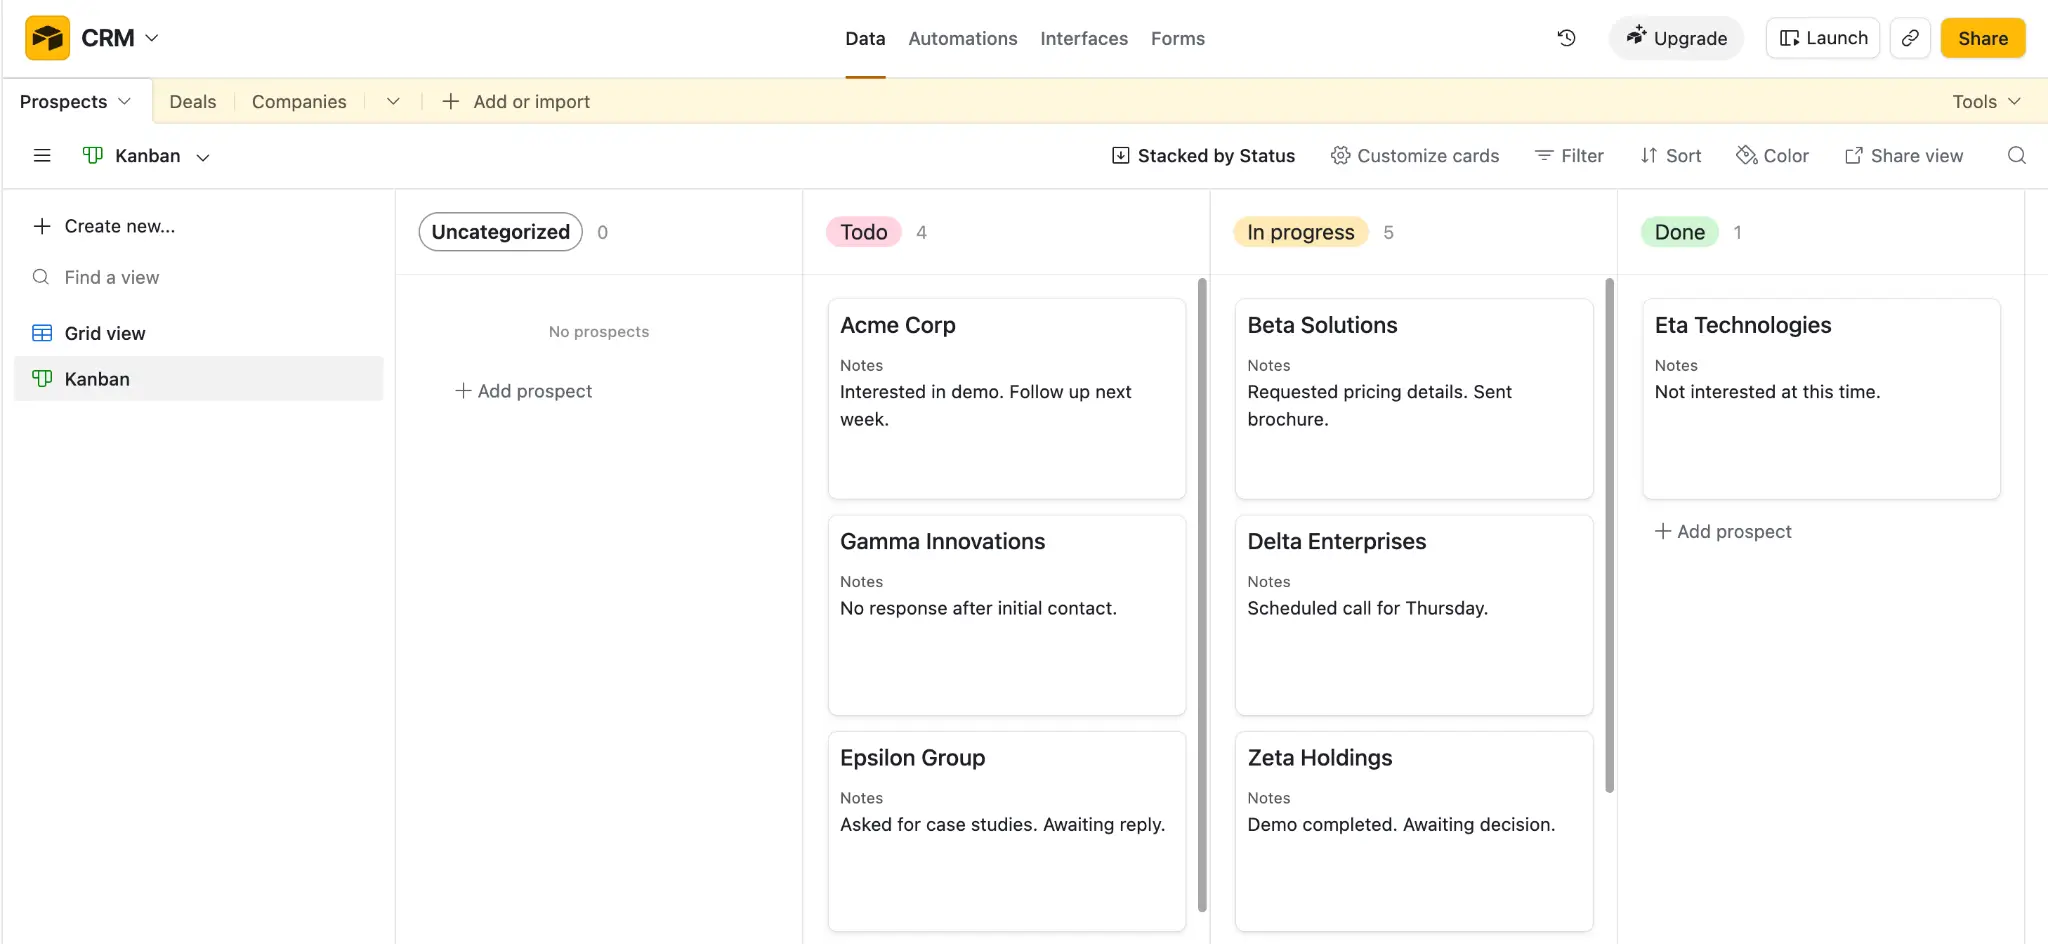
- Views: Views allow you to display the same information in different ways without duplicating data. For example, you can visualize records as a grid, calendar, Kanban board, gallery, timeline, or list depending on your workflow.
Build your Airtable database from a template
For most beginners, starting with a template is probably the quickest way to build a database in Airtable. Templates come with pre-built tables, fields, linked records, views, and sample data, helping you understand how Airtable databases are structured before you start customizing.
They’re especially useful if you’re new to Airtable; want to understand how databases are structured, or need a working system quickly.
Depending on the complexity of the template you choose, you can go from zero to a functional database in less than 10 minutes.
Step 1: Select a template
Log in to Airtable, using your credentials. You can also create an Airtable account, if you don’t have one. Then navigate to your homepage. Click Start with template and select an option from the list available, or search all available templates by clicking on Explore more templates.
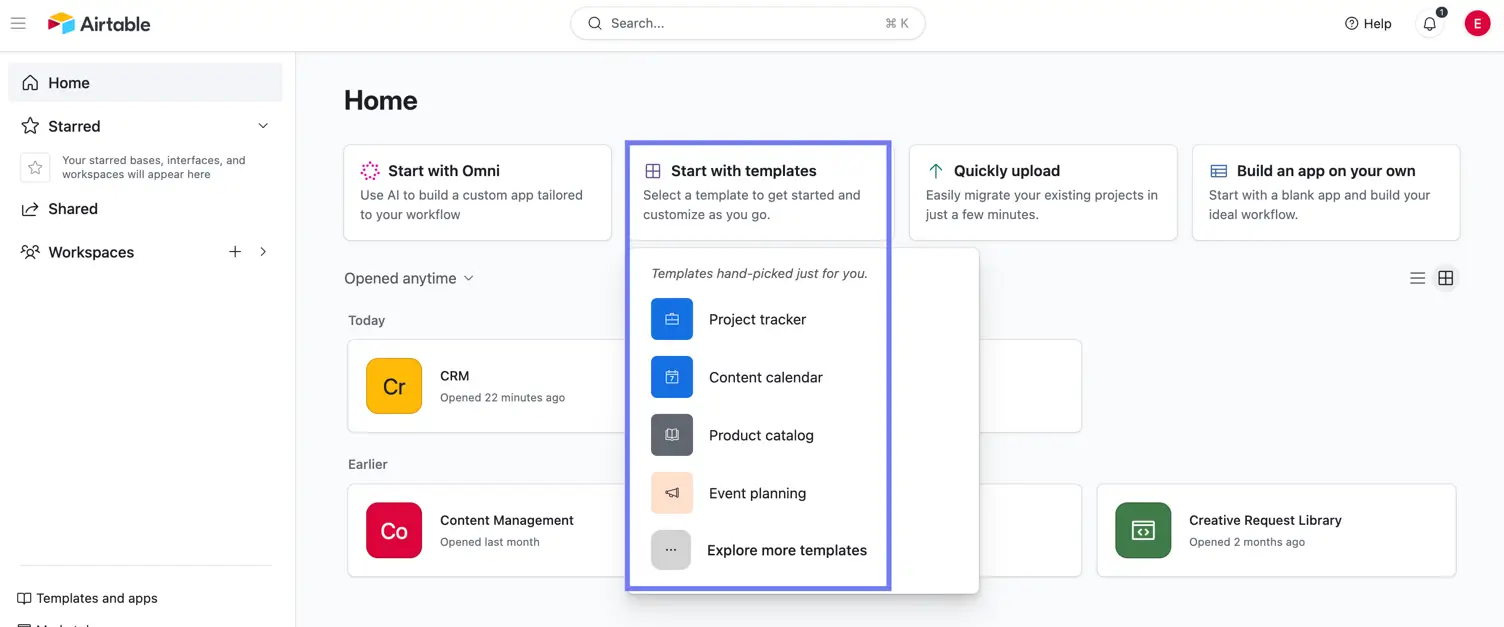
We’ve chosen to go for the Sales CRM template for our use case. You don’t need to find the perfect template. Instead, choose one that closely matches the way you already work.
For example:
- Use a CRM template for sales tracking
- A project management template for operations
- A content calendar template for marketing workflows
The goal is to customize an existing structure rather than build everything from scratch yourself.
Step 2: Add the template to your workspace
Once you’ve selected a template, click “Use template” to create a copy inside your Airtable workspace.
At this point, the template becomes fully editable. You can:
- Rename tables
- Add or remove fields
- Delete sample records
- Create new views
- Customize the structure however you like
Think of the template as a starting framework, not a finished system. Generally speaking, you can now follow the framework of building your database from scratch.
Step 3: Understand the structure before editing
Before making changes, spend a few minutes exploring how the database is organized.
Look at:
- The tables
- Linked records
- Field types
- Saved views
This is one of the fastest ways to learn how Airtable databases are structured.
For example, our CRM template separates:
- Sales reps into a Team table
- Companies into an Accounts table
- People into a Contacts table
- Sales opportunities into an Opportunities table
These tables are connected through linked records, allowing Airtable to keep related information synced across the database. For instance, a sales rep in the Team table can be linked to multiple accounts and opportunities, while each opportunity can also be connected to specific contacts and companies.
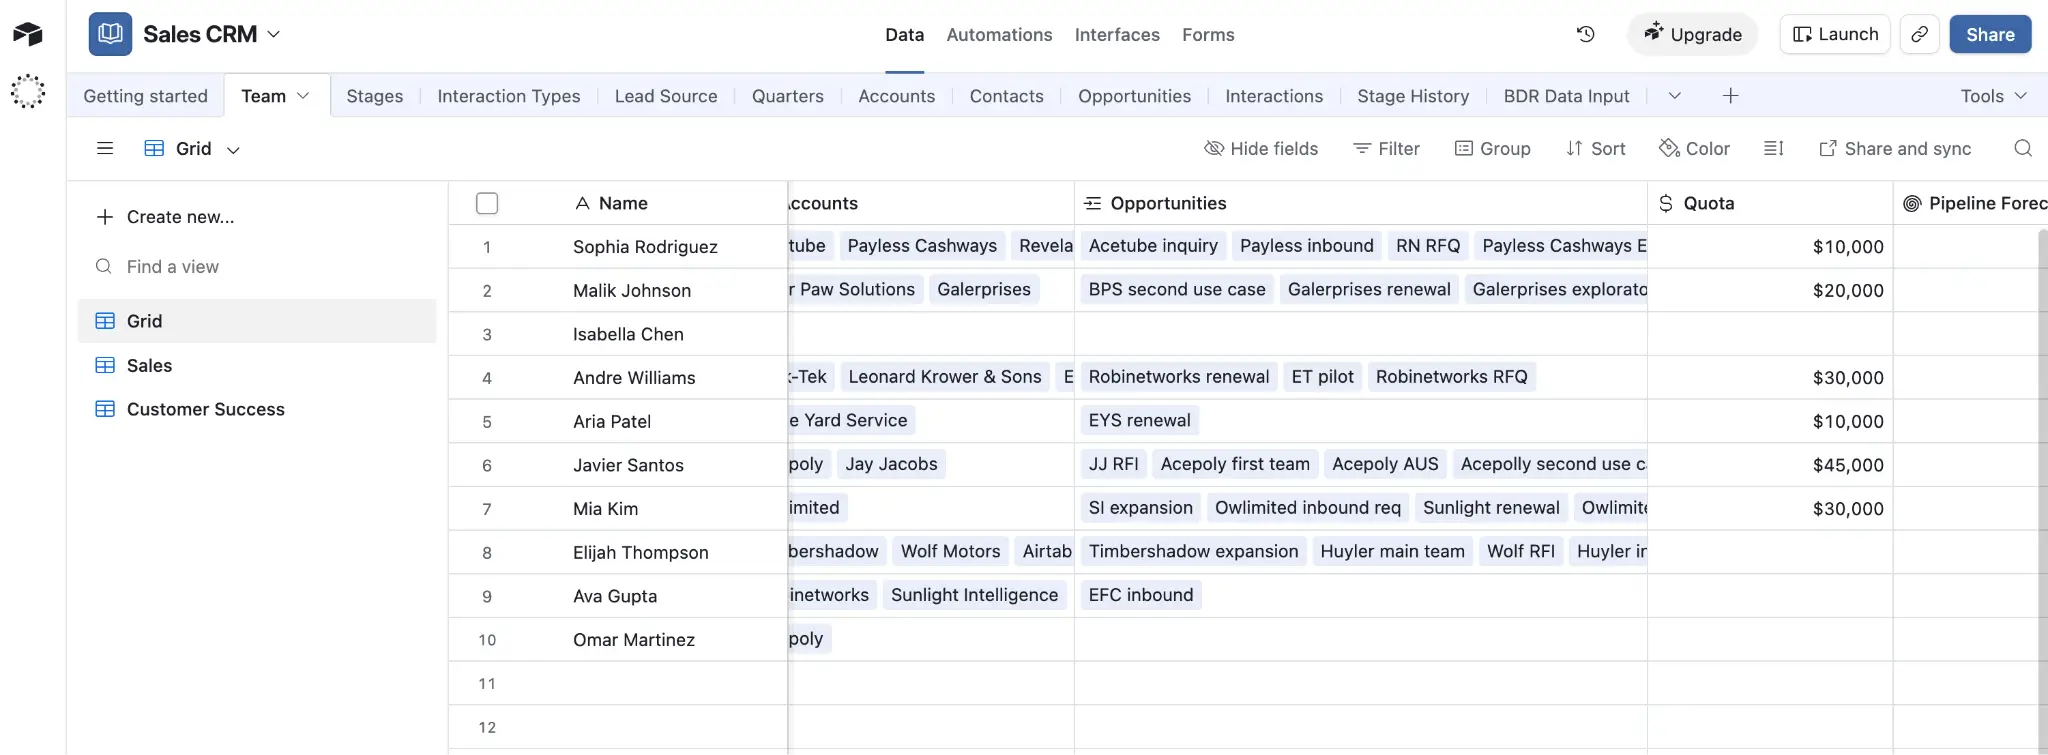
You’ll also notice that the template uses different field types to organize information more effectively. In the Team table, for example, some fields store text values like names, while others use linked records, currency fields, single-select tags, or attachments such as profile photos.
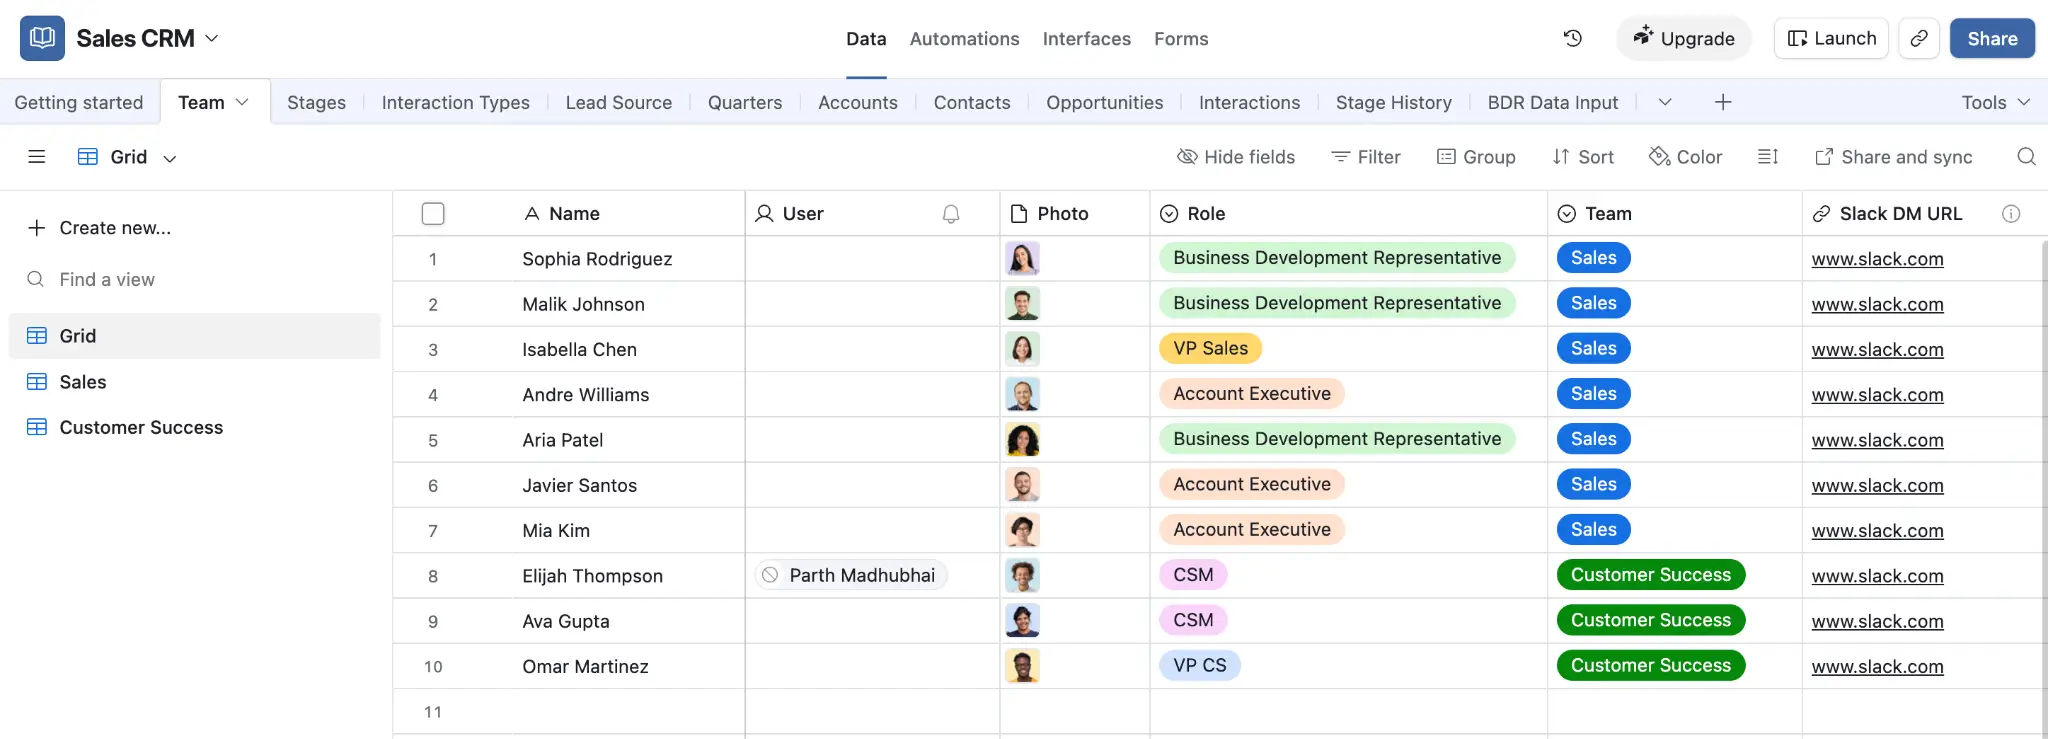
Finally, explore the saved views on the left side of the screen. In this template, the same Team data can be viewed as:
- A complete grid of all team members
- A filtered Sales view
- A Customer Success view
This is one of Airtable’s biggest strengths: instead of duplicating data across multiple spreadsheets, you can create multiple views of the same underlying information depending on the team or workflow.
Step 4: Replace the sample data with your own
Most templates come pre-filled with example records to demonstrate how the database works.
Start replacing this sample data with real information from your workflow. You can:
- Manually enter records
- Import a CSV, Google Sheets, or Excel file
- Copy and paste data directly into Airtable
As you begin using the database with real data, you’ll quickly identify:
- Which fields are useful
- Which views need adjusting
- What information might still be missing
Step 5: Customize your fields
Once your data is in place, begin tailoring the fields to your workflow.
You can:
- Rename fields
- Change field types
- Add new columns
- Remove unnecessary ones
Choosing the correct field types is important because it affects how your data can be filtered, grouped, automated, and visualized later on.
For example:
- Use single select fields for statuses
- Date fields for deadlines
- Attachments for files
- Linked records for relationships between tables
Step 6: Create views for different workflows
Views allow different teams or users to interact with the same information in different ways without duplicating data.
For example, you might create:
- A Kanban view for tracking sales stages
- A calendar view for deadlines
- A gallery view for creative assets
- Filtered views for specific teams or projects
Instead of creating duplicate tables, Airtable encourages you to create multiple views on top of the same dataset.
Step 7: Remove anything you don’t need
Many Airtable templates include extra views, automations, or fields designed to showcase Airtable’s capabilities.
As you customize your database, remove anything unnecessary to keep the structure clean and manageable.
A simpler database is usually:
- Easier to maintain
- Easier for teams to adopt
- Easier to scale over time
Step 8: Start using the database
One of the biggest mistakes beginners make is trying to perfect the database before anyone actually uses it.
Instead, start working with the system as early as possible. Real usage will quickly reveal:
- Missing fields
- Confusing workflows
- Unnecessary complexity
- Opportunities for automation
The best Airtable databases evolve gradually over time rather than being designed perfectly upfront.
Build an Airtable database from scratch
While templates are the easiest way to get started, building a database from scratch gives you complete control over your structure, workflows, and relationships between tables.
This approach is best if:
- Your workflow is highly customized
- Existing templates don’t fit your needs
- You already understand Airtable’s core concepts
Unlike older versions of Airtable, the platform no longer includes a simple “Start from scratch” button. Instead, Airtable now offers two ways to create a new base:
- Start with Omni, Airtable’s AI-powered setup assistant
- Build an app on your own, which creates a blank base you can configure manually
For this tutorial, select “Build an app on your own.”
From there, the process is similar to customizing a template, except you’re designing the structure yourself from the beginning.
Typically, this involves:
- Creating tables for each type of information you want to track
- Adding fields to structure your data
- Creating records
- Connecting tables using linked records
- Organizing workflows using views, filters, and grouping
For example, a CRM database built from scratch might include separate tables for:
- Prospects
- Companies
- Contacts
- Deals
- Tasks
The advantage of building from scratch is flexibility. Instead of adapting an existing structure, you can design the database entirely around your own workflows and processes.
However, this approach also requires more upfront planning. For most beginners, starting with a template is still the easiest way to learn how Airtable databases are structured before building one manually.
Build an application on top of Airtable with Softr
Once your Airtable database is set up, you may want to turn it into something more user-friendly for clients, customers, or internal teams. This is where AI app builders like Softr come in.
Softr is a no-code AI application builder that creates portals, internal tools, CRMs, dashboards, and other business apps without writing code. Instead of working only inside Airtable tables and views, Softr helps transform your database into a complete, secure business system with:
- Navigation
- User authentication
- Permissions
- Custom layouts
- Front-end interfaces
Using Softr’s AI Co-Builder, you can generate a working app from a short prompt, then customize the structure, workflows, and interface visually. You can also connect Claude or ChatGPT through the Softr MCP to manage your data from your AI assistant. Softr supports Airtable as a data source, allowing you to connect existing Airtable bases directly into your application.
How to connect Airtable to Softr
Once your Airtable base is ready, you can connect it to Softr and use it as the backend for a portal, dashboard, CRM, or internal business app.
Step 1: Create a Softr account
Head to Softr and create an account or log in to your existing workspace.
From the dashboard, click “Create application.”
Step 2: Choose how you want to build
Softr gives you several ways to start building:
- Generate an app using AI
- Start from a template
- Build manually from scratch
For this tutorial, we’ll use a CRM template connected to Airtable.
Step 3: Connect Airtable as a data source
Inside Softr, open the Data Sources section and select Airtable.
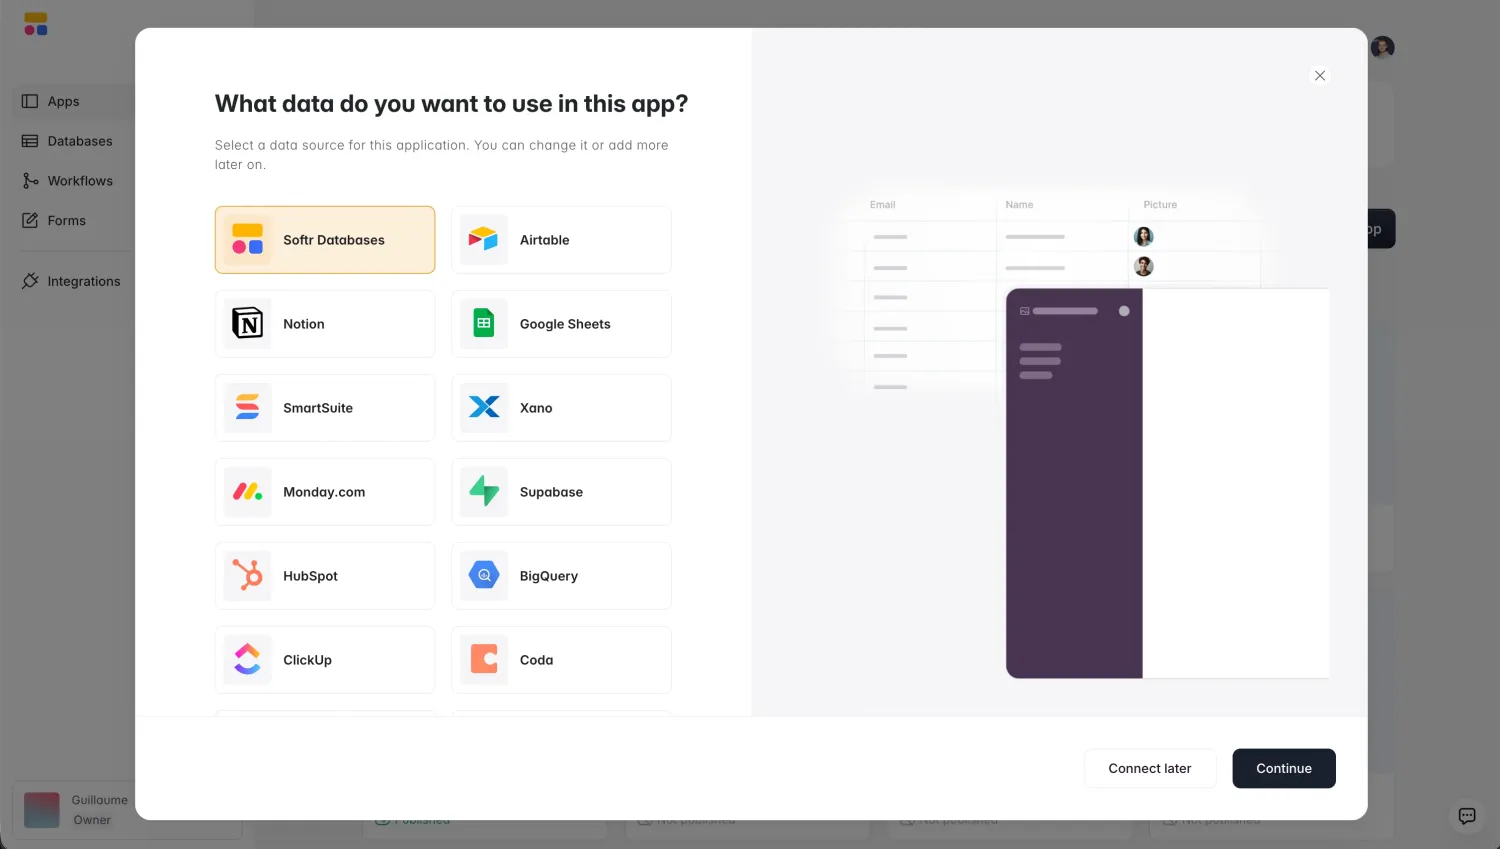
You’ll be prompted to authorize your Airtable account and grant Softr access to the Airtable bases you want to use inside your application.
Once connected, your Airtable bases become available throughout Softr.
Step 4: Select the Airtable base you want to use
After authorizing Airtable, choose the base you want to connect to your app.
For example, if you previously created a CRM database in Airtable, you can select that base and use its tables inside Softr.
This allows Softr to pull in:
- Records
- Linked relationships
- Attachments
- Airtable views
Step 5: Add dynamic blocks connected to Airtable
Softr applications are built using blocks such as:
- Lists
- Tables
- Grids
- Charts
- Forms
- Detail pages
Each block can connect directly to an Airtable table or view.
For example:
- A Contacts table in Airtable could power a customer directory
- A Deals table could power a sales dashboard
- A Tasks table could power a project tracker
Step 6: Map Airtable fields into the interface
Once a block is connected, Softr allows you to map Airtable fields into the app interface.
For example:
- Attachment fields can become profile images
- Select fields can become tags or statuses
- Linked records can display related companies, contacts, or projects
This allows you to transform spreadsheet-style Airtable data into a more polished application experience.
Step 7: Configure permissions and user access
One of Softr’s biggest advantages over plain Airtable is its built-in user management system.
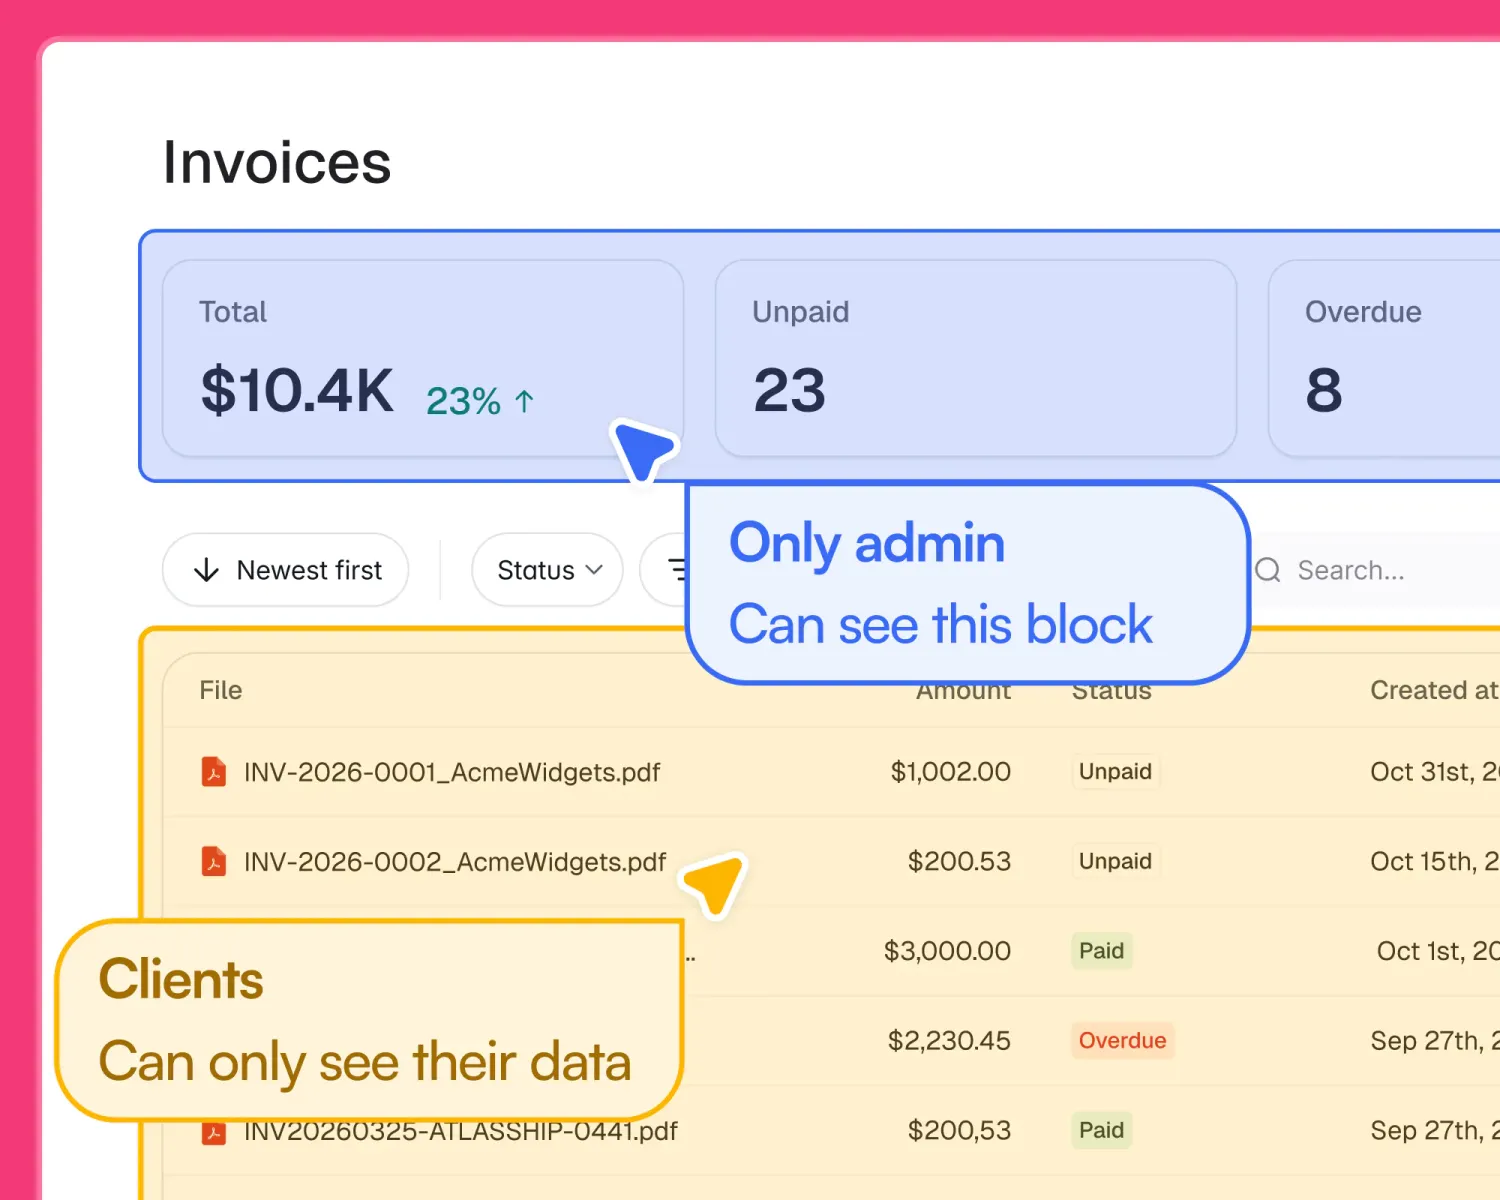
You can create:
- Private client portals
- Employee dashboards
- Role-based permissions
- Authenticated internal tools
For example:
- Sales reps might only see their own deals
- Clients might only see their own projects
- Admins could access the entire database
Step 8: Customize and publish your app
Once your data and interface are connected, you can customize:
- Navigation
- Layouts
- Branding
- Workflows
- Forms
- Page visibility
When you’re ready, click “Publish” to make your app live.
At this point, Airtable continues acting as the database layer, while Softr provides the front-end experience users interact with.
Build on (or migrate) your bases with Softr
You have options: keep Airtable as your backend and build Softr apps on top of it; or, migrate to Softr Databases and consolidate your full stack to one platform. Either way, Softr AI generates the business tools your team and clients need—like portals, dashboards, and CRMs—with the logins, roles, and granular permissions that Airtable's interfaces lack.
Now that Bending Spoons owns Airtable, it's worth weighing your options. Softr connects seamlessly to your bases, so you can move the apps without moving the data, then swap the data layer later if pricing or feature offerings change for the worse.
Try Softr free and build a complete app on top of your data today.
Frequently asked questions
Is Airtable a real database?
What is the difference between a base and a table in Airtable?
Do you need coding skills to build an Airtable database?
Can you build an Airtable database for free?
Can you turn an Airtable database into an app?