


Lookup fields in Airtable allow you to view and display content from linked records effortlessly. When you’re doing anything that involves interconnected data, lookup fields can significantly streamline your workflow by providing a consolidated view of related information.
In this article, we will delve into two processes of creating and utilizing lookup fields in Airtable:
- Creating lookup fields with conditions;
- Creating lookup fields with views.
Creating lookup fields in Airtable with conditions
Before we dive into how to create lookup fields in Airtable with conditions, we've made it even easier for you to get started: you can use this ready-to-use Airtable base template to get started.
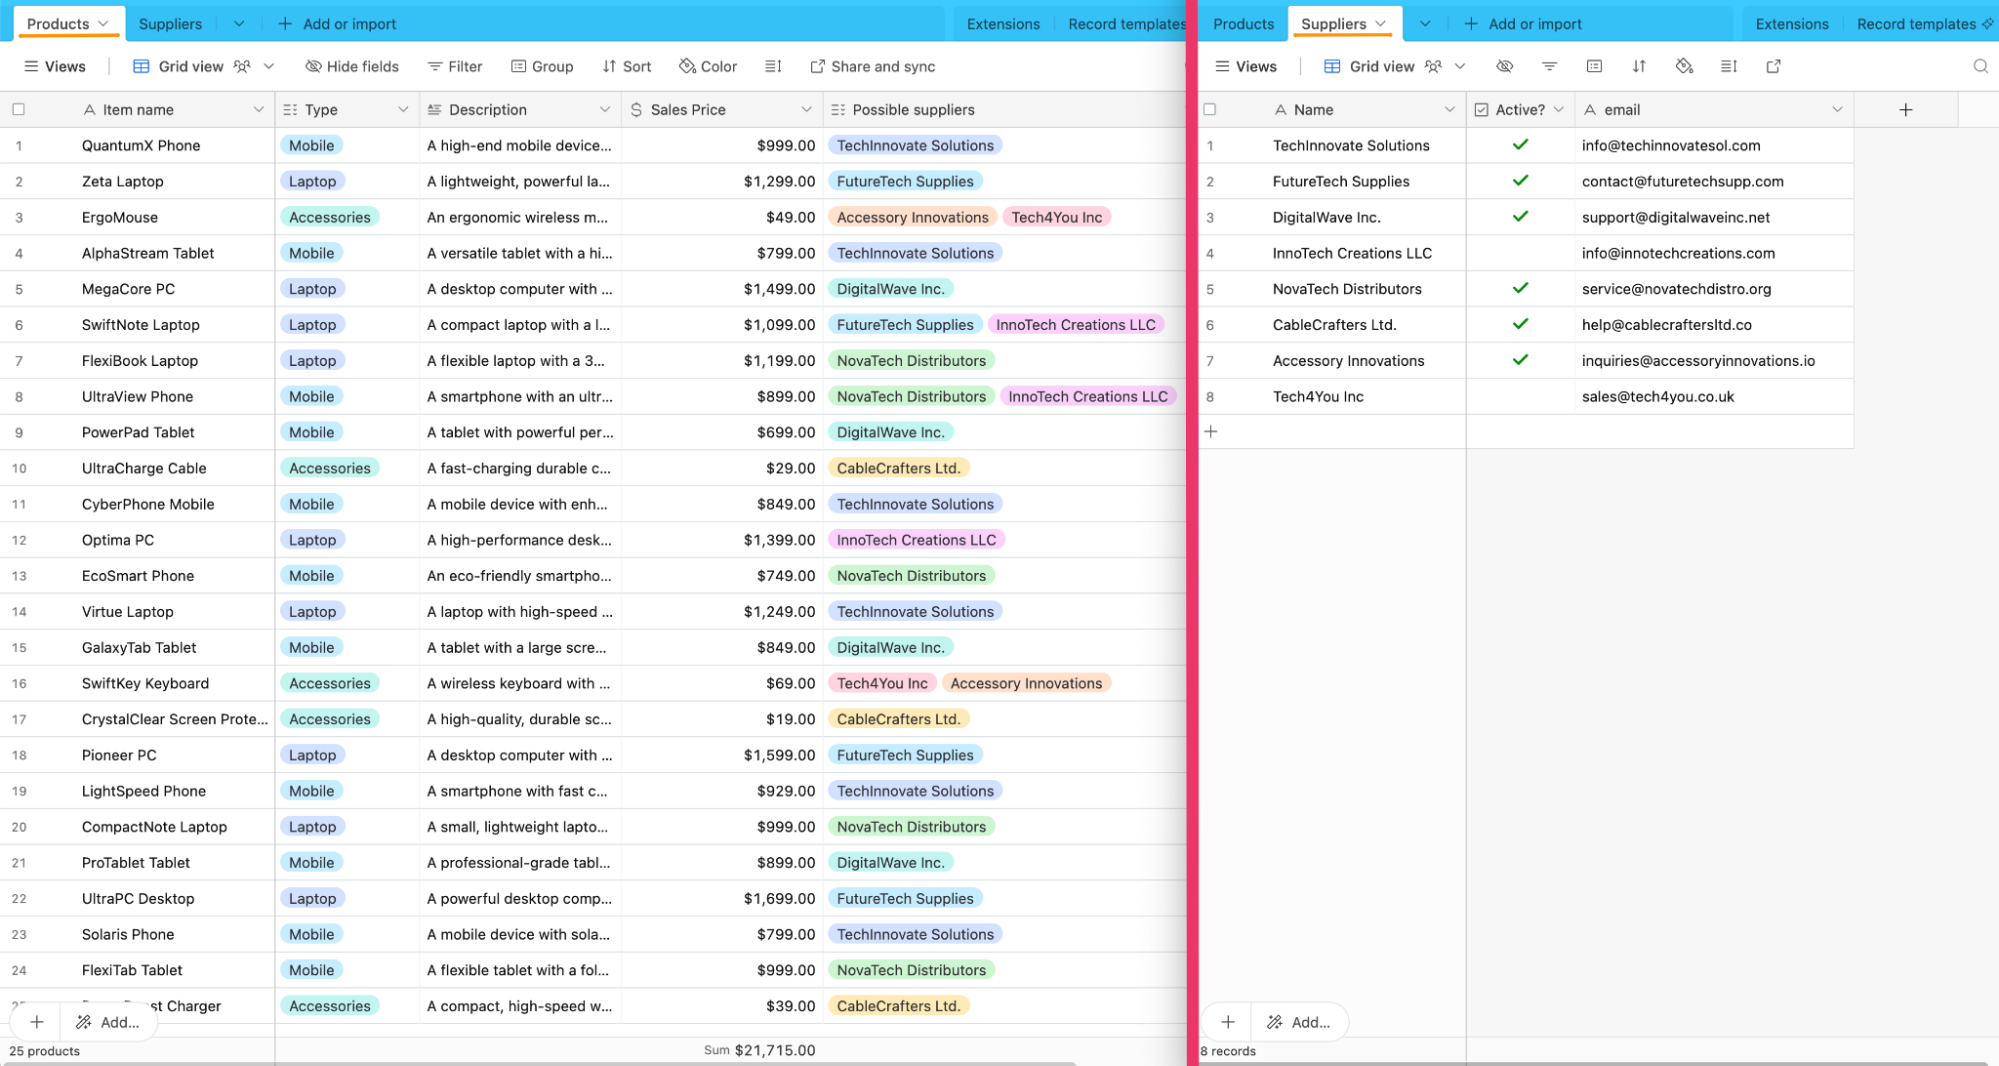
This template base includes pre-populated "Products" and "Suppliers" tables with sample data, mirroring the scenario we'll be discussing in this article.
Step 1: Set a field to be linked to another record
To begin linking records between tables, you need to change the field type of the “Possible suppliers” field to “Linked to another record.”
Step 1.1: Change field type
Navigate to the “Products” table and locate the “Possible Suppliers” field. Click on the arrow next to the field name to access the field options, and then click on “Edit field.”

Step 1.2: Change field type
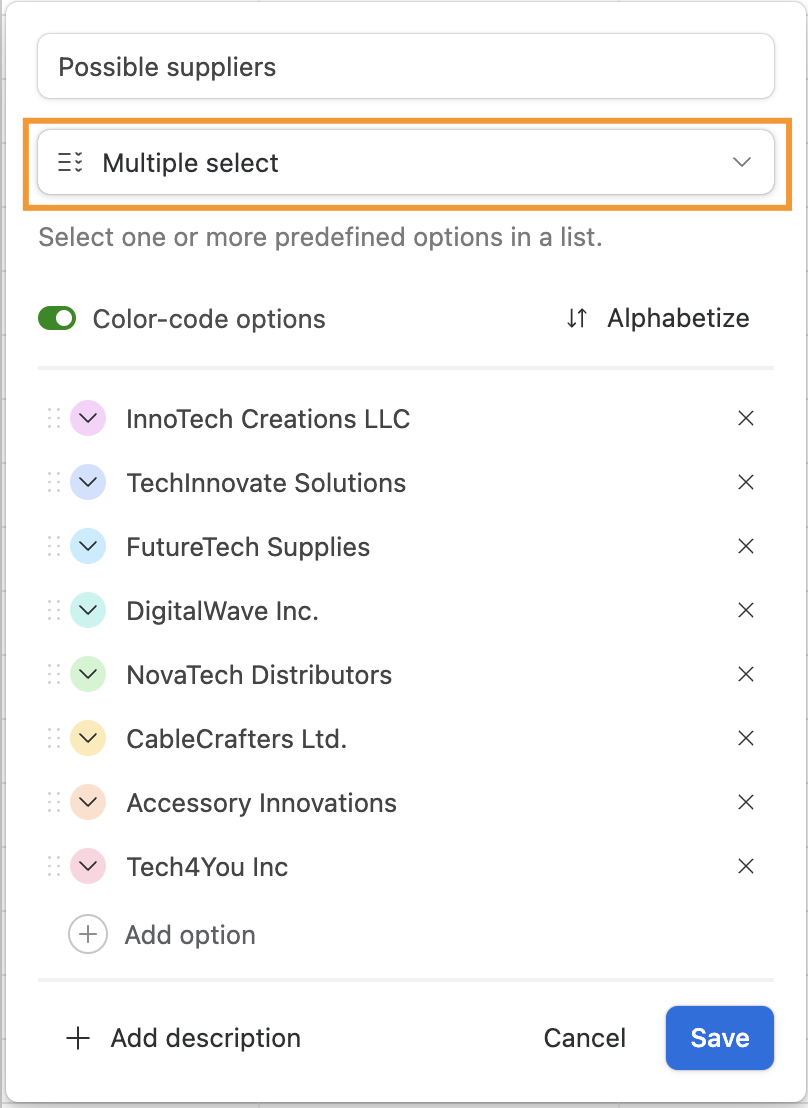
In the field editing screen, click on the dropdown menu and choose “Link to another record” from the list.
Step 1.3: Select the table to link
Choose the “Suppliers” table as the table you want to link to and confirm your selection by hitting “Save.”
You can add the fields directly by toggling the desired fields on the screen that is displayed next, as shown in the video above. But if you need to filter the information needed you can set conditions for data retrieval.
Step 2: Add a lookup field (using conditions)
Now, let’s add a lookup field to display the names of active suppliers.
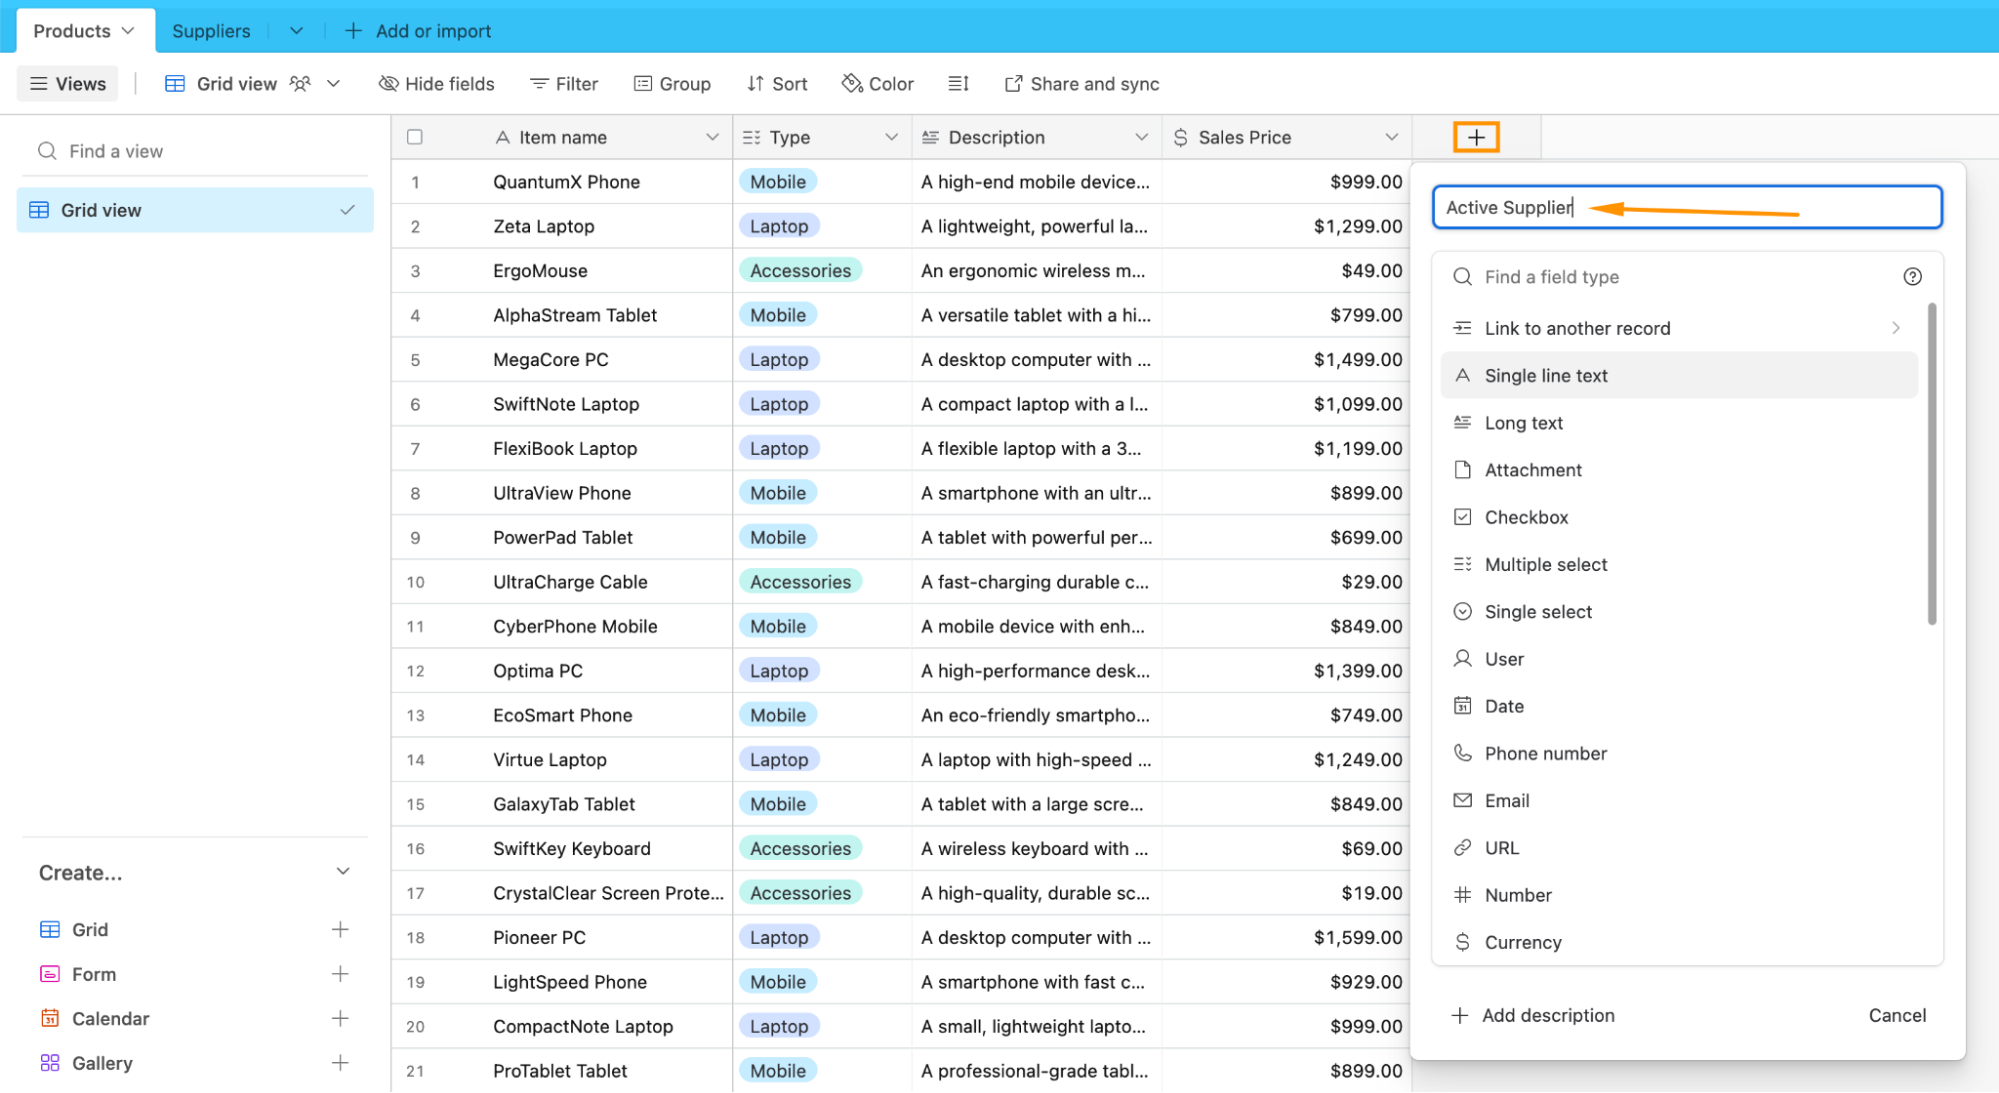
Step 2.1: Create a new field
In the “Products” table, create a new field and name it “Active suppliers”.
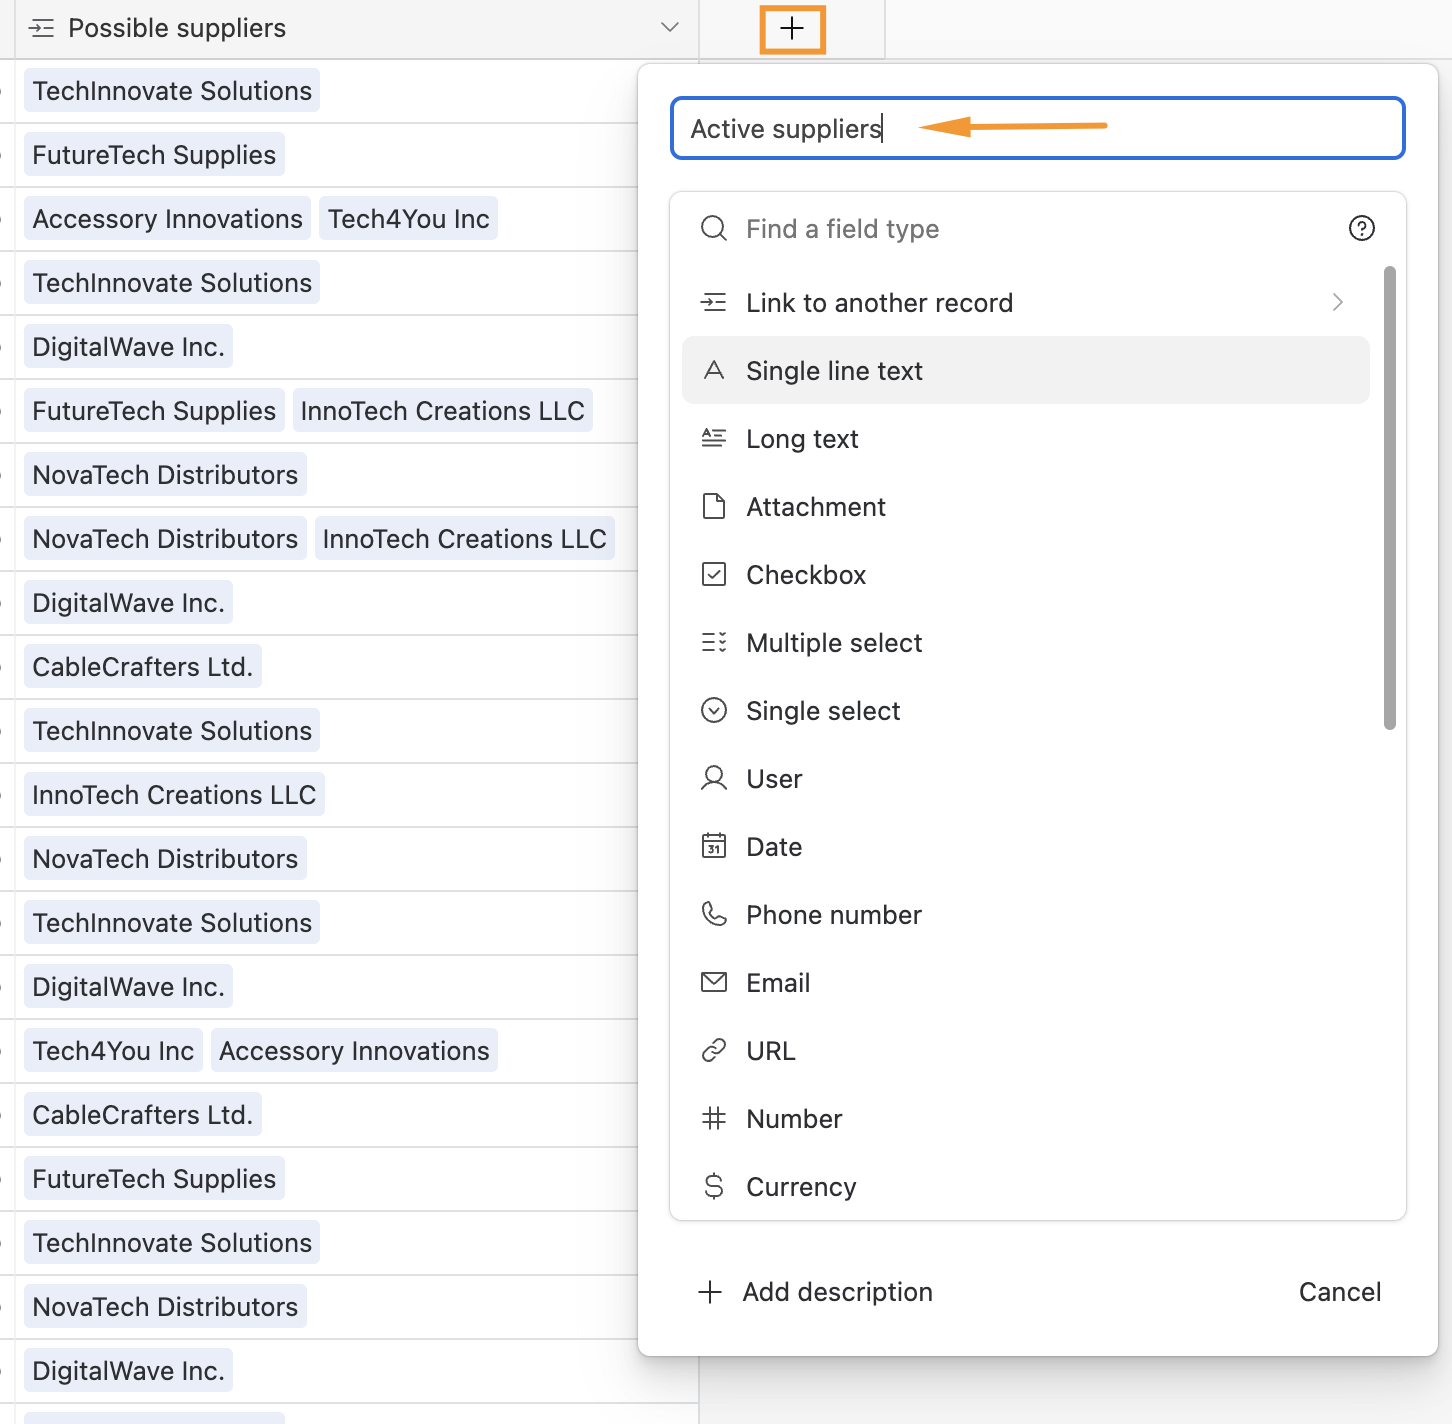
Step 2.2: Set field type to Lookup
Choose “Lookup” as the field type for the new field you’ve created, by scrolling through the dropdown list or by typing “lookup.”
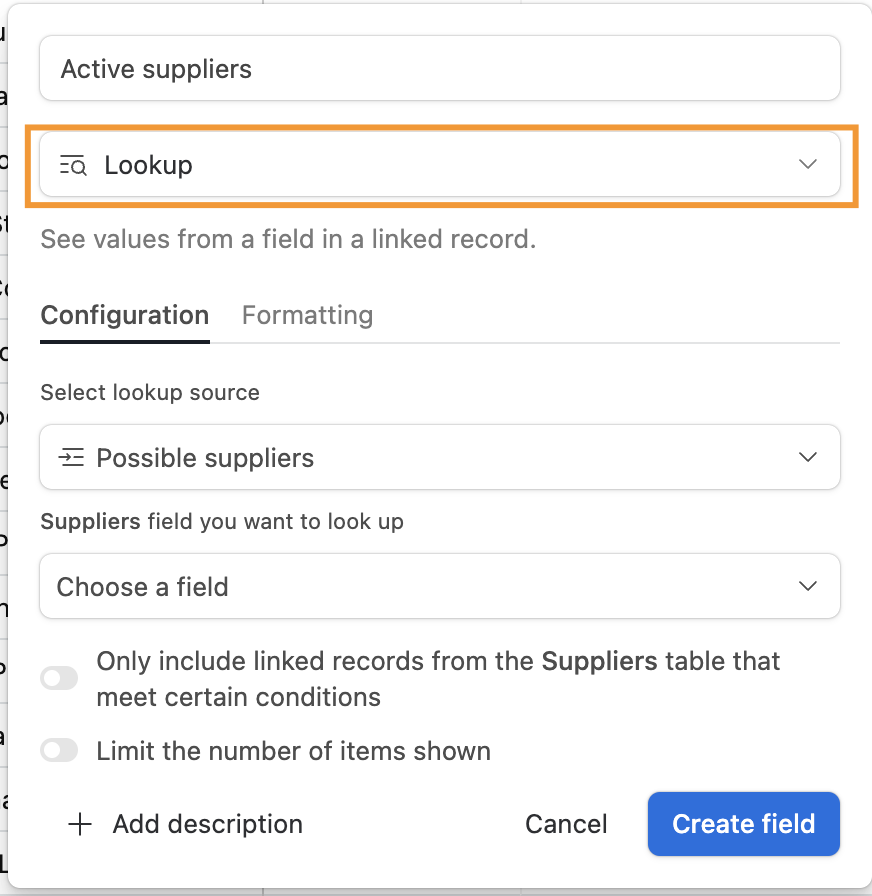
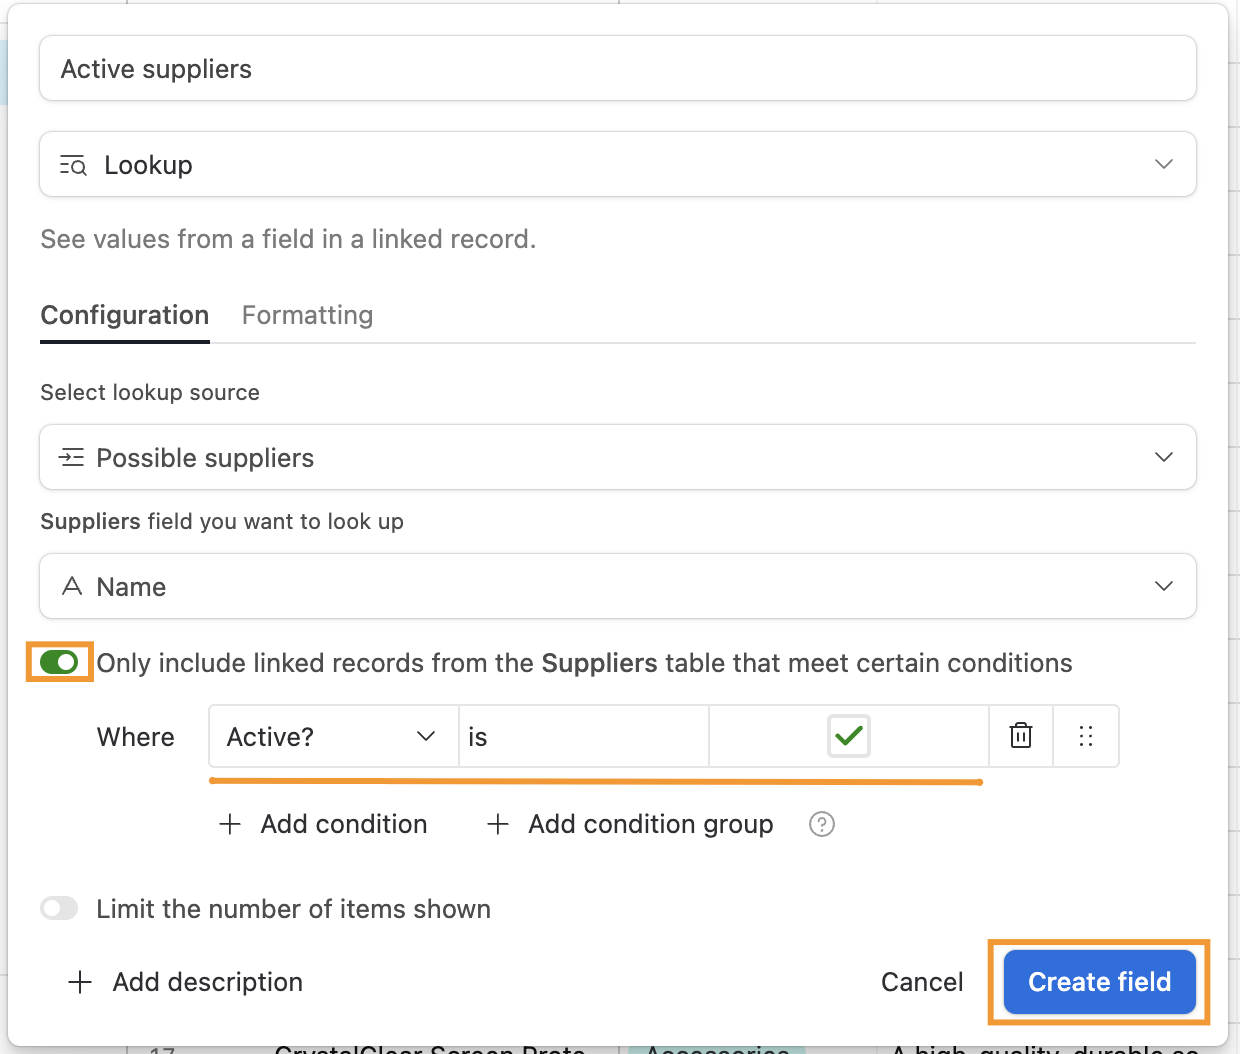
Step 2.3: Configure your lookup field
On the “Configuration” tab, make sure the lookup source is the field you edited in Step 1. Choose a field on the table to which your source is linked. We want to retrieve the “Name” field from the table “Possible suppliers.”

Step 2.4: Set conditions
By toggling the option “Only include linked records from the [Name of the table] table that meet certain conditions,” you will be able to filter certain records. In our case, we want to display only the active supplier. In the “Where” option, you have to specify the criteria for records that will be included in the lookup field. To show only active suppliers, configure it to retrieve the records where the “Active?” field is enabled.
When you’re done, click on “Create field”.
Creating lookup fields in Airtable using views
In this section, we'll explore how to create lookup fields in Airtable using views, leveraging a slightly different Airtable base template that showcases another facet of the power of lookup fields.
Before we begin, you can access our Airtable base template tailored for this section. Copy it to your Airtable account.
Step 1: Set a field to be linked to another record
To begin linking records between tables, you need to change the field type of the “Possible suppliers” field to “Linked to another record.”
Step 1.1: Create a new field
Navigate to the “Products” table and locate the “Sales Price” column. Click on the plus sign next to this column to add a new field.
Step 1.2: Set the field type
Next, click on the dropdown menu and choose “Link to another record” from the list.
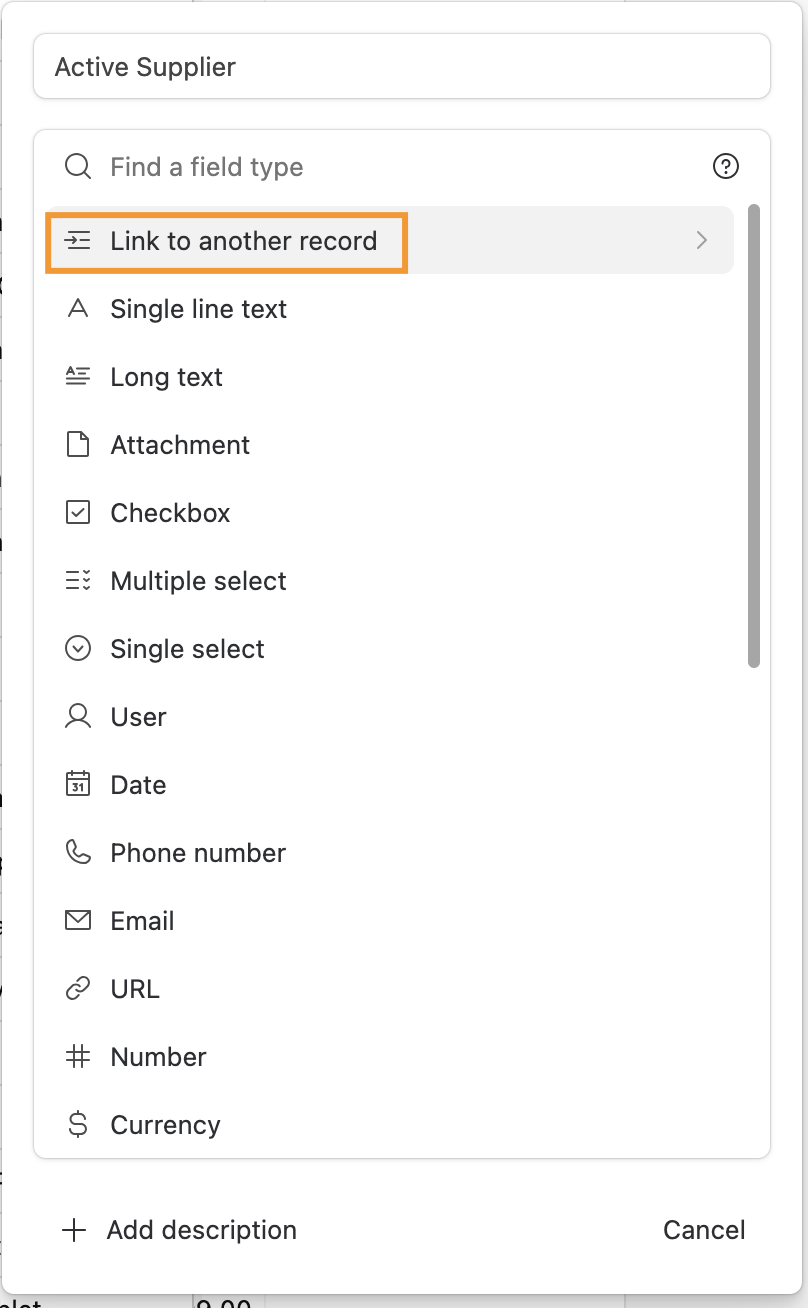
Step 1.3: Select the table to link
Choose the “Suppliers” table as the table you want to link to and confirm your selection by hitting “Save.”
Step 2: Add a lookup field
The data that is now retrieved for lookup fields is filtered based on the conditions you’ve just set.
Step 2.1: Create a new field
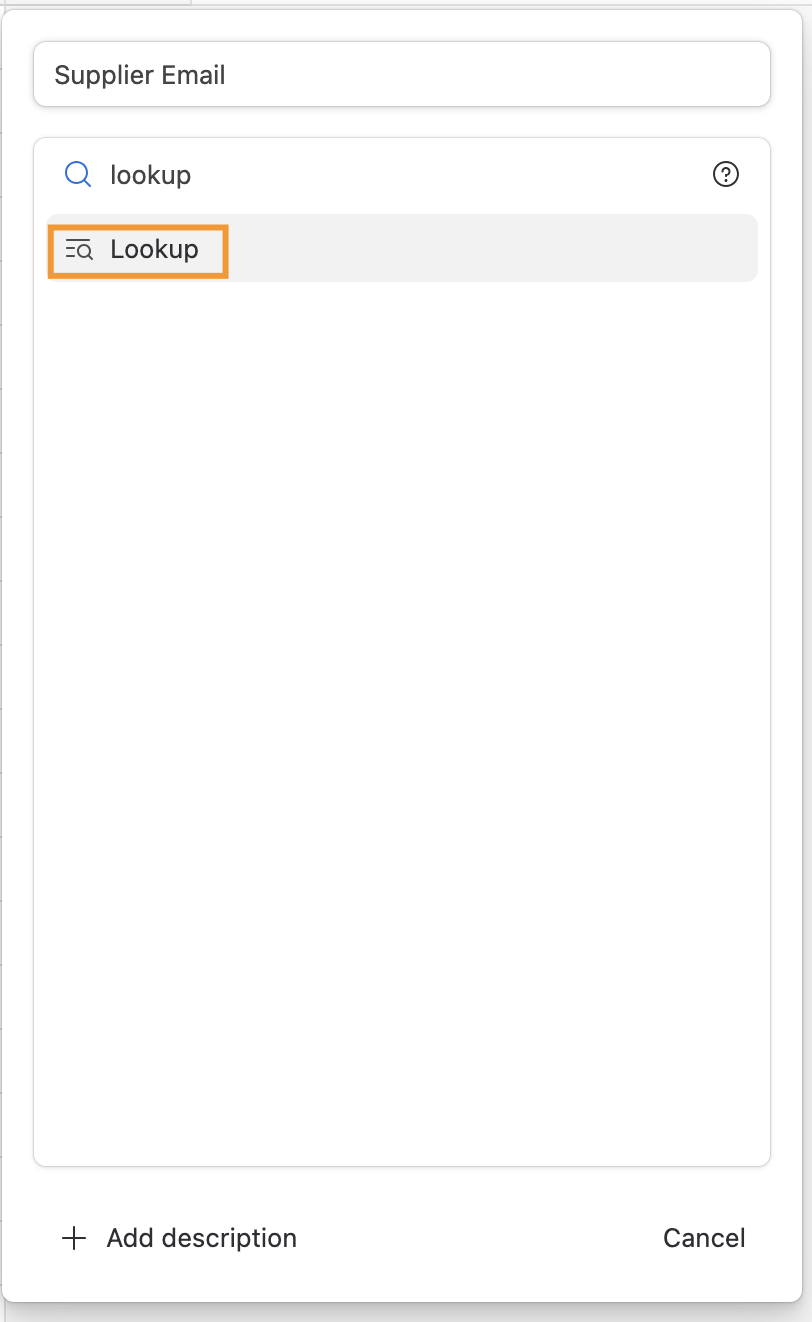
In the “Products” table, create a new field by clicking on the “+” sign and name it “Supplier Email.”
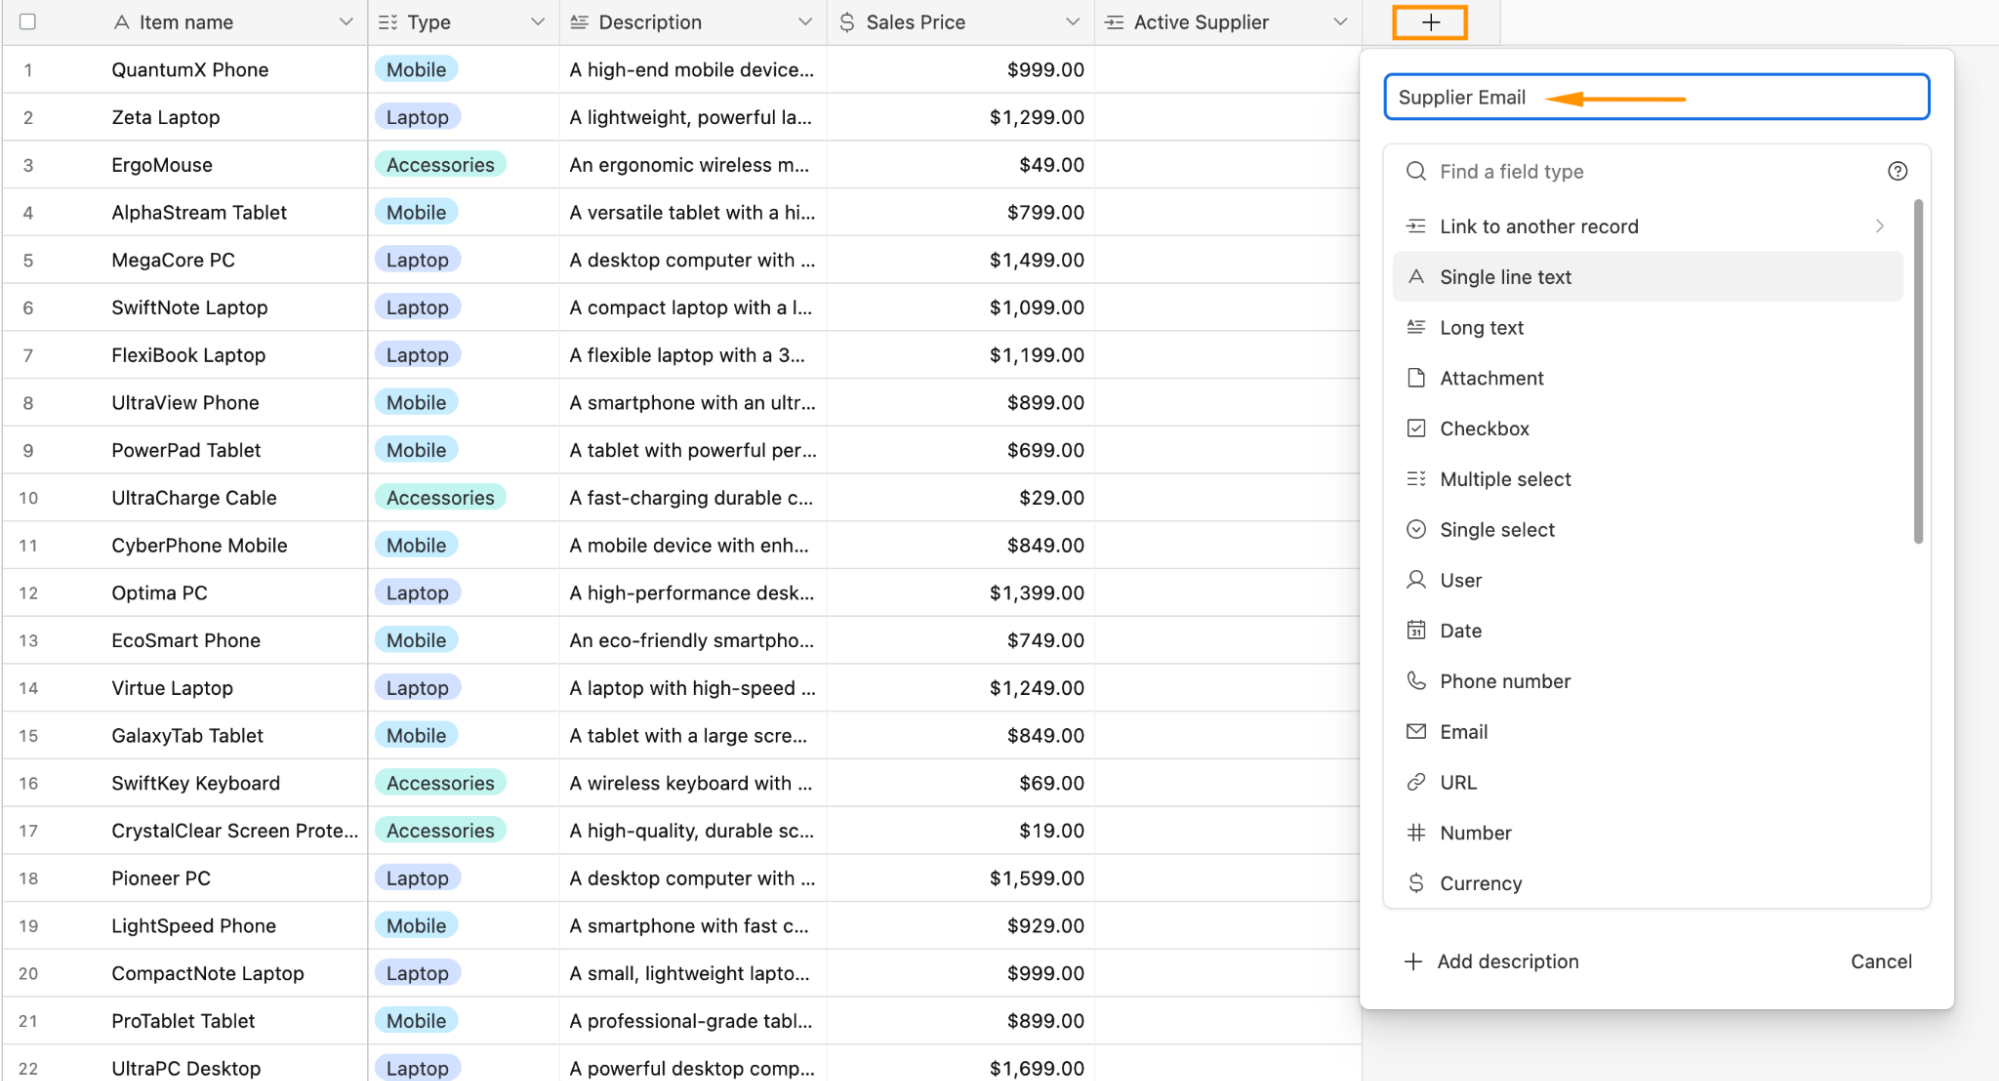
New field options
Step 2.2: Set field type to Lookup
Choose “Lookup” as the field type for the new field you’ve created, by scrolling through the dropdown list or by typing “lookup.”
Field type options in Airtable.
Step 2.3: Select the field to lookup
Click on “Choose a field”, select “email”, and click on “Create field".
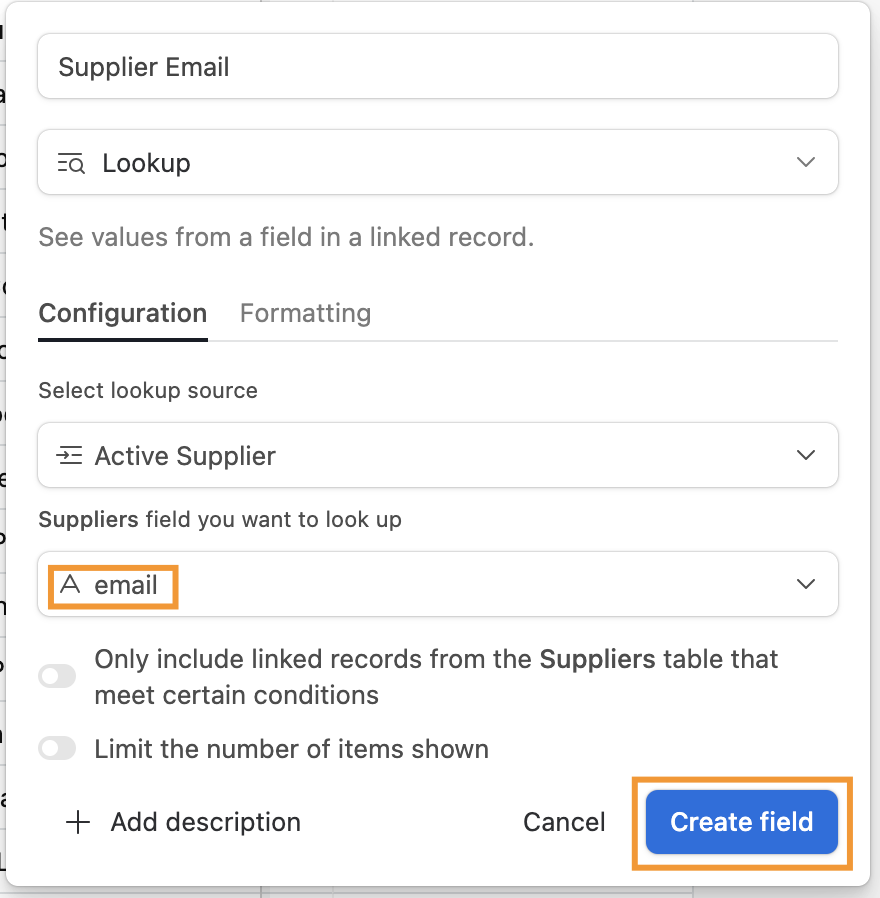
Lookup configuration in Airtable.
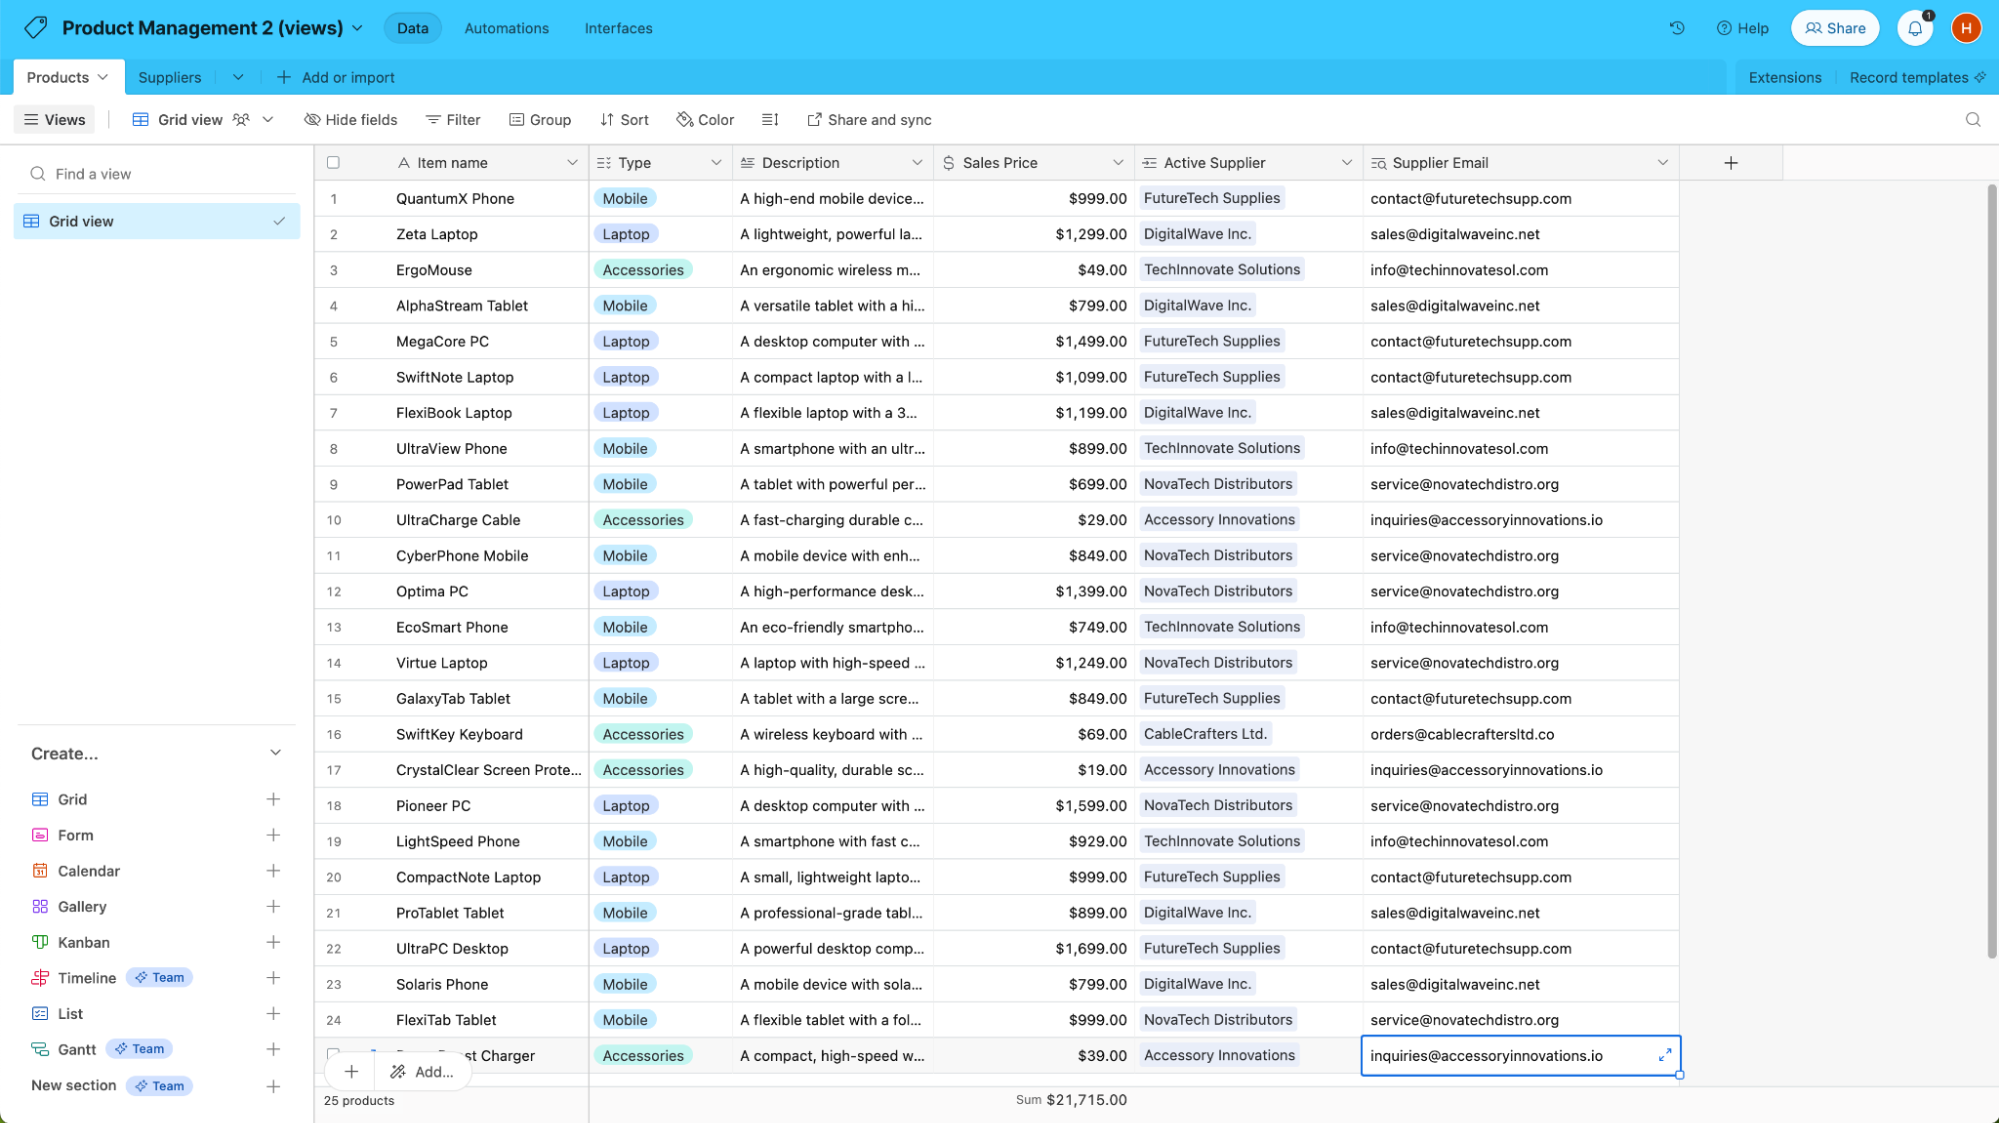
Step 3: Insert data
Now, when you insert data into the field “Active Supplier” you will notice that only Suppliers set as active appear. By inserting them into this field, their email will automatically appear on the correspondent field.
Step 4: Check the Lookup integration on the second table
After setting up the lookup fields, let’s check the integration on the Suppliers table. There, you can observe the new column that Airtable has automatically created. In this new column, you should see the products that are linked to each supplier, meaning the lookup fields were successfully integrated.
What is Softr
Softr is the easiest way to turn your data into powerful business apps—no code required. Connect to your spreadsheet or database, customize layout and logic, and share with your team or clients.
Join 800,000+ users worldwide, building client portals, internal tools, CRMs, dashboards, project management systems, inventory management apps, and more—all without code.
Join 800,000+ users worldwide, building client portals, internal tools, CRMs, dashboards, project management systems, inventory management apps, and more—all without code.
Get started free

Hugo Nunes


Categories


.png)

