


Airtable is a useful tool for managing and analyzing your company’s data in real time. Many companies choose to store their data in Airtable to easily work with their data. But using importing Google Analytics data to Airtable can be more complicated, especially if you don’t know where to start. That’s why we’ve created this step-by-step guide on how to import Google Analytics data to Airtable to organize and visualize your data.
Import Google Analytics data to Airtable with Data Fetcher
Data Fetcher is one of the best Airtable apps out there which enables syncing Airtable with a number of platforms including Google Analytics. To import Google Analytics data to Airtable with DataFetcher follow these steps:
Step 1: Install the Data fetcher app from Apps in the upper right corner of your table.
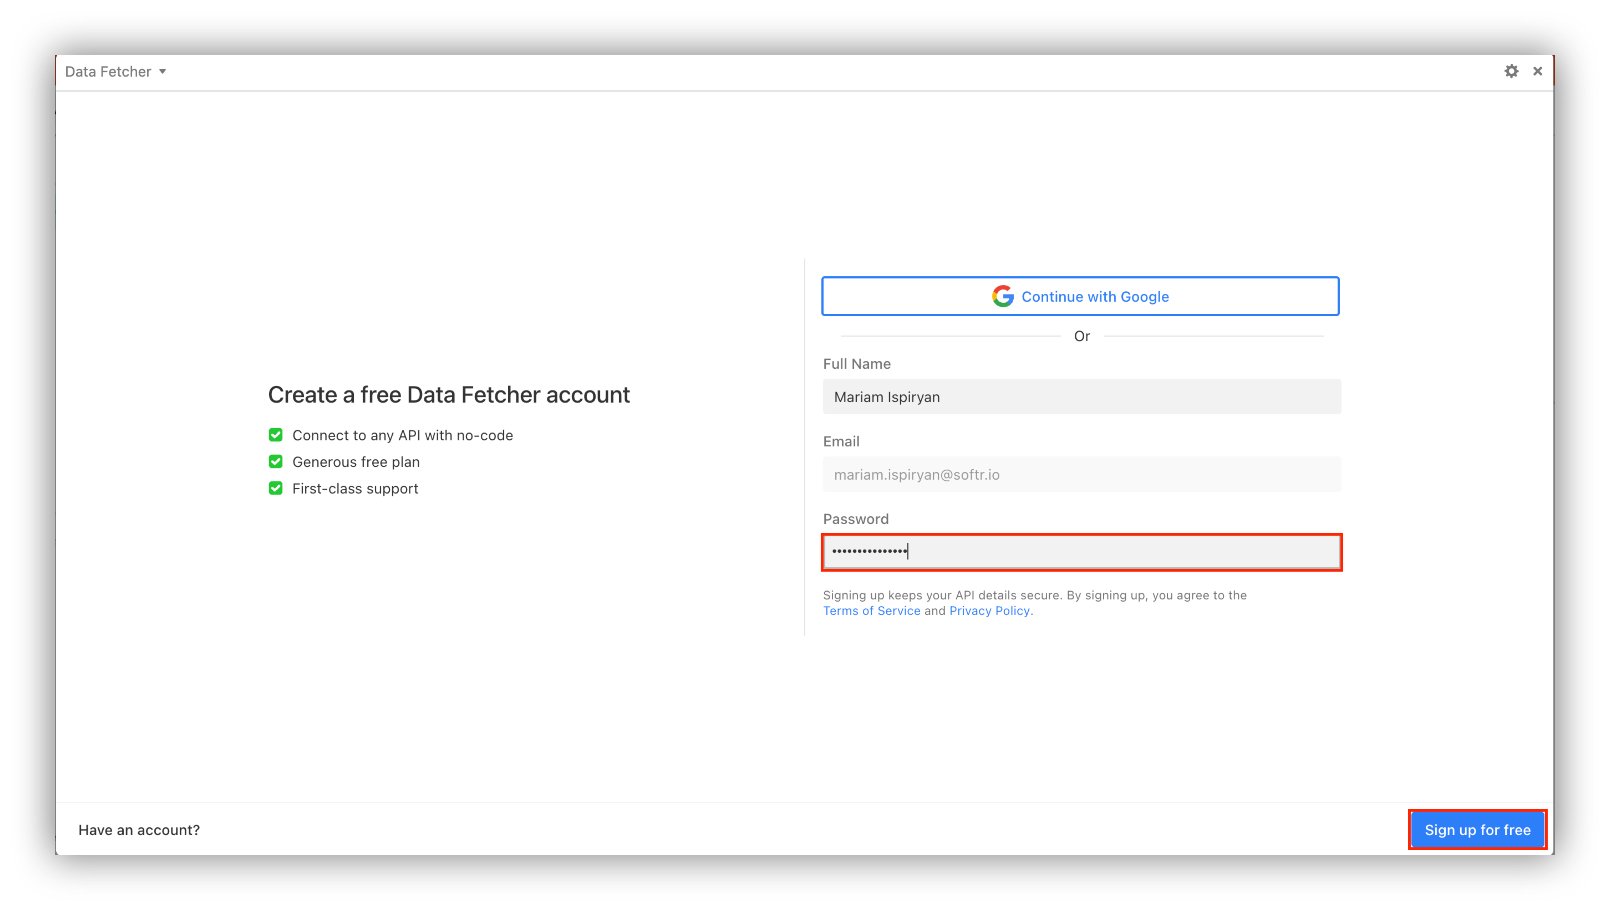
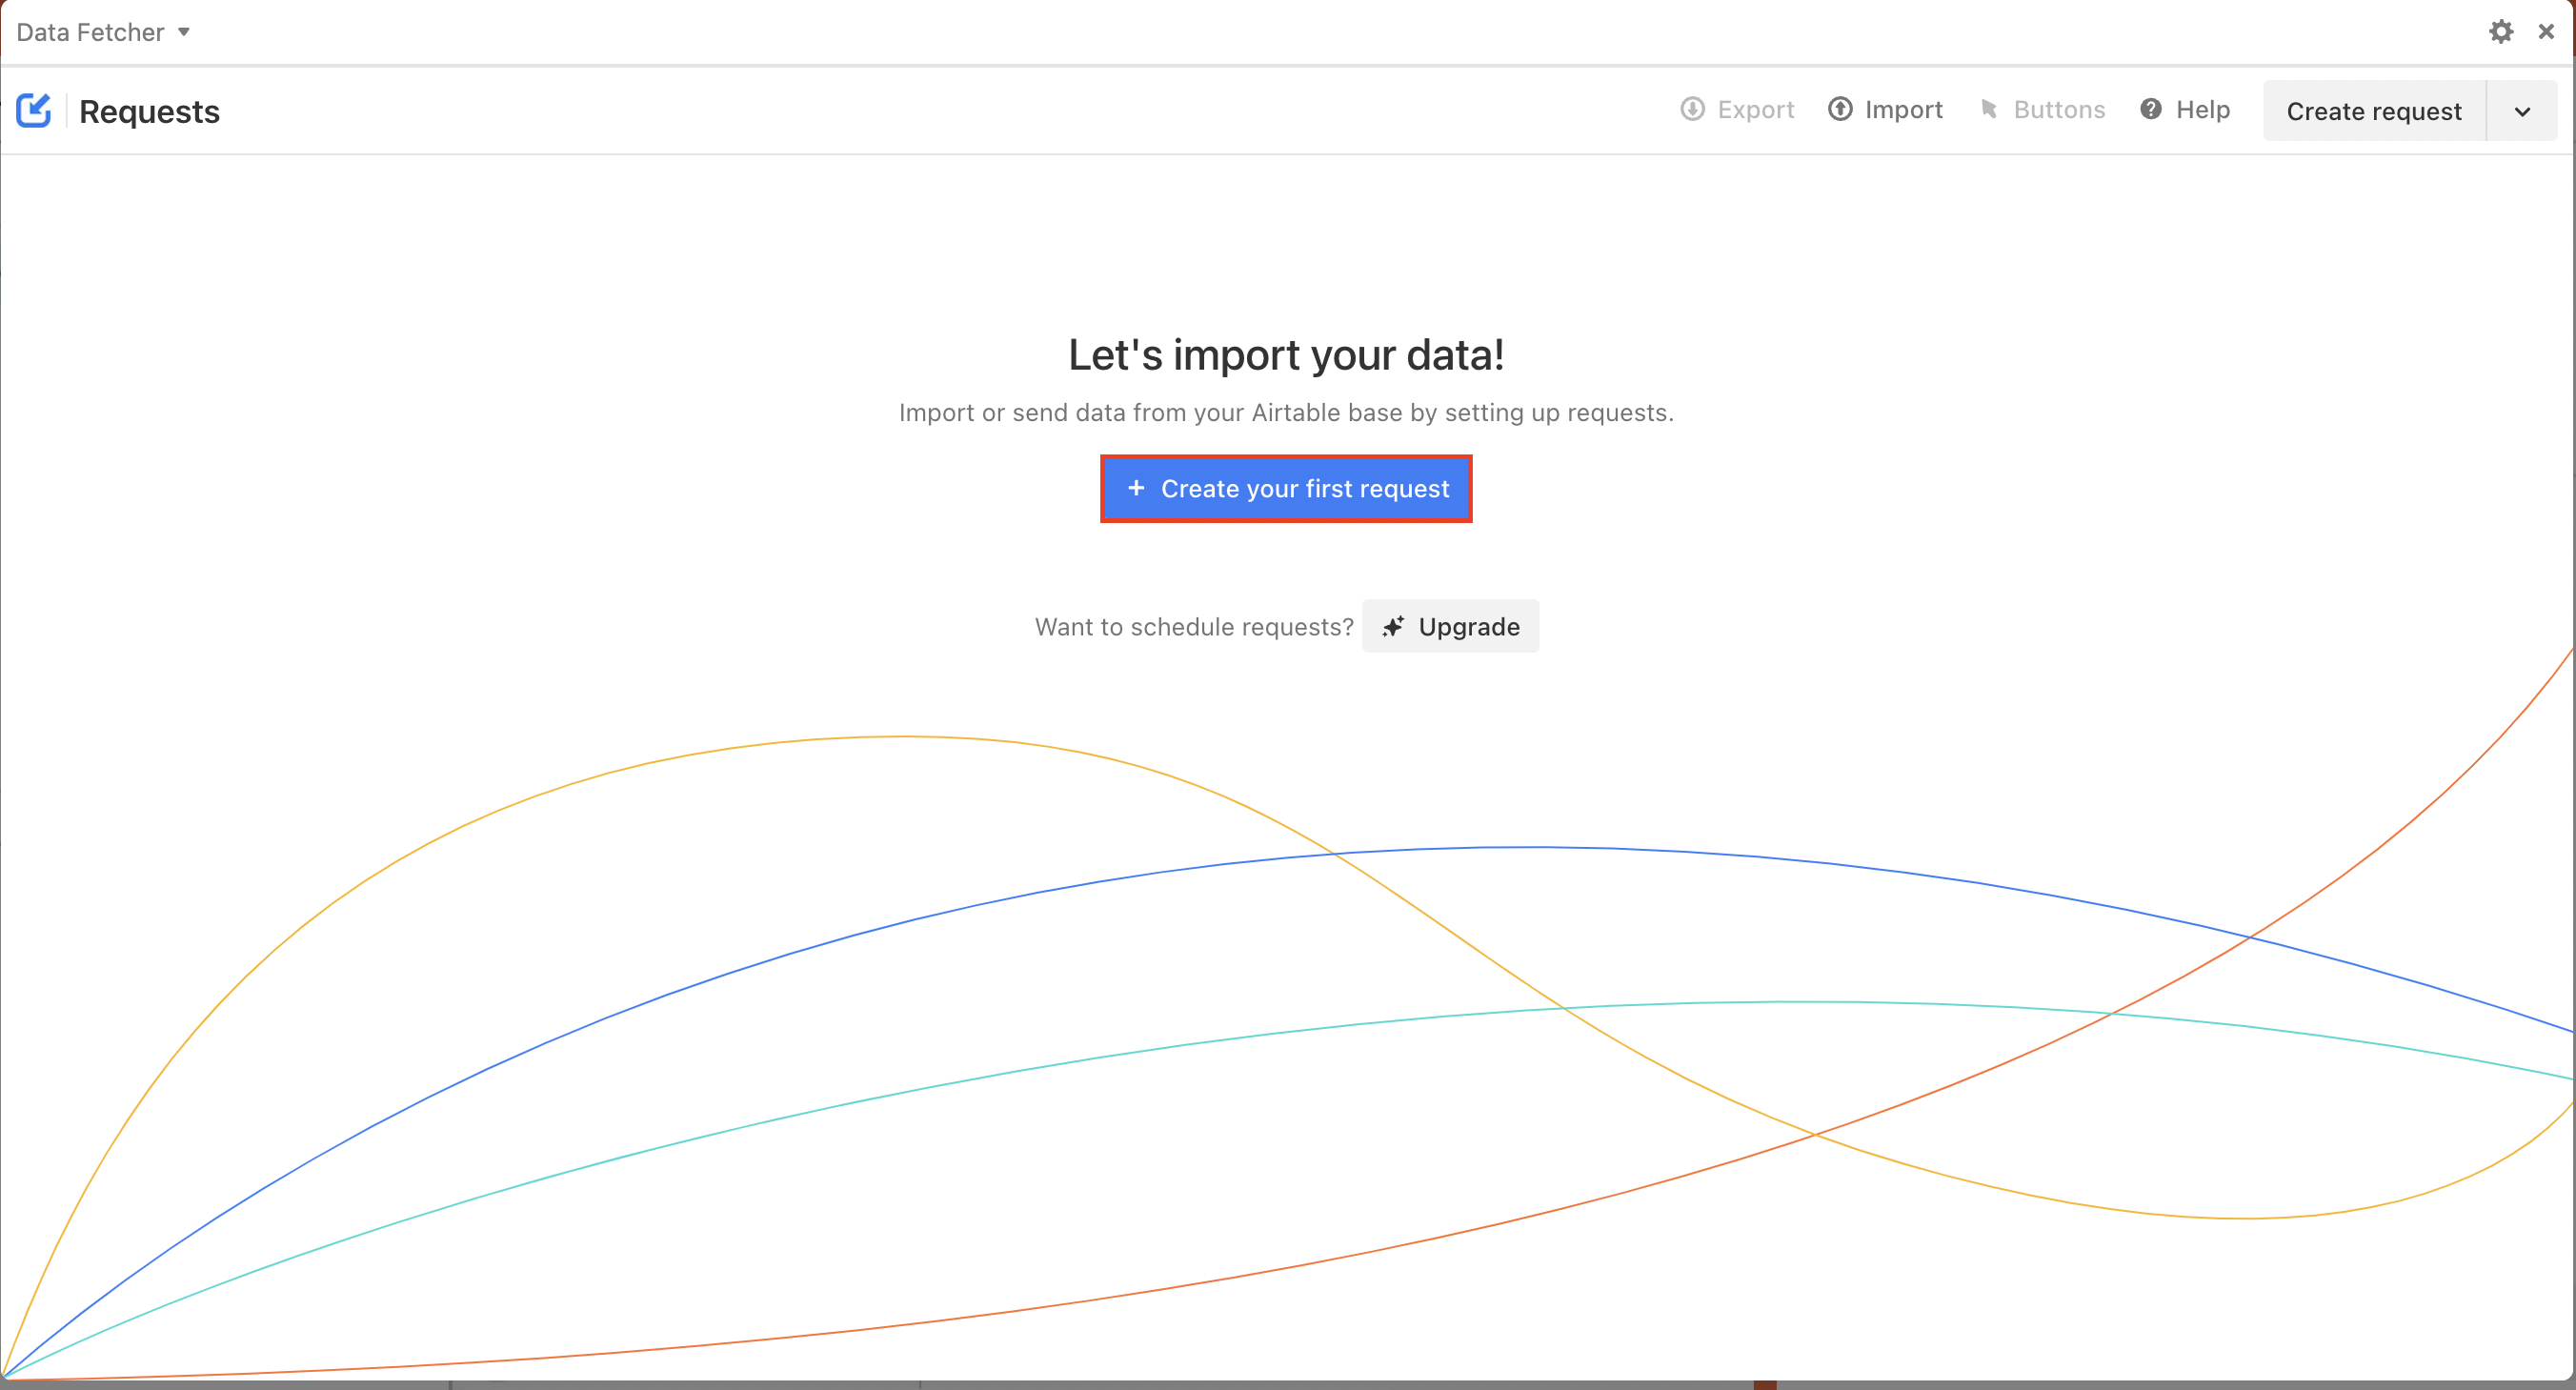
Step 2: Create a free account and create a new request
Step 3: From the Marketing section, select Google Analytics.

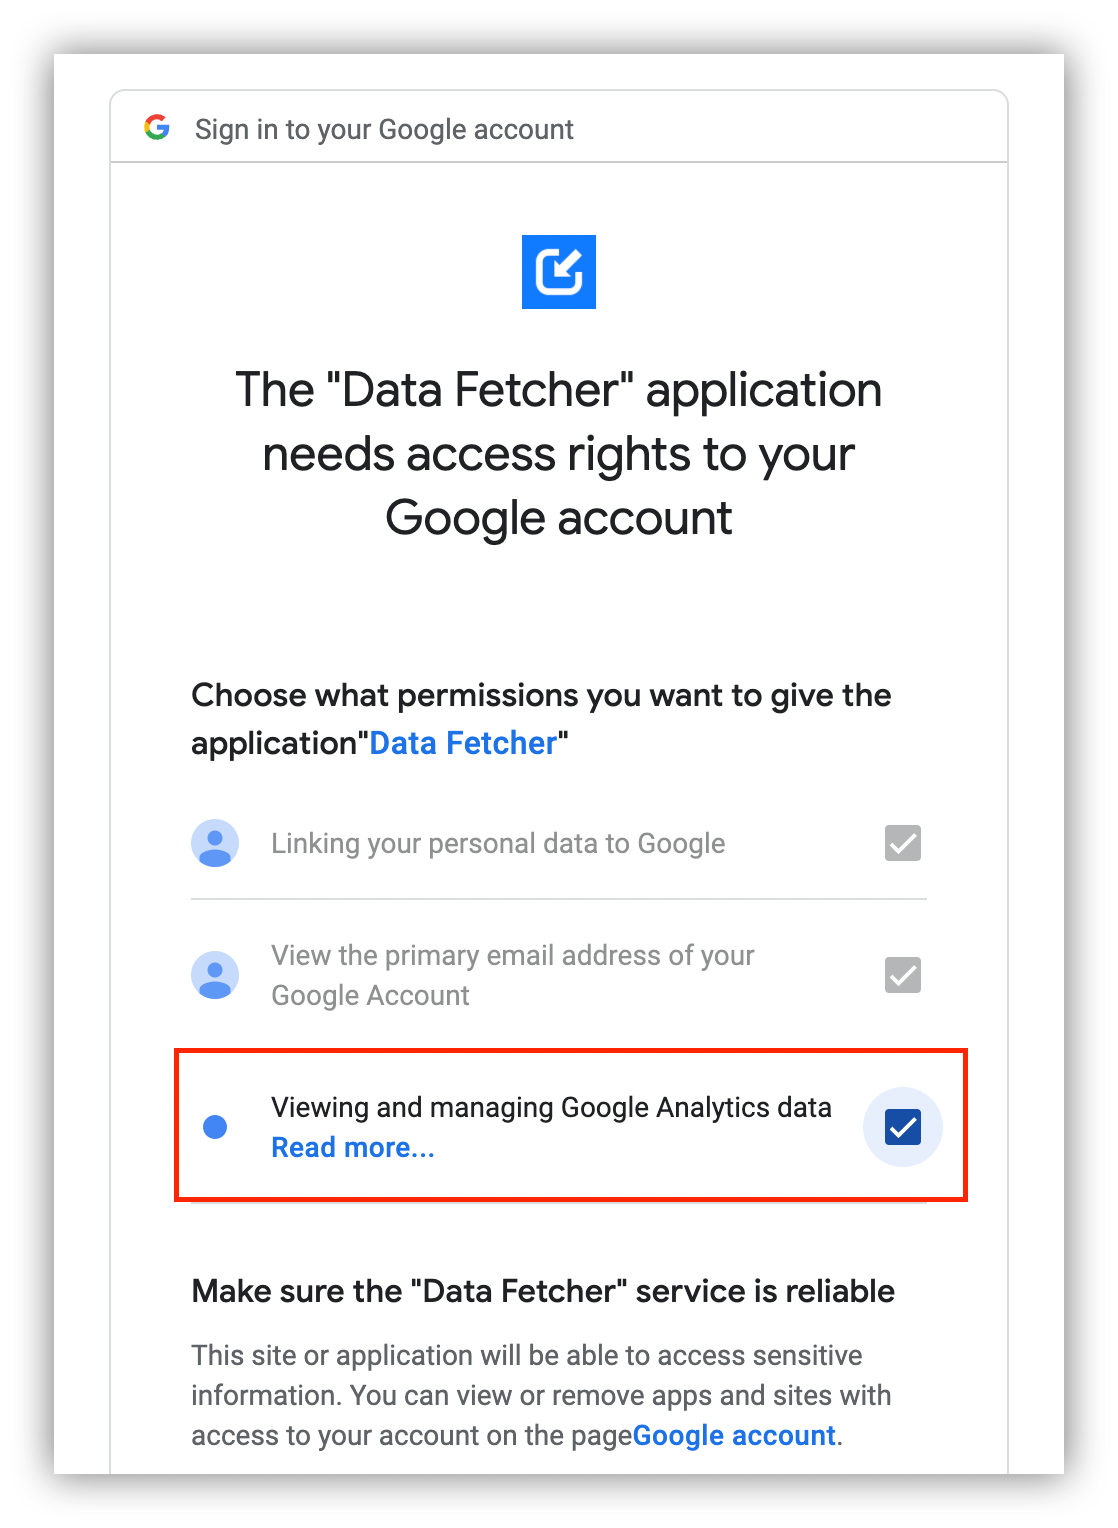
Step 4: A new tab will open where you need to authorize Data Fetcher to access your Google Analytics data.
Step 5: Choose the Google account you want to import Google Analytics data from.
Step 6: Make sure you check the ”View and manage your Google Analytics data” checkbox before proceeding.
You will be back on your request page with the Google Analytics connection on.
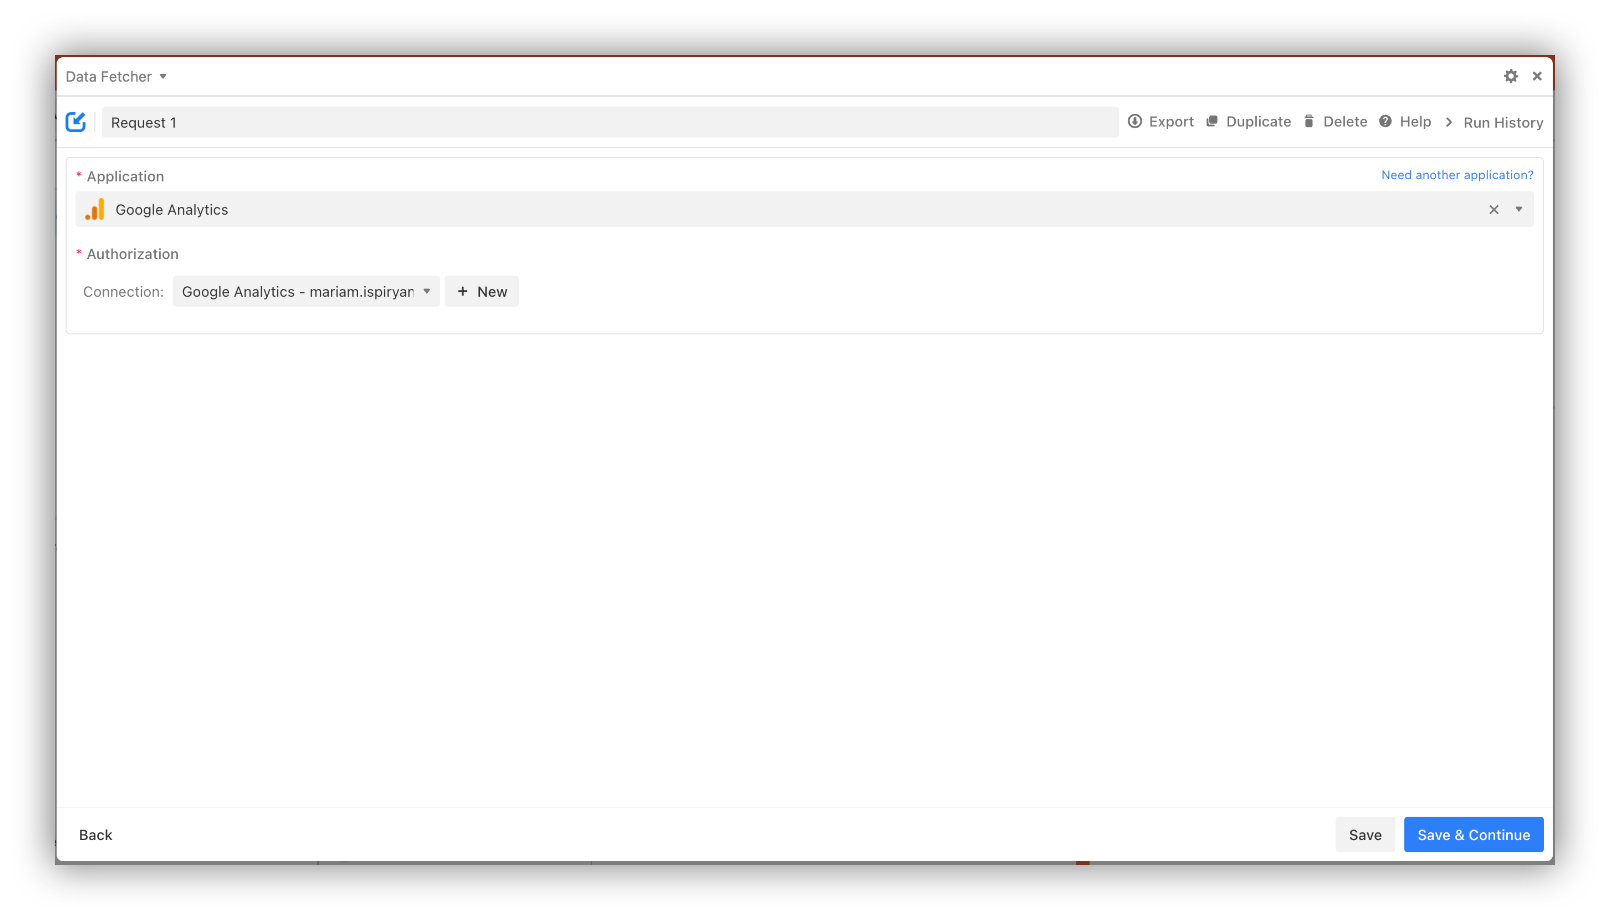
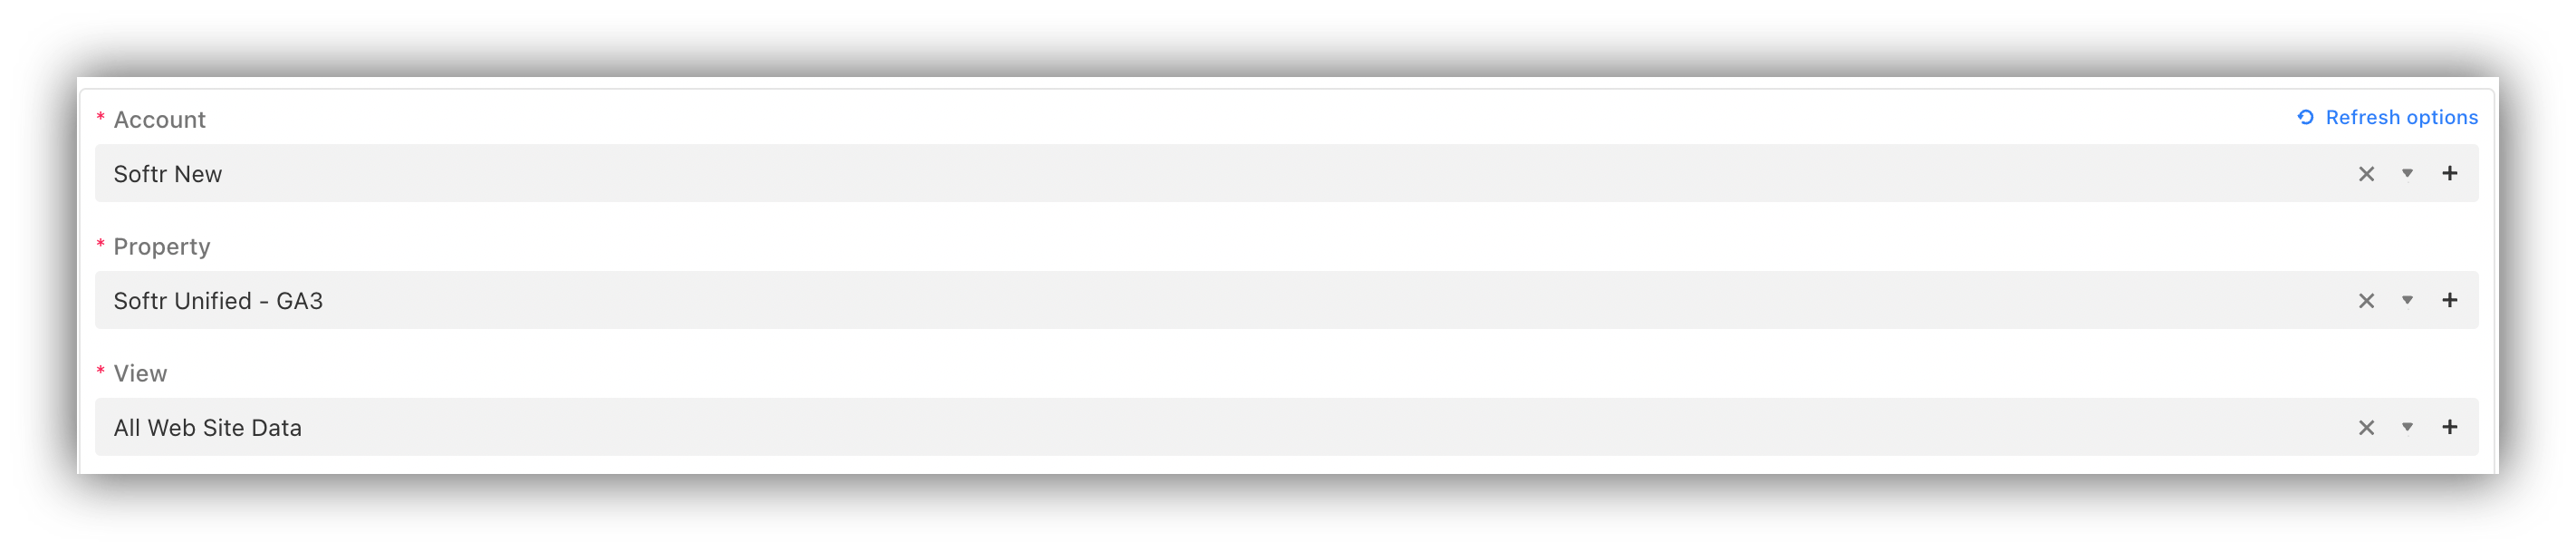
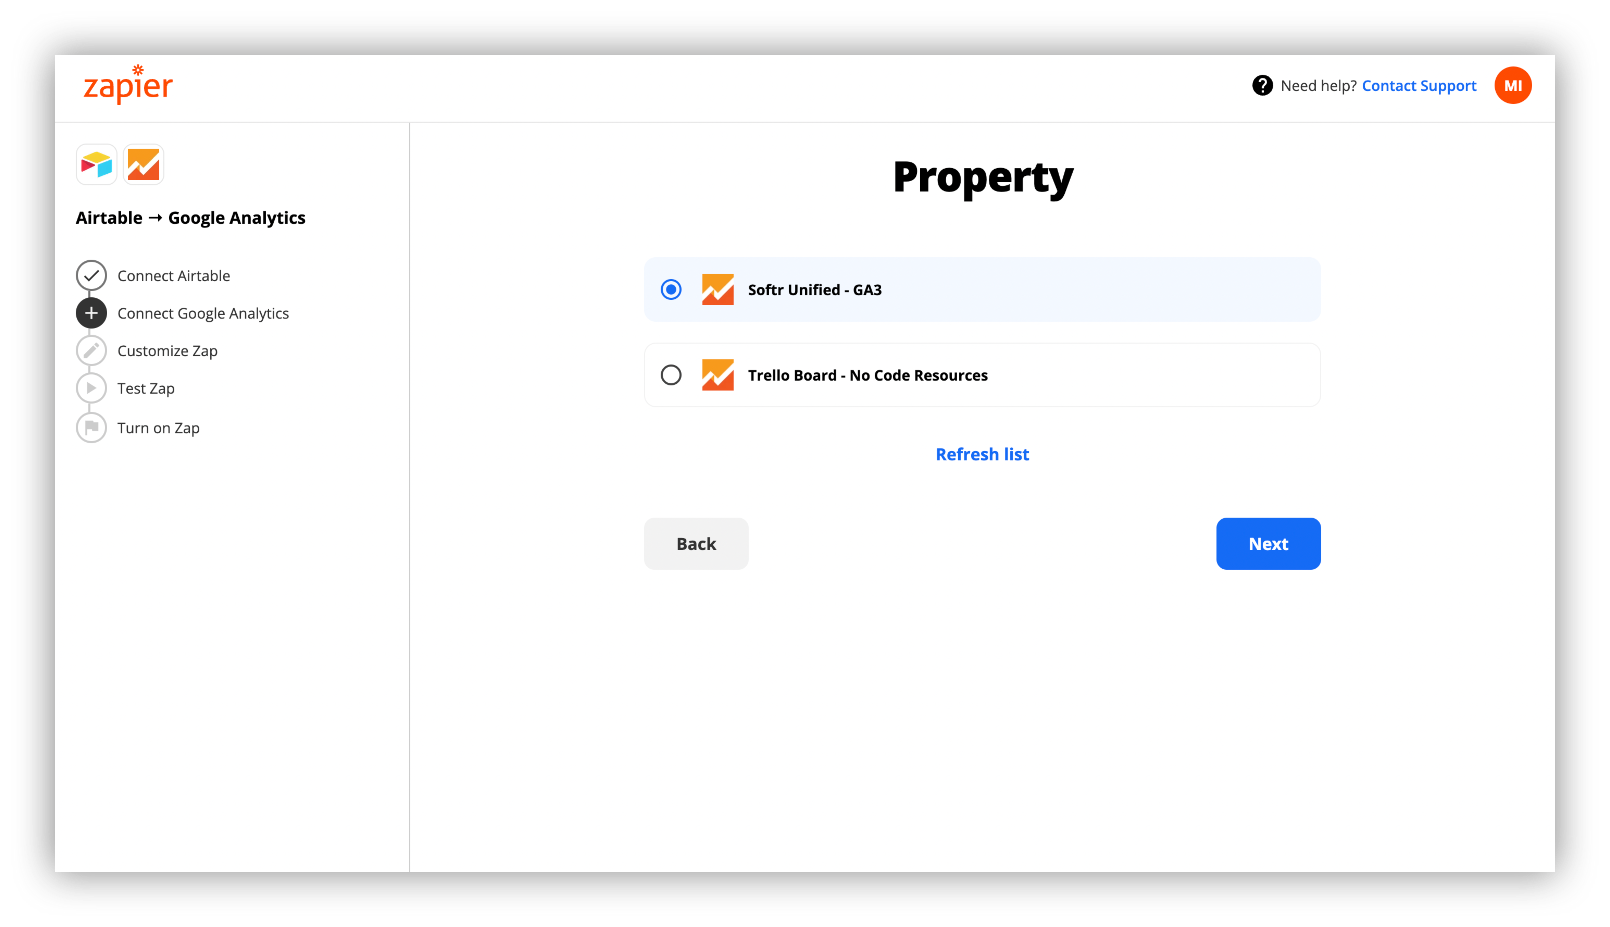
Step 7: Select the Google Analytics Account, Property, and View your data will be imported from.
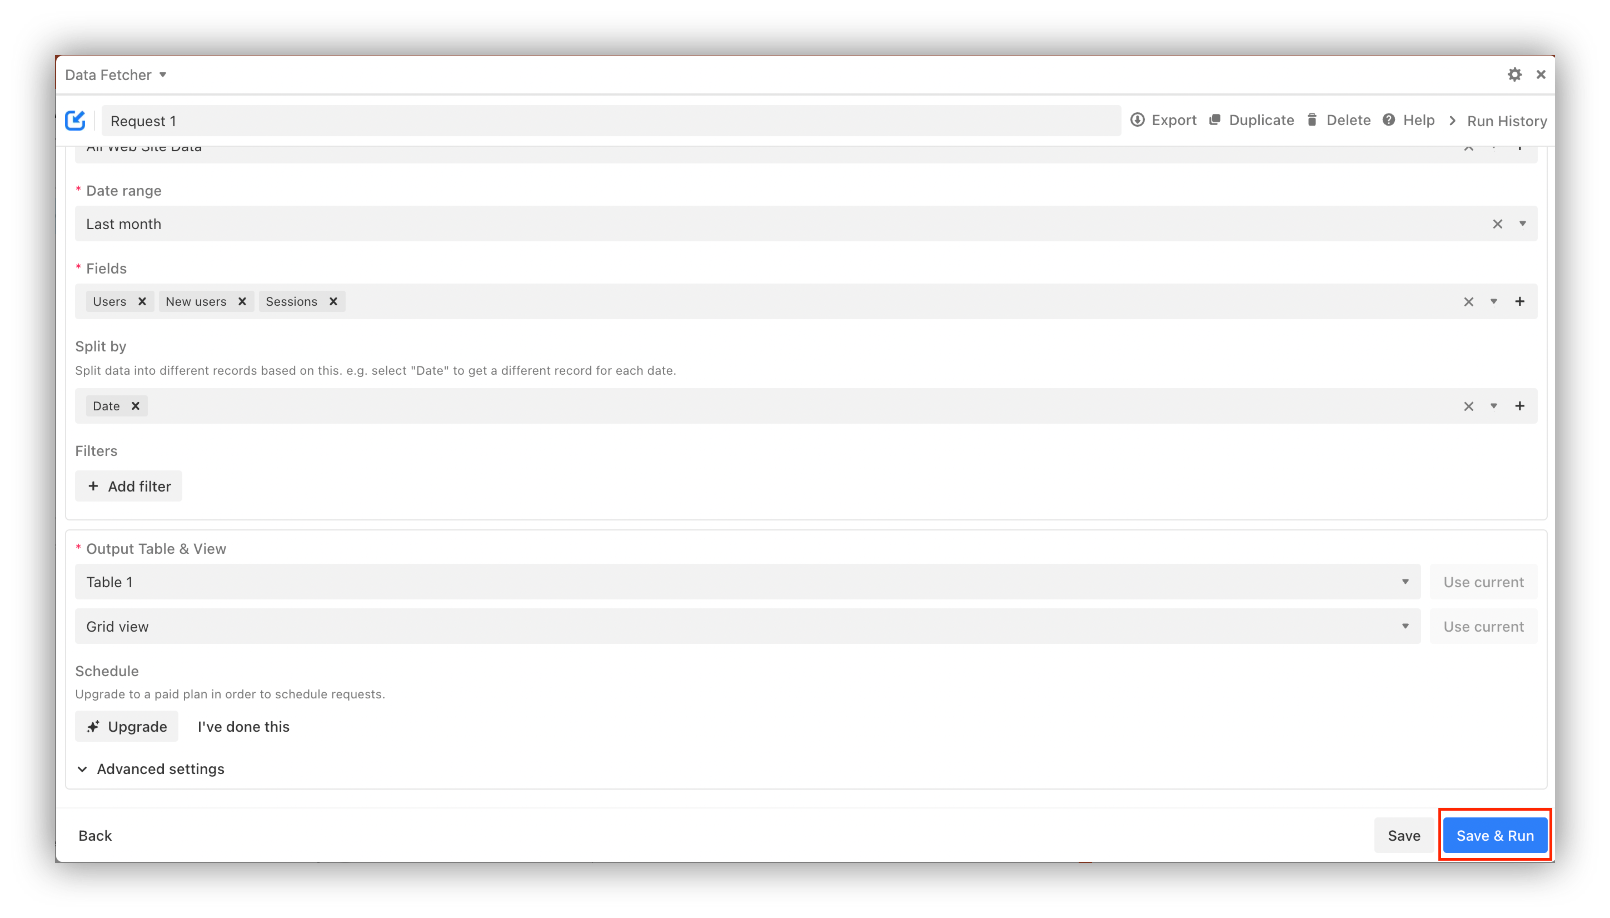
Step 8: Choose the Date range you want to import data for.
Step 9: Select the Fields you want to import from Google analytics.
In our case, we went for the Data range of last month and the data of the Users, New Users, and Sessions to be imported.

Step 10: Select a value for Split by to split the data into different records. We’ve selected "Date" to get a different record for each date.

Step 11: Select the Output Table & View you want to import Google Analytics data into.

Step 12: Click 'Save & Run'.
The request will run and the Response field mapping tab will open, where you can select how GA fields should be mapped to Airtable fields. The Google Analytics fields can be imported or filtered. The imported fields can be set to be mapped to an existing field or a new one.
Once you’re done with mapping, click 'Save & Run'.
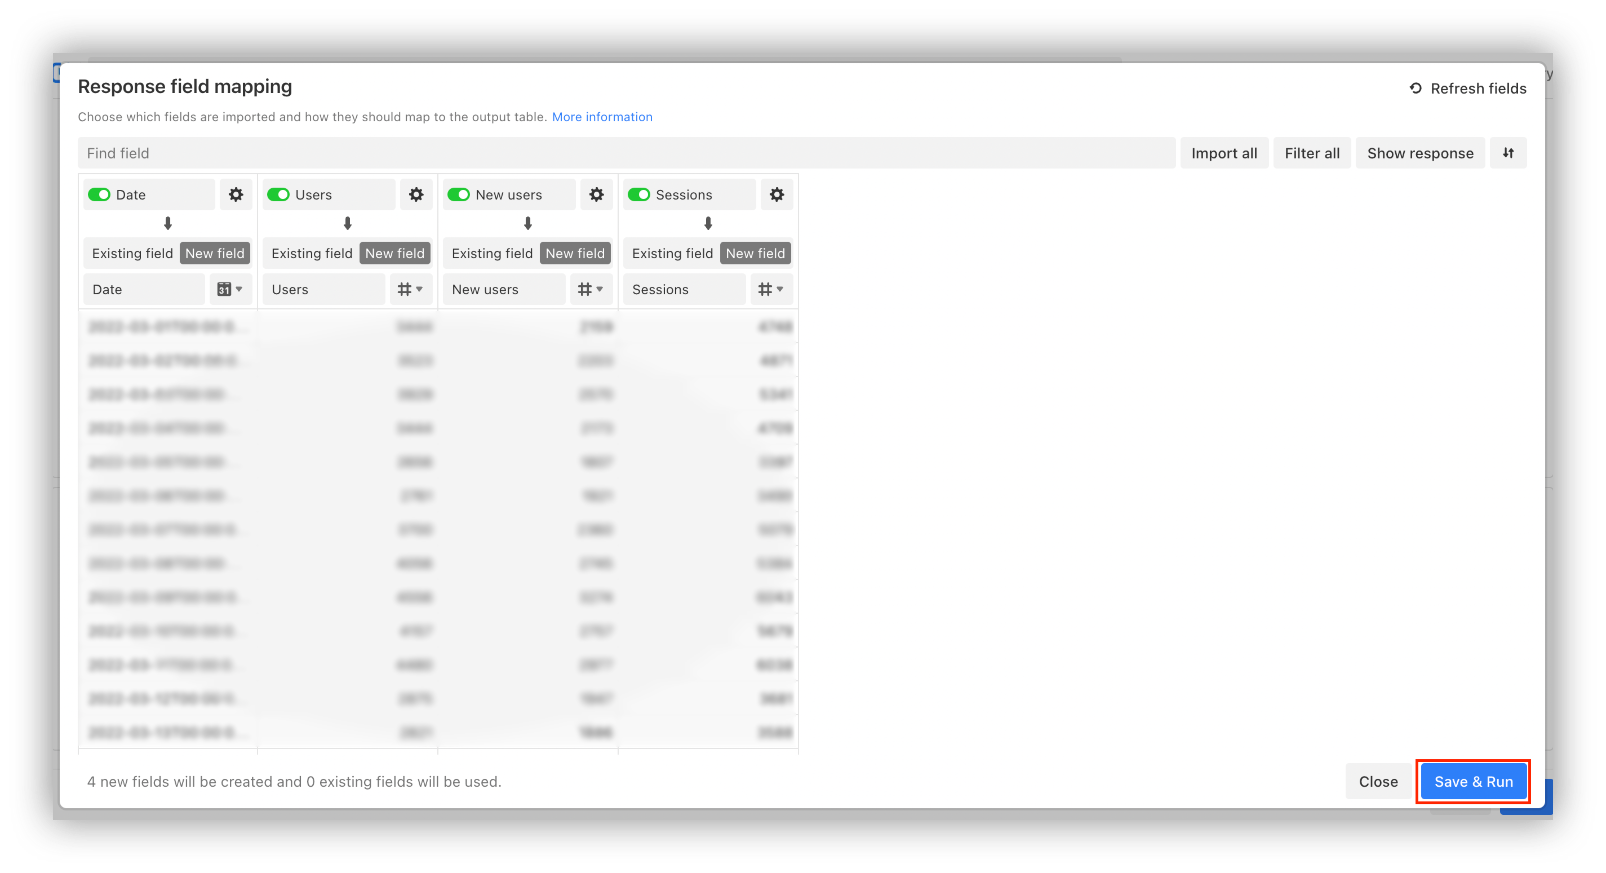
Data Fetcher will create the fields in the output table, running the request and importing the data from Google Analytics to Airtable successfully. If you want to run the request again, simply click 'Run'. If the fields remain the same, you will not need to set up the response field mapping again.
These were all the steps required for syncing Google Analytics with Airtable manually and for free.
Import Google Analytics data to Airtable Automatically
Data Fetcher also has a premium schedule request feature that allows syncing Google Analytics and Airtable automatically.
Step 1: In Data Fetcher, scroll to Schedule and click 'Upgrade'.

A new tab will open where you can get familiar with plans, selected one, and add payment details to proceed.
Step 2: When you’re done with the payment process, simply go back to Data Fetcher and click "I've done this".

Step 3: Click 'Add API key'. You can find your API key in your Airtable account.

Step 4: Enter your Airtable API key and hit 'Save'.
Step 5: Toggle on Schedule this request.

Step 6: Select how often you want the request to run and click 'Save'. This way, the request will run automatically according to your set time.
Import Google Analytics data to Airtable with Zapier
Zapier is one of the best no-code automation tools. And if you’re looking for a free and automatic way of syncing Google Analytics data with Airtable, Zapier is the right tool for you. The process might be complex for first-time Zapier users, but we will do our best to present the steps with ease. Let’s get started!
Step 1: Go to Zapier sign-in/sign-up page.

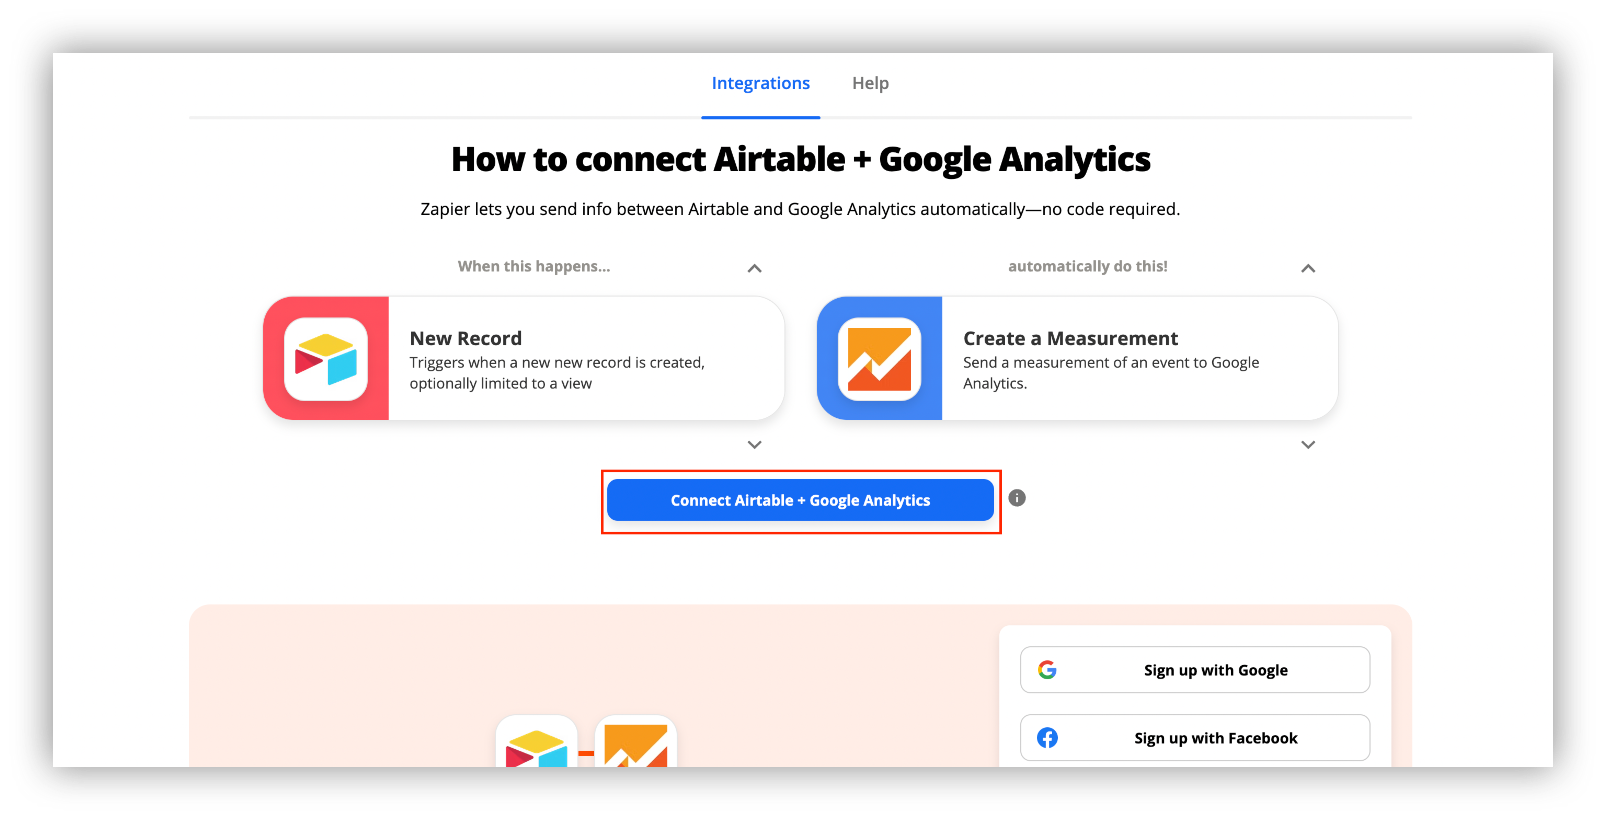
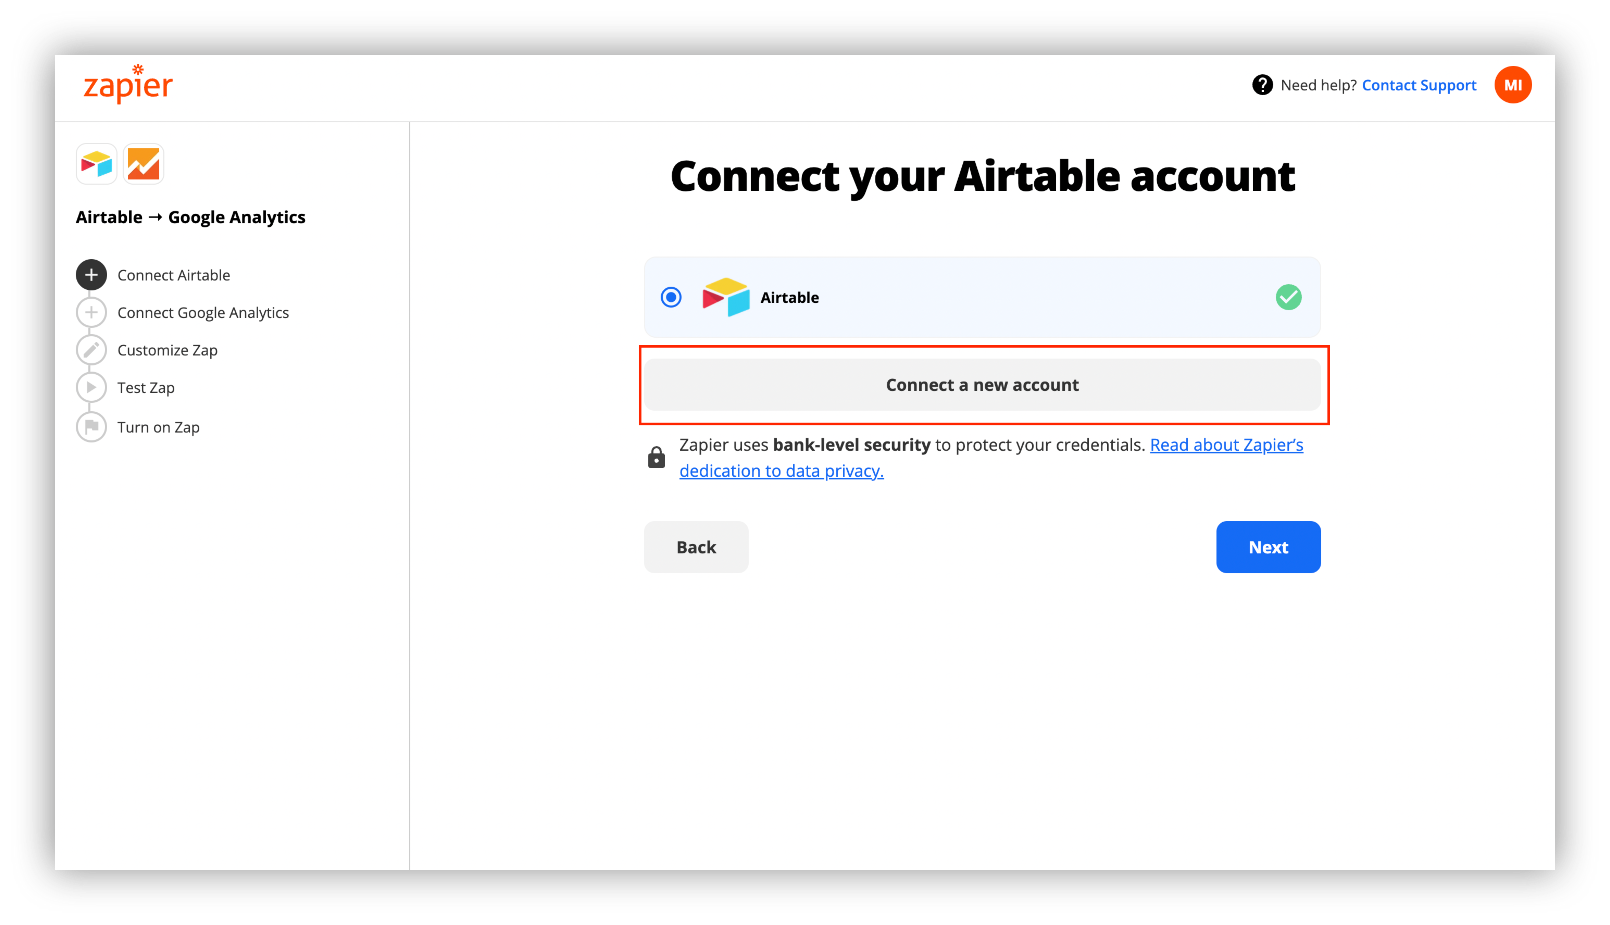
Step 2: Go back to the Google Analytics x Airtable page and click on the “Connect Airtable + Google Analytics” button to get started.
Step 3: On the opened page, click on “Connect a new account”.
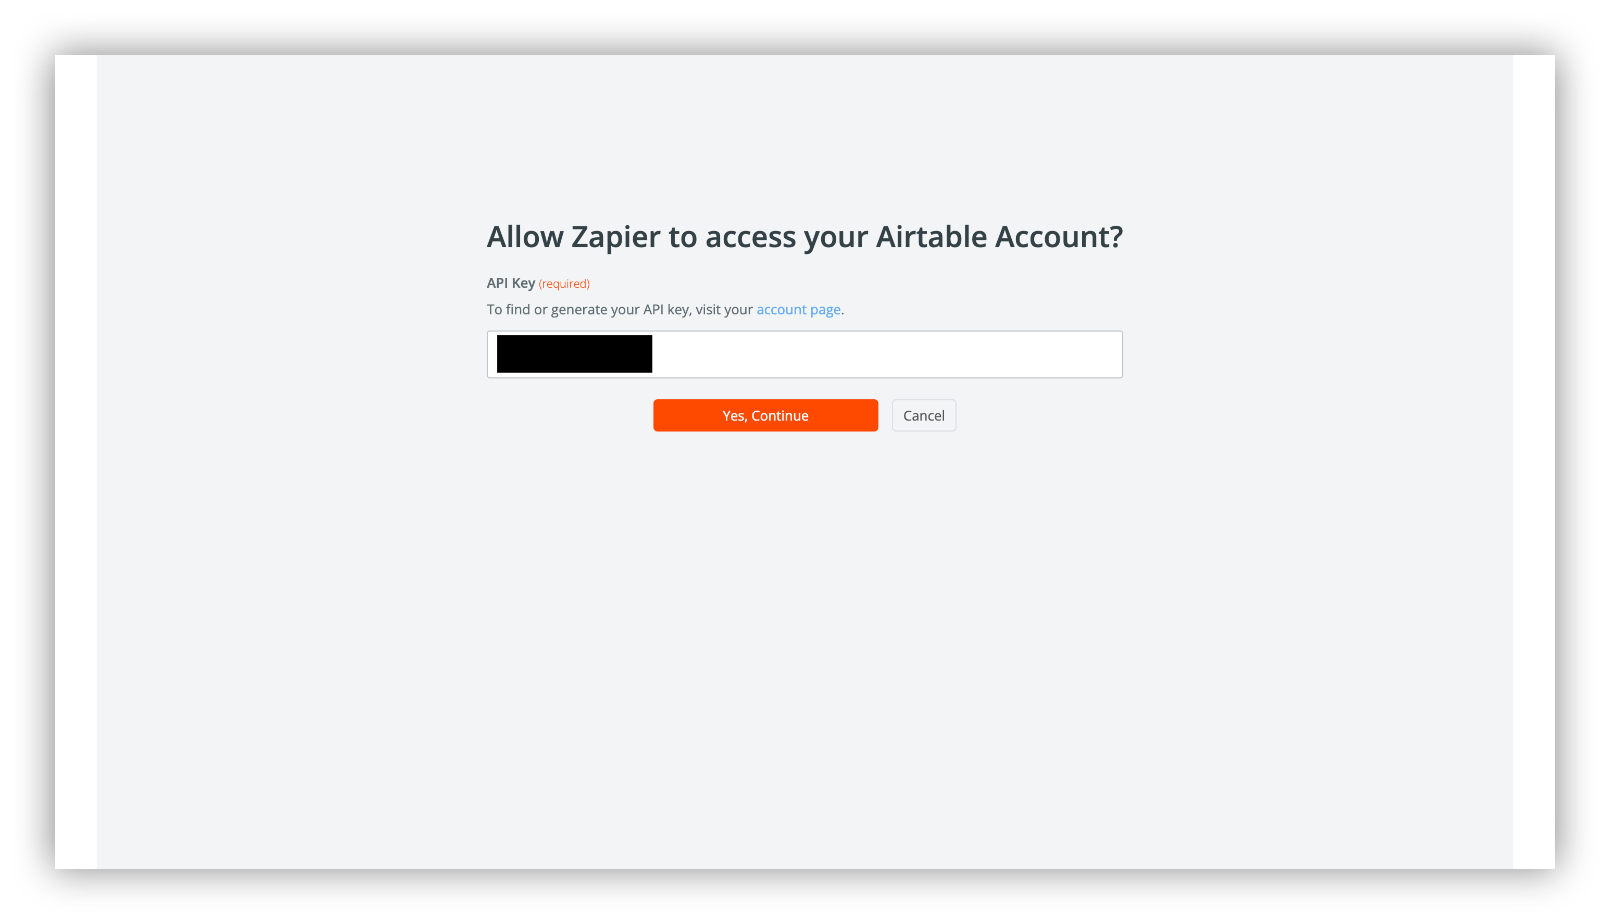
Step 4: On the opened tab add your Airtable API.
You can copy your API key from your account page.
Step 5: Click “Yes, Continue”, after you add your API key.
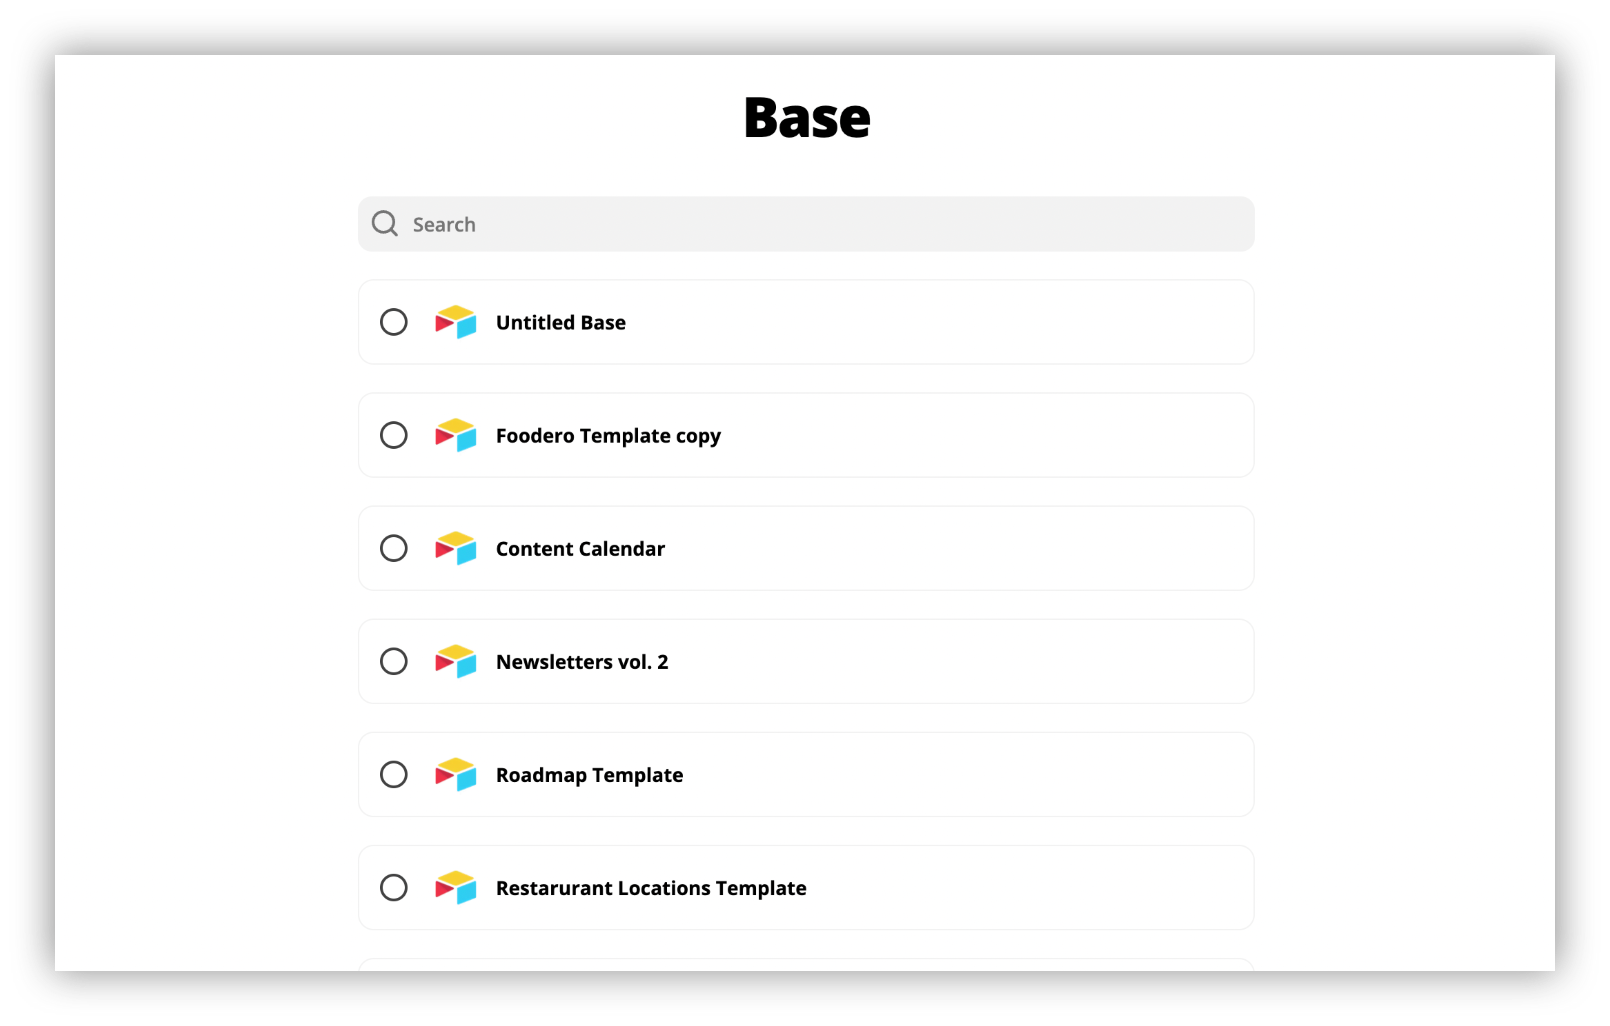
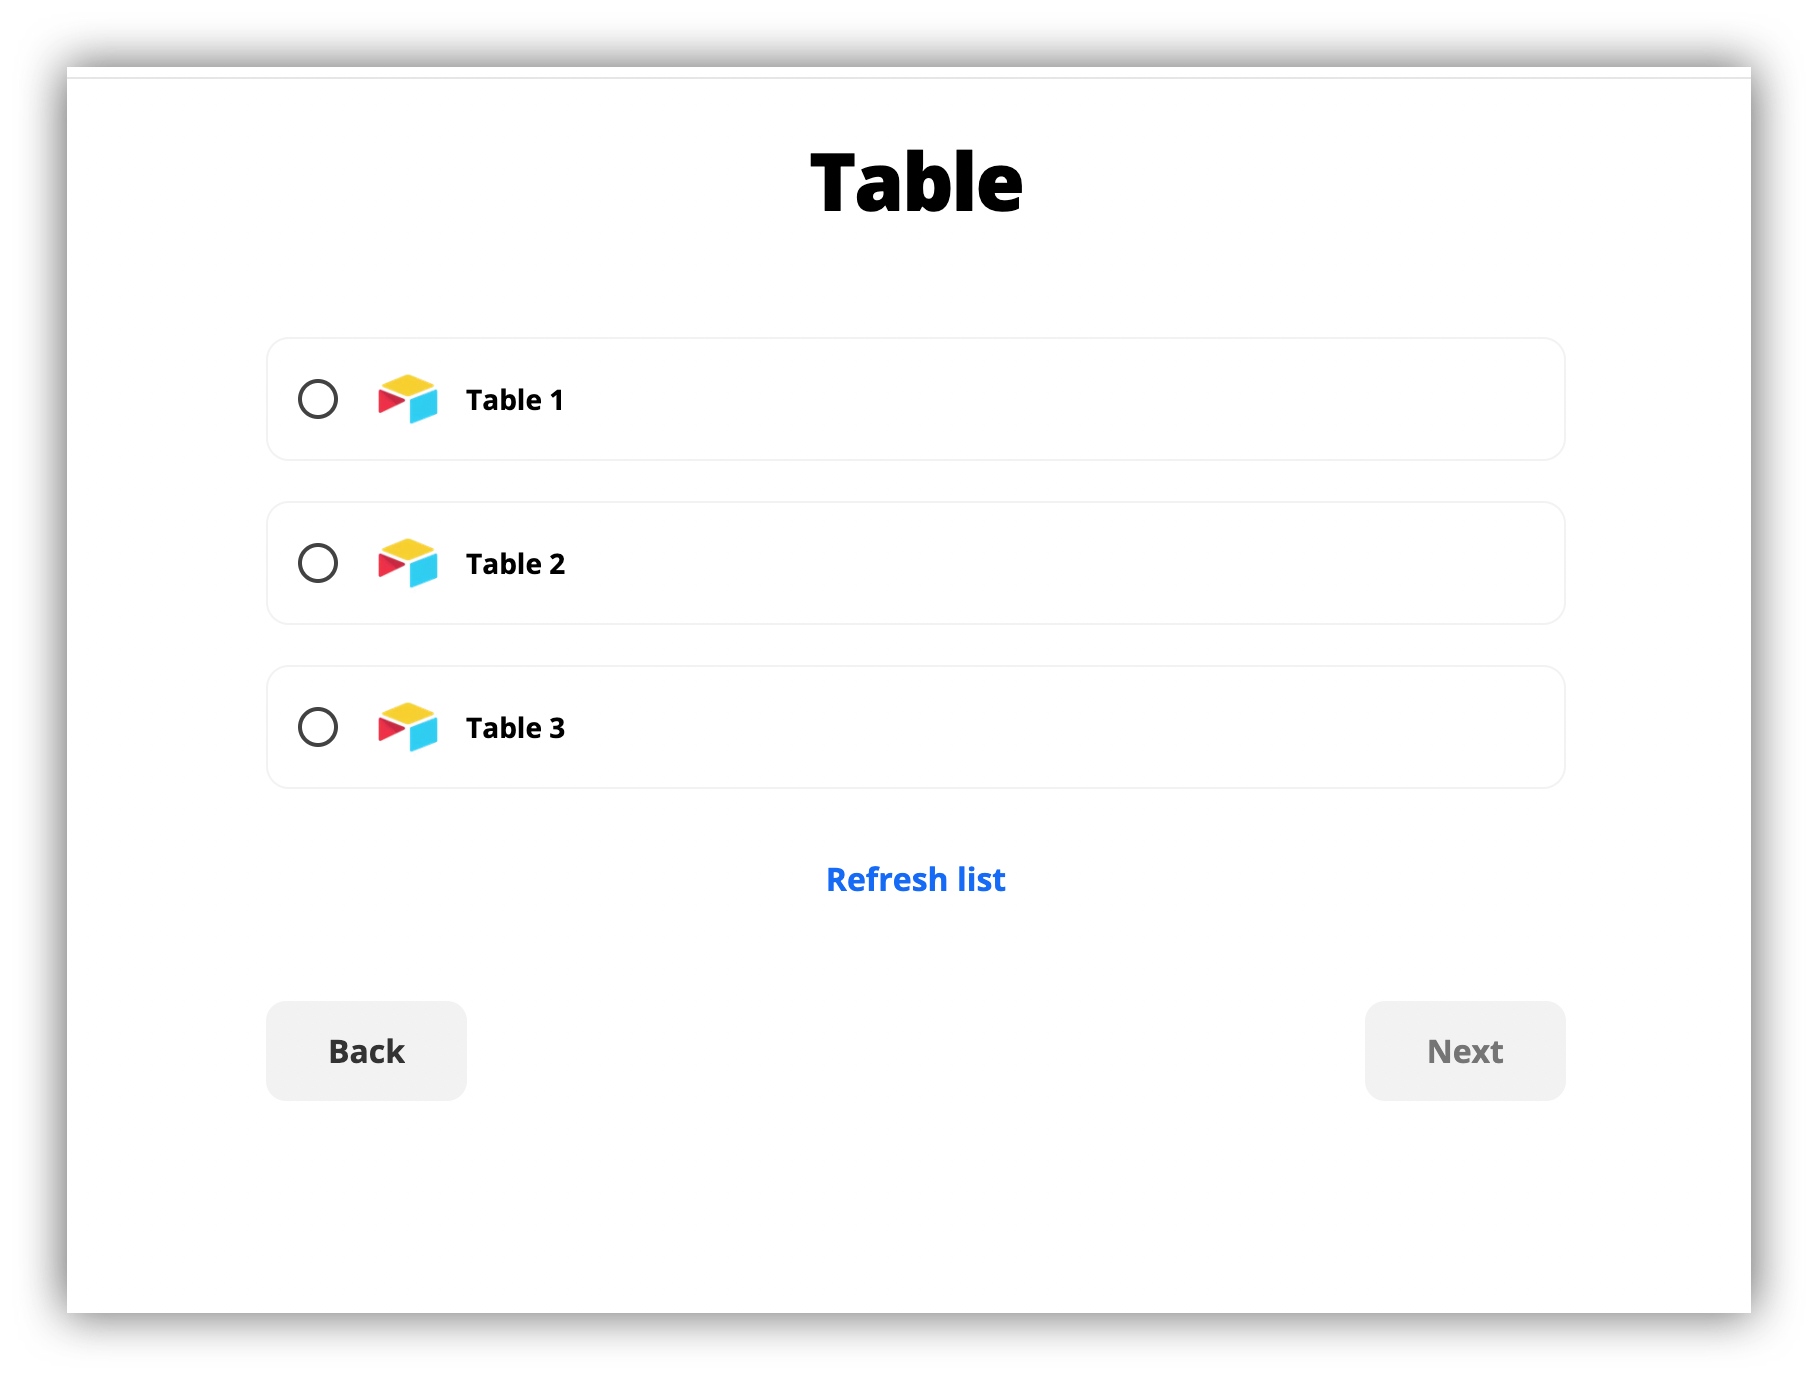
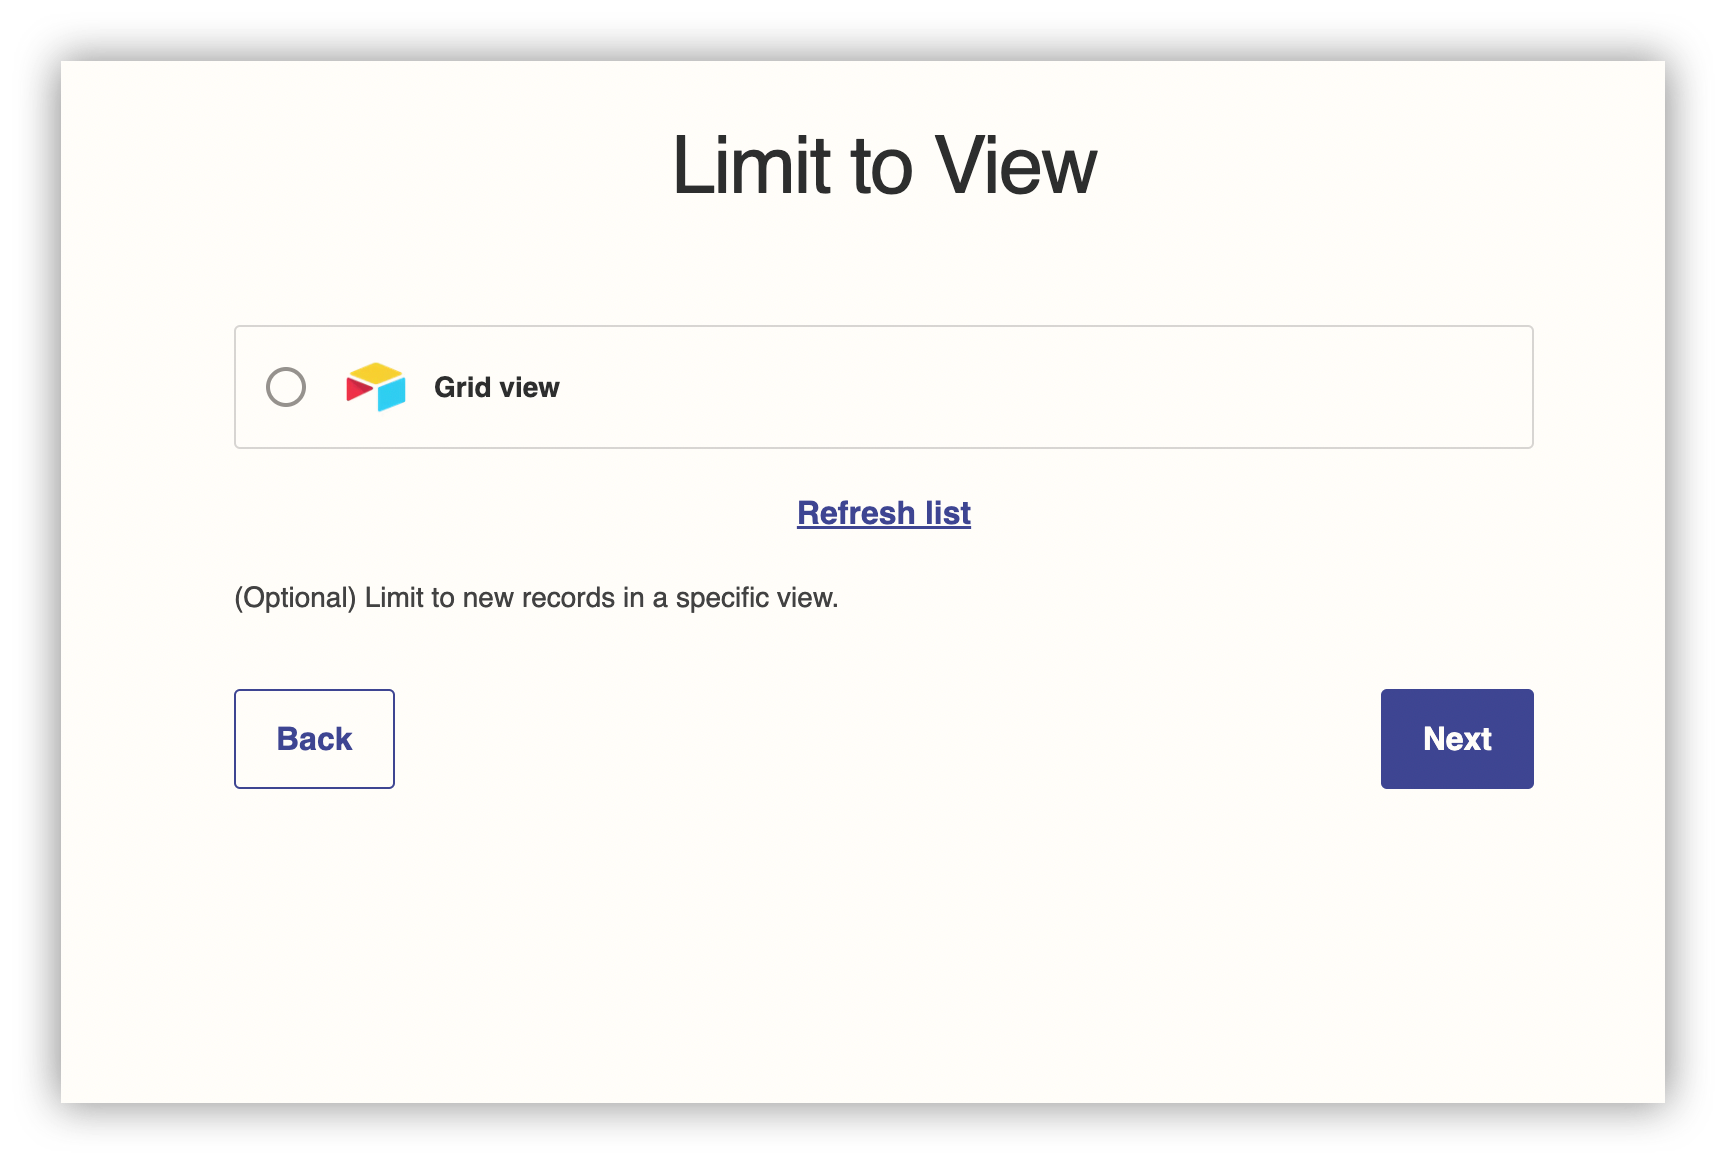
Step 6: Choose a Base, a Table and a Grid view you want the data to be imported.
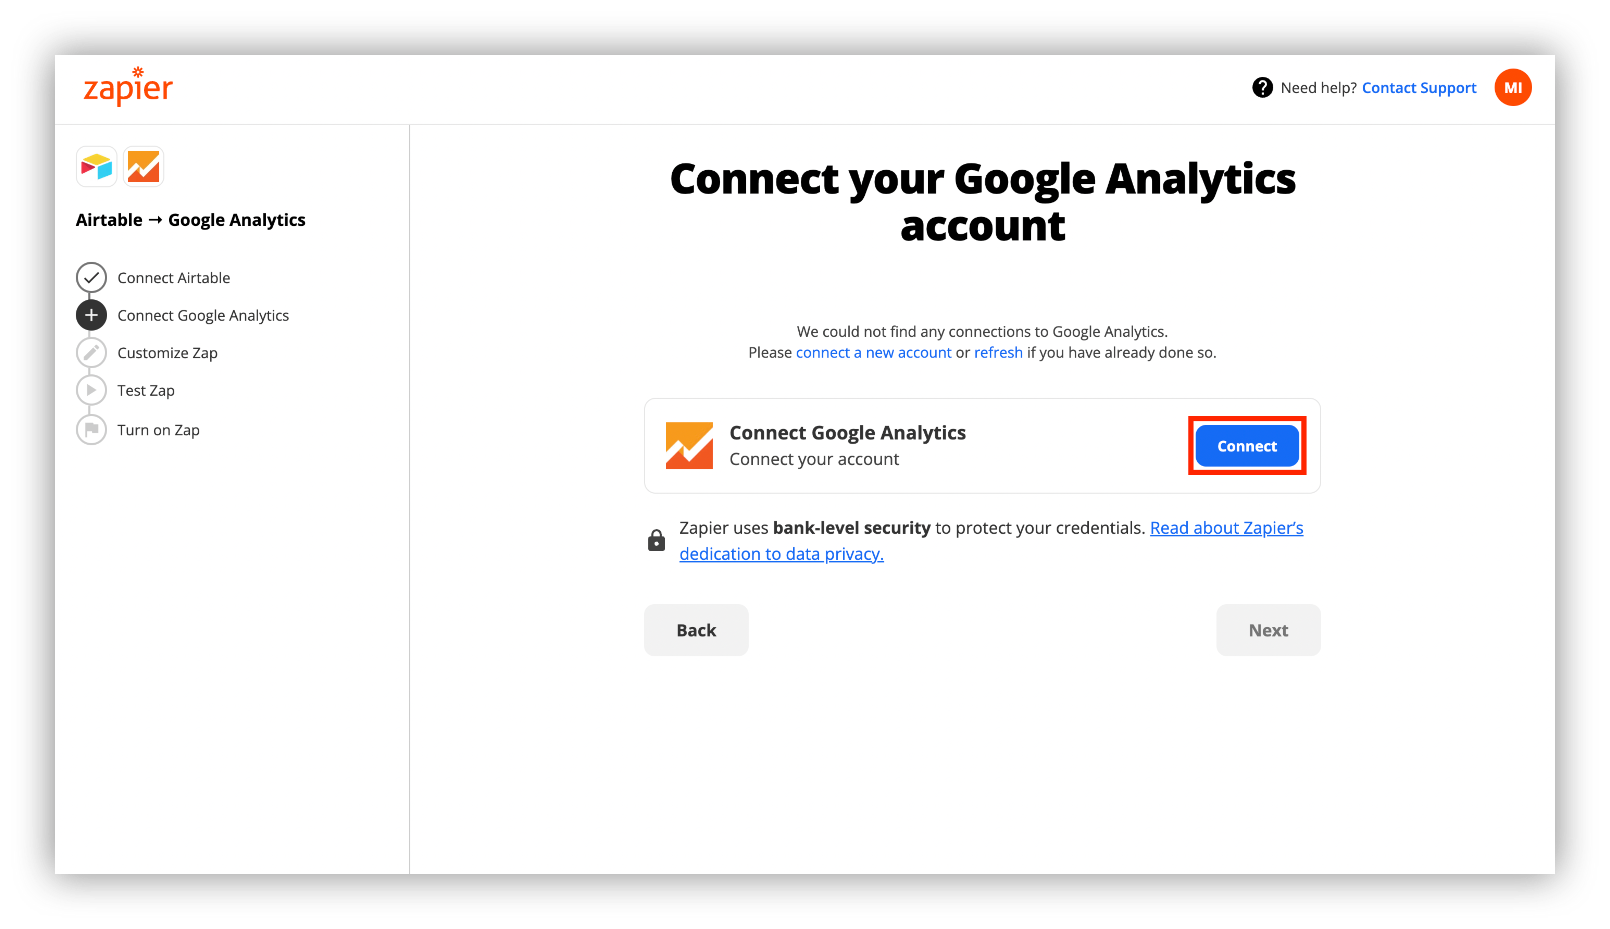
Congrats! You have successfully integrated Airtable with Zapier. The second step of the syncing process is connecting Zapier with Google Analytics.
Step 1: Click “Connect”, to start the process.
Step 2: Choose a Google Analytics account you want to connect to Zapier.
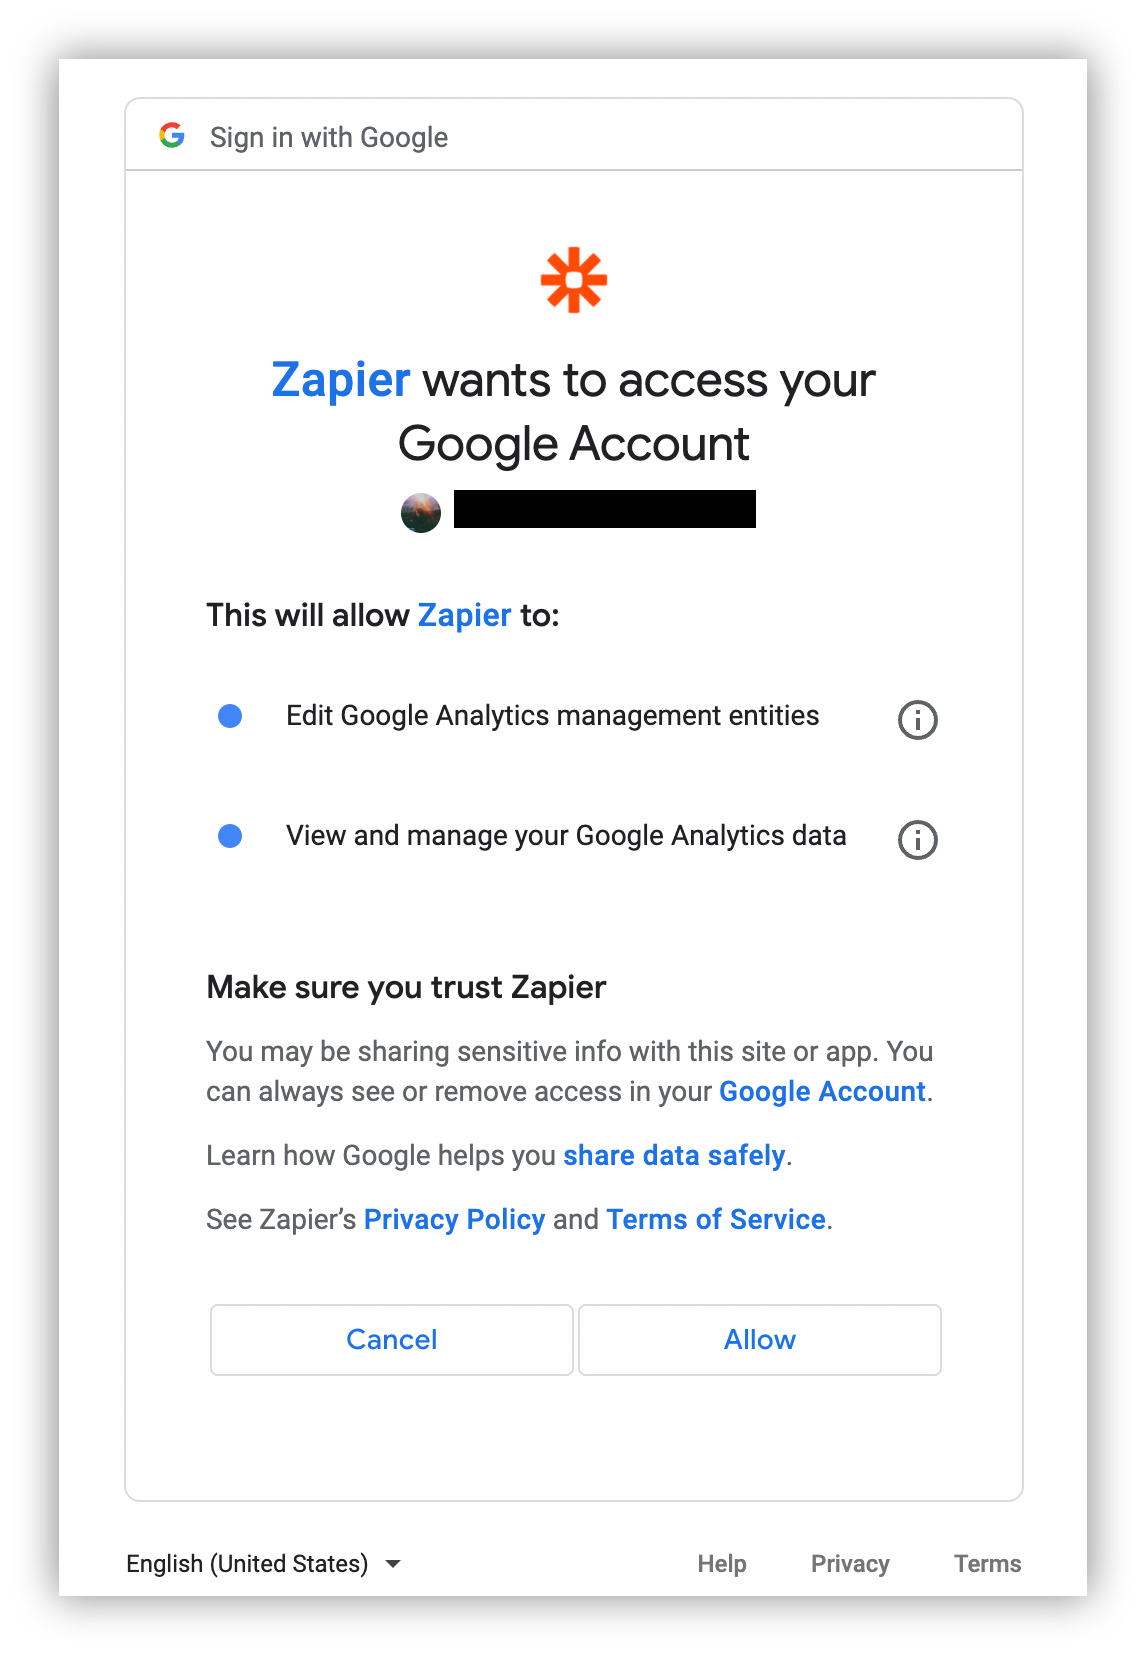
Step 3: Click “Allow”, for Zapier to access your data.
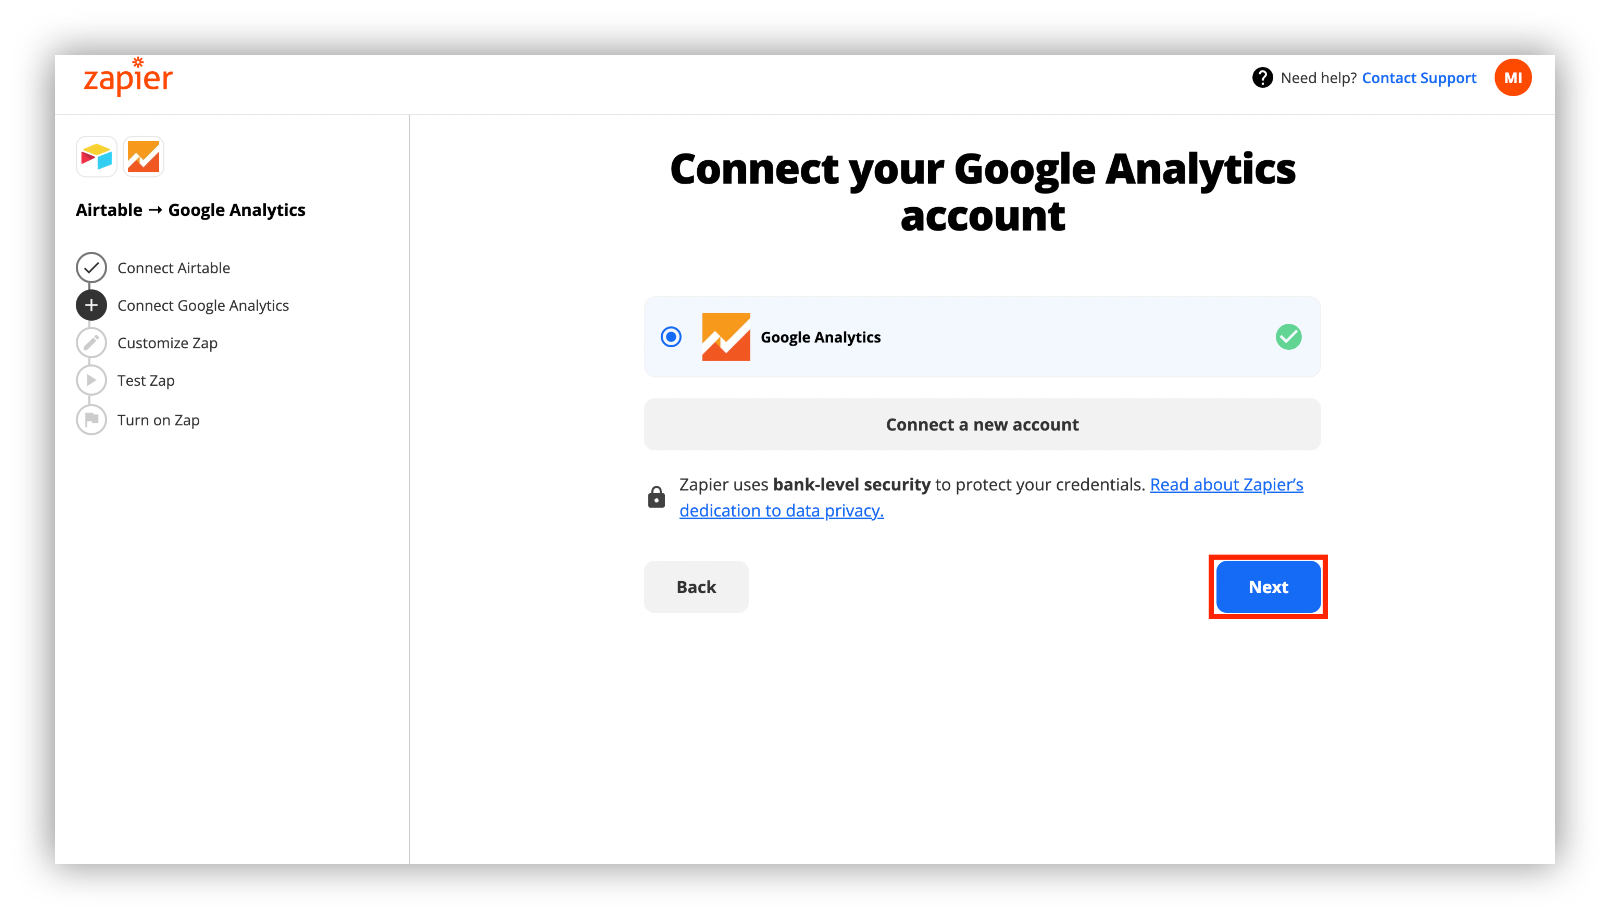
Step 4: You will be directed to the connecting page, where, by clicking “Next”, you will resume the syncing process.
Step 5: Choose a Google Analytics account, property, and type.

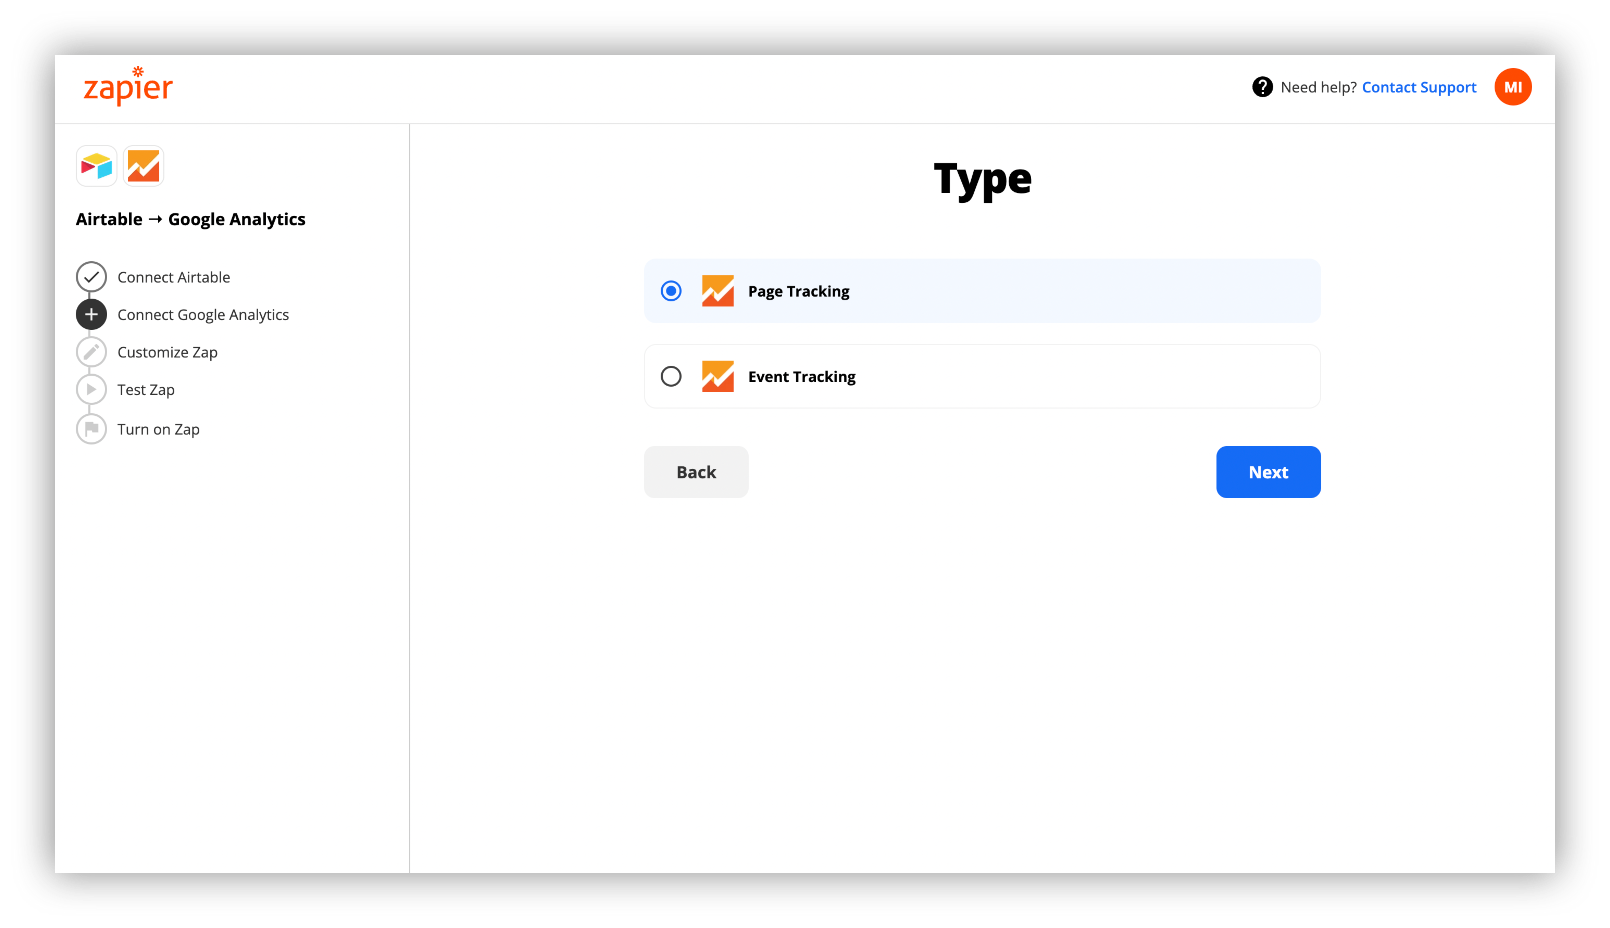
Step 6: Select the fields you want to edit in Airtable.
We selected Name and Type.

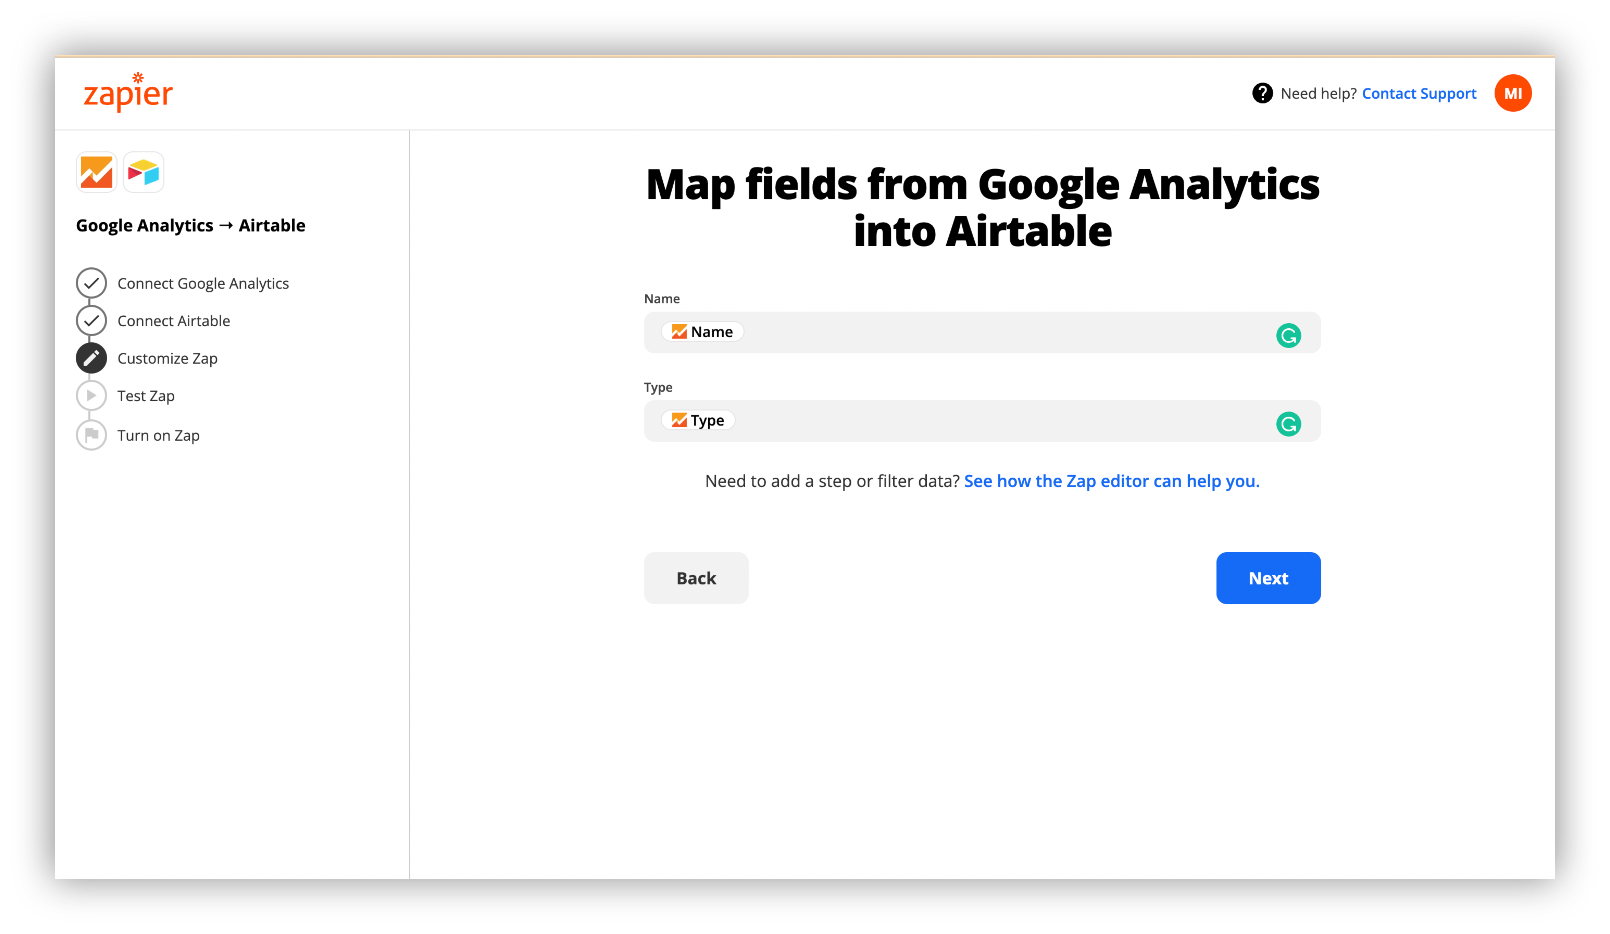
Step 7: Click “Next” to move on to customizing Zap for the final step. For this step, you’ll need to map fields from Google Analytics into Airtable.
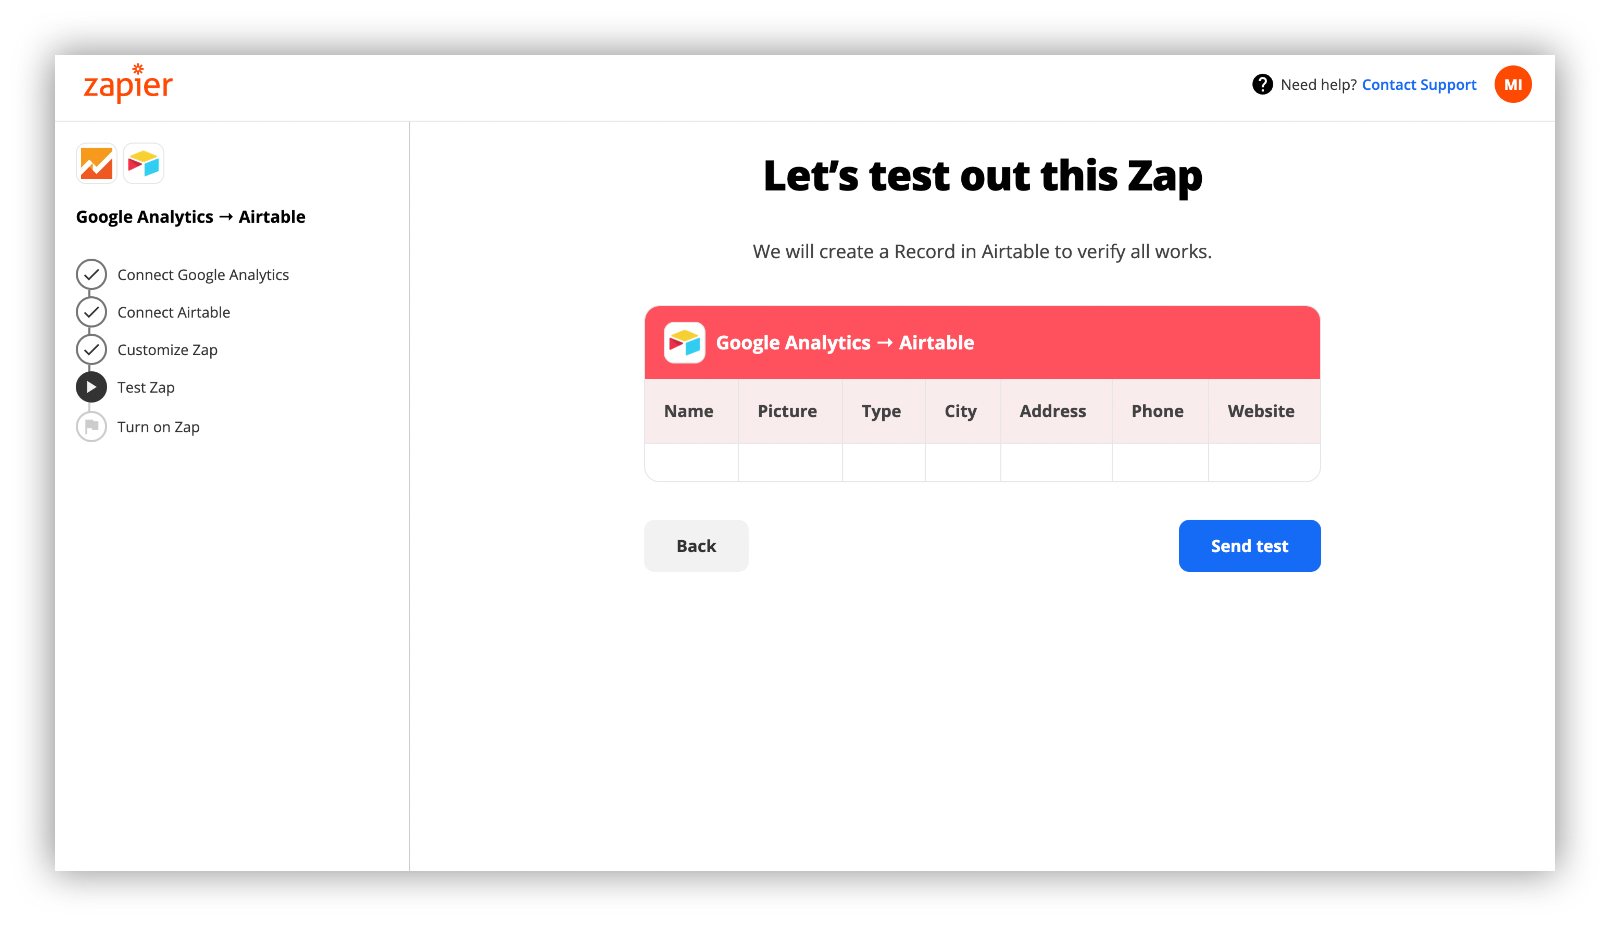
Step 8: “Send test” to test if you have successfully connected GA with Airtable.
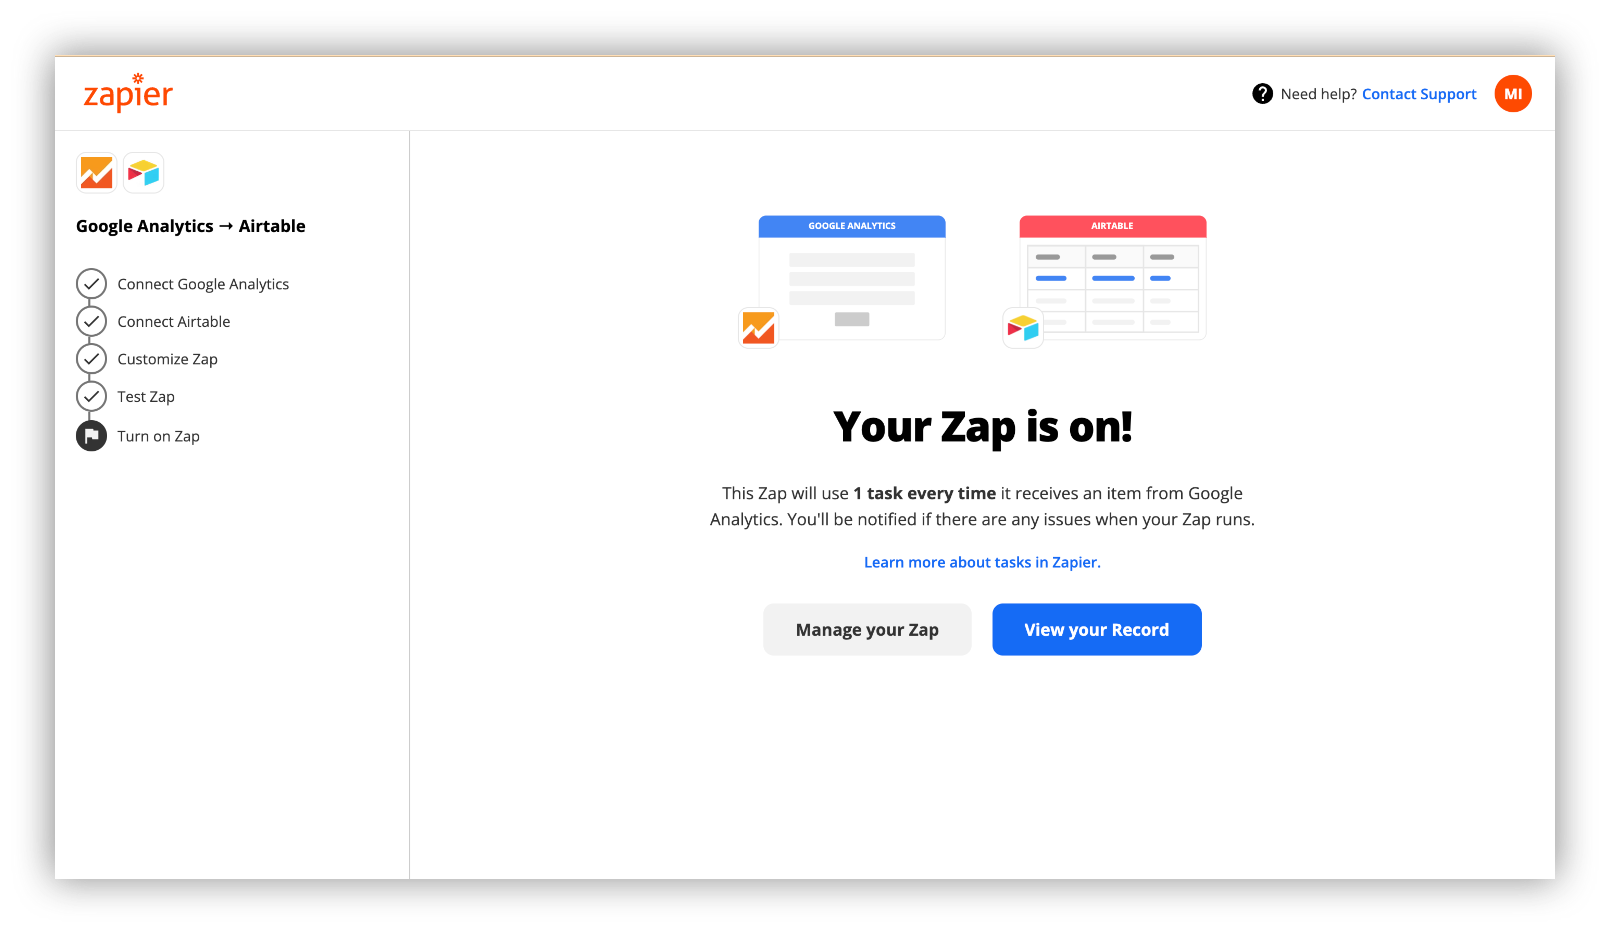
Zapier will create a test record for you to check if the connection went smoothly.

Step 9: After clicking next, you can Turn on the Zap to have your GA data automatically sent to Airtable.
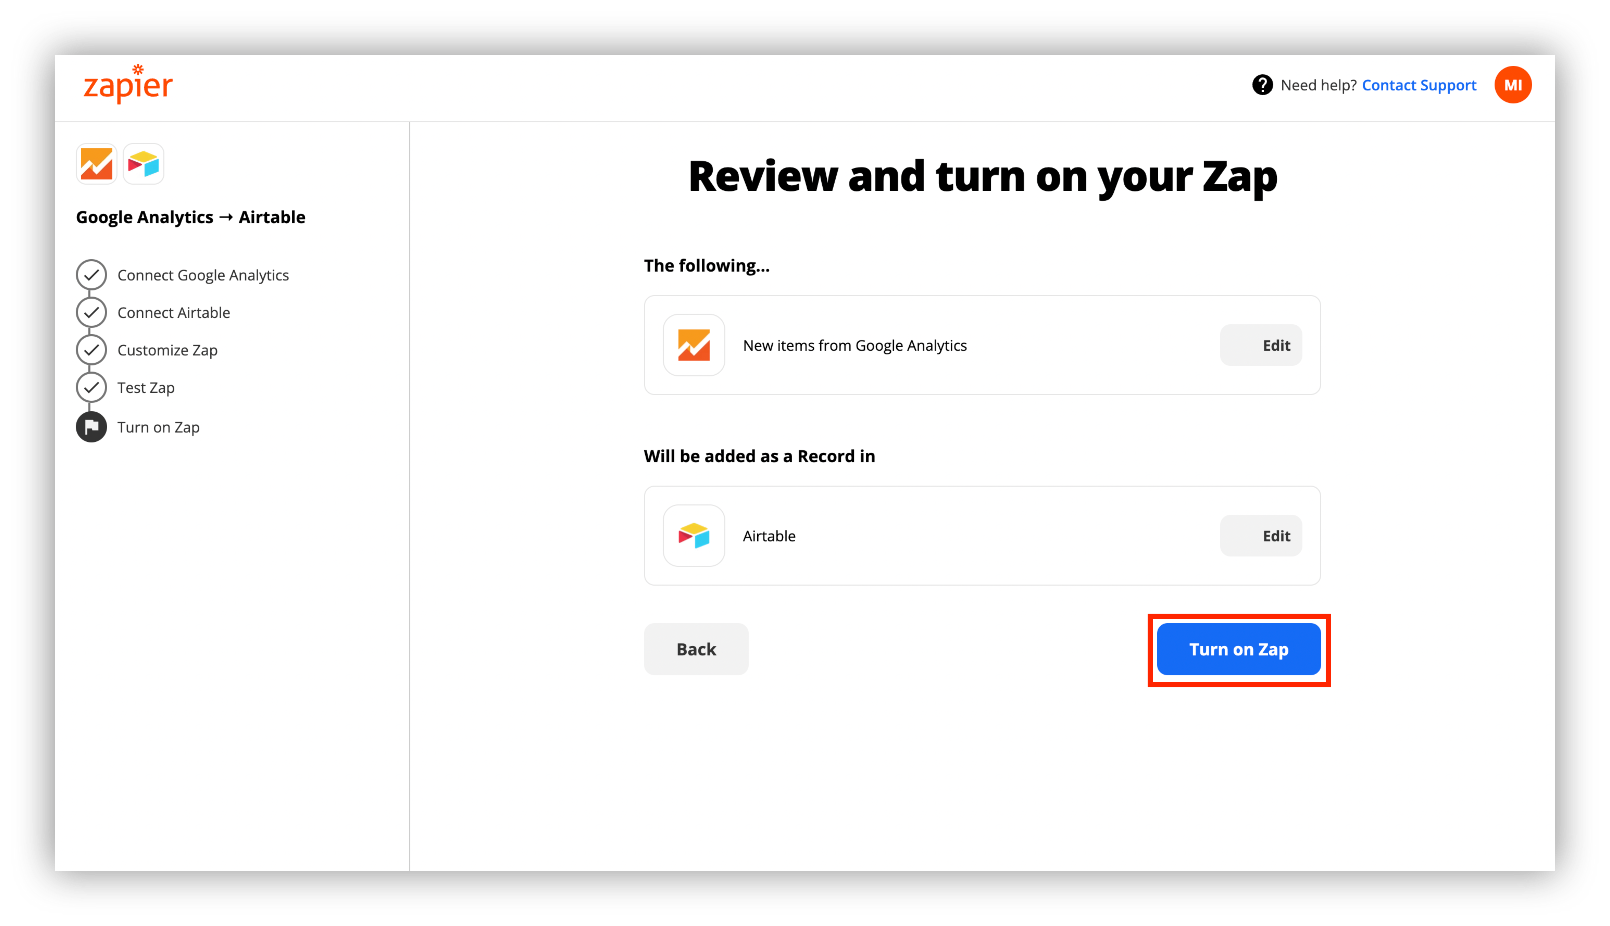
That would be it. You can always manage your Zap, turn it off/on, and even delete it if there is a need.
Import Google Analytics data to Airtable with Make
Next, we move on to Make.
Like Zapier, Make (formerly Integromat) is also an automation tool, with which you can sync GA with Airtable. The main difference between the two no-code platforms is the level of customization and difficulty. Zapier is much easier, less technical and less customizable, while Make is the right choice if you need a highly customizable tool and the level of complexity and steep learning curve won’t be an issue for you.
So, without further due, here is how you can import Google Analytics data to Airtable with Make :
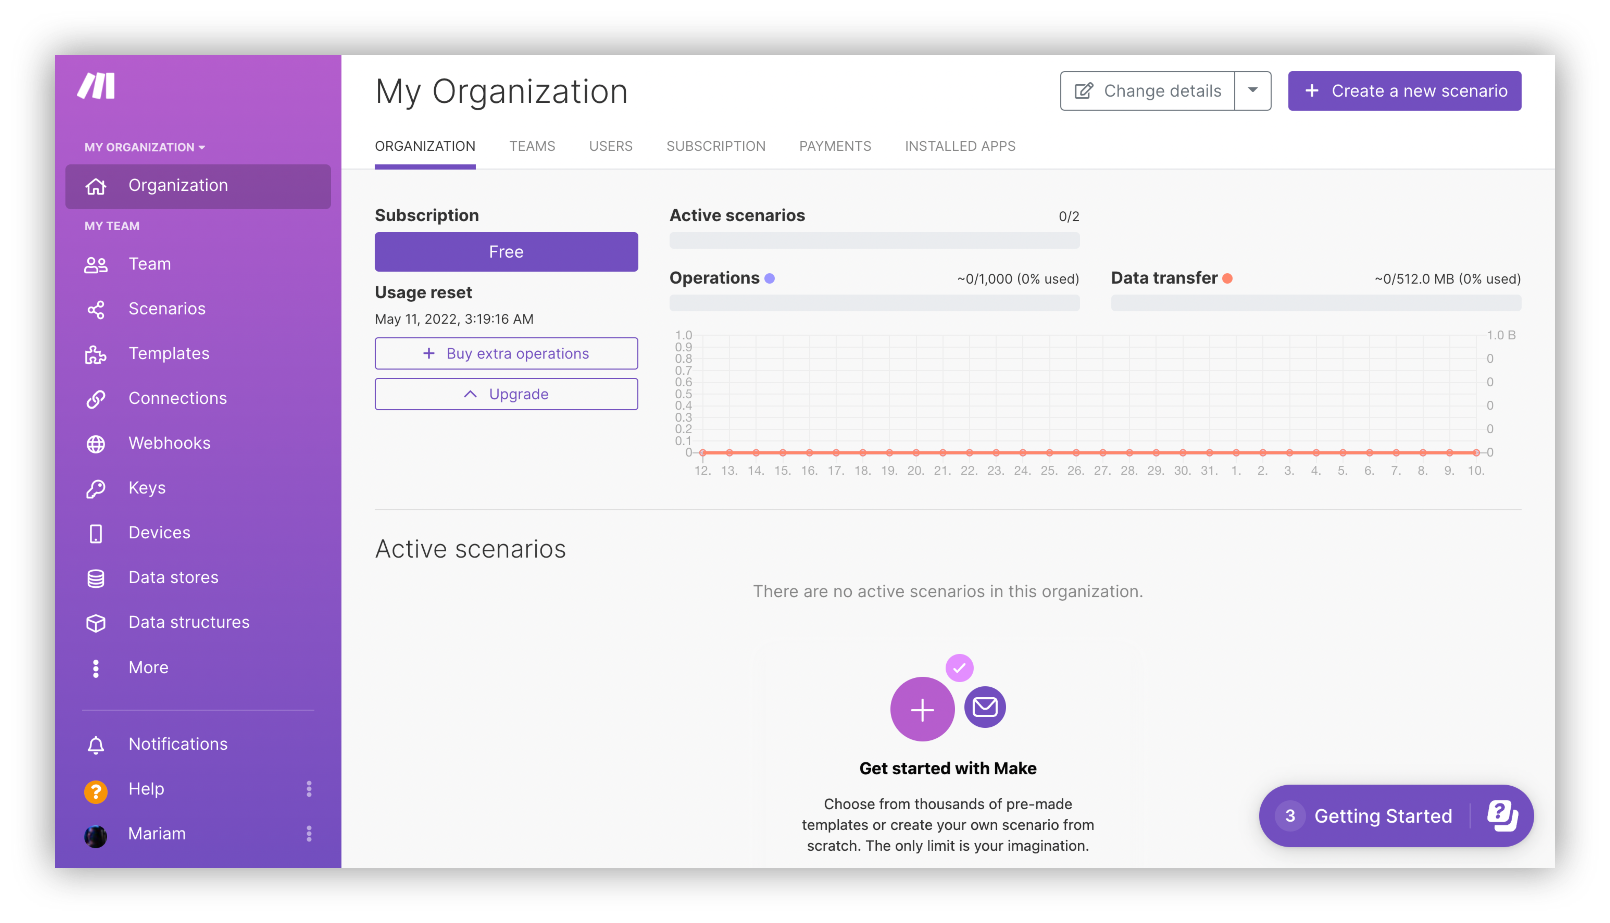
Step 1: Sign up if you don’t have a Make account to proceed with the process
After you’re done signing up, you will be taken to your “My Organization page”
Step 2: In the right corner of the homepage, click “Create a new scenario” to start syncing Airtable and Google Analytics.

Step 3: A window will pop up where you can select a module (integrated platform) to build the scenario.
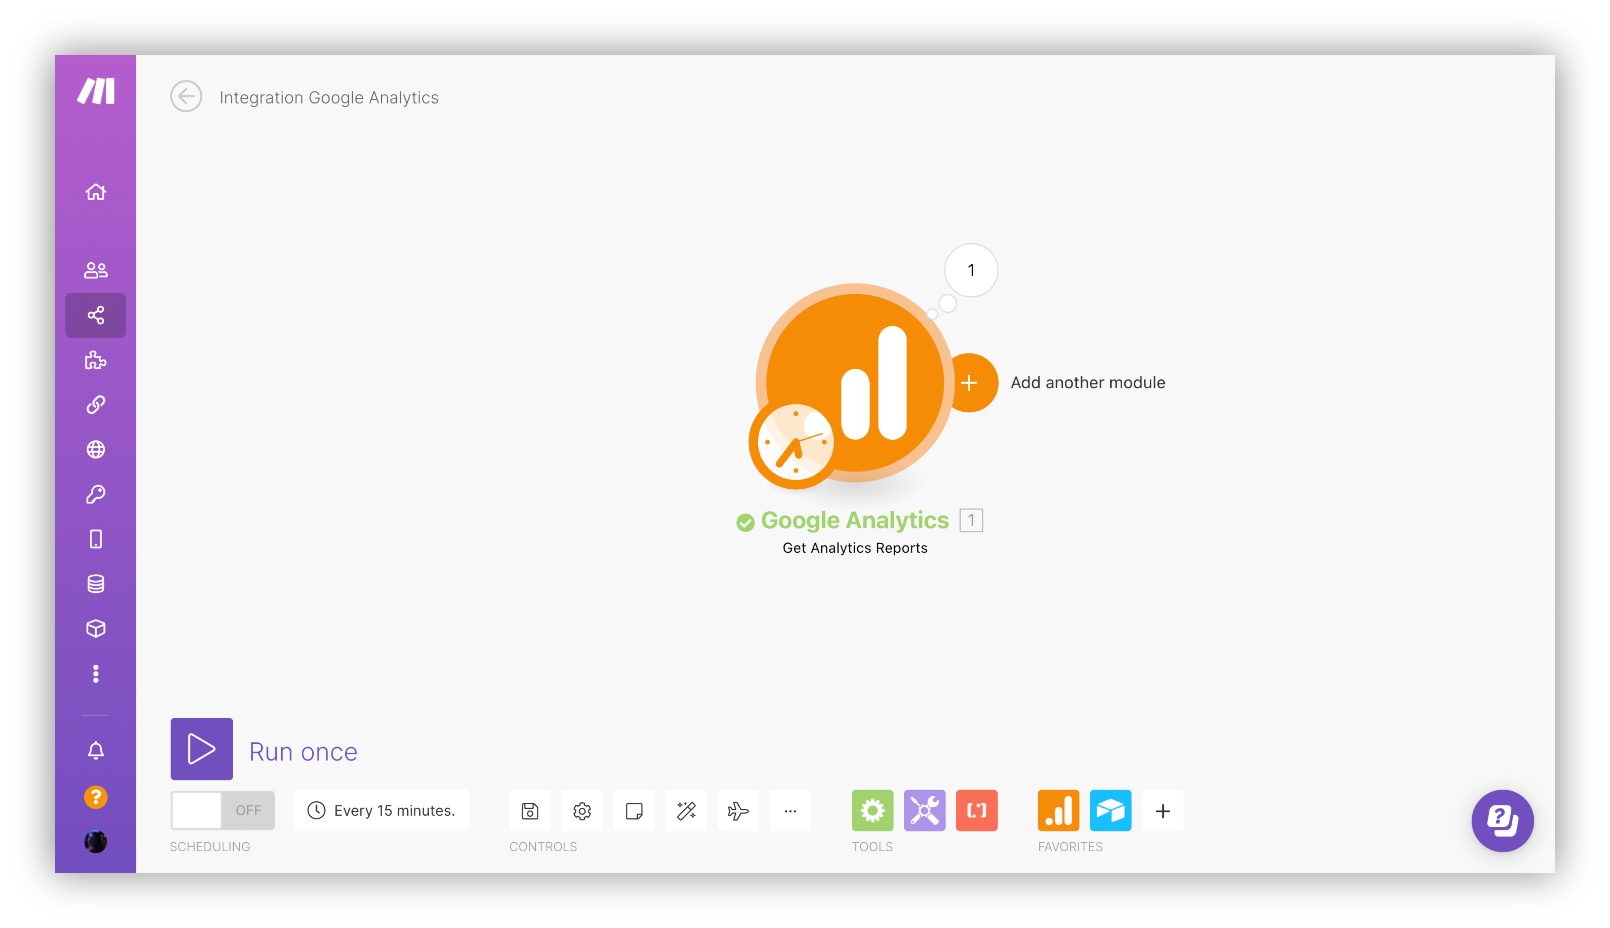
Step 4: Connect your Google Analytics account to Make.
- Click on the + button to search for Google Analytics module.
- Once you click on Google Analytics a new window will pop up where you should select “Get Analytics Report” option.
[video embed]
Step 5: Add a Google Analytics account.

Step 6: In the opened Google Analytics module's dialogue, click the “Add” button and choose the account you want to connect to.
The following steps are mandatory for Make to be able to retrieve analytics data for the specified website. However, there are also optional steps available that can make the importing process more customizable. We recommend you take a look at Make’s Google Analytics documentation for more thorough guidance.
Step 1: Enter a View ID by clicking the “Search” button.
Step 2: Select at least one data range for Make to return results (learn about supported date formats here)

Step 3: Enter a dimension name you want to include in the module’s output. In our case, we selected the “Browser” dimension.
Step 4: Add metrics you want to include in the importing process. We’ve selected ga:users metric to get the data on the total number of users for the requested time period. If you feel confused about GA dimensions and metrics, take a look at this guide to get a better understanding.
[video embed]
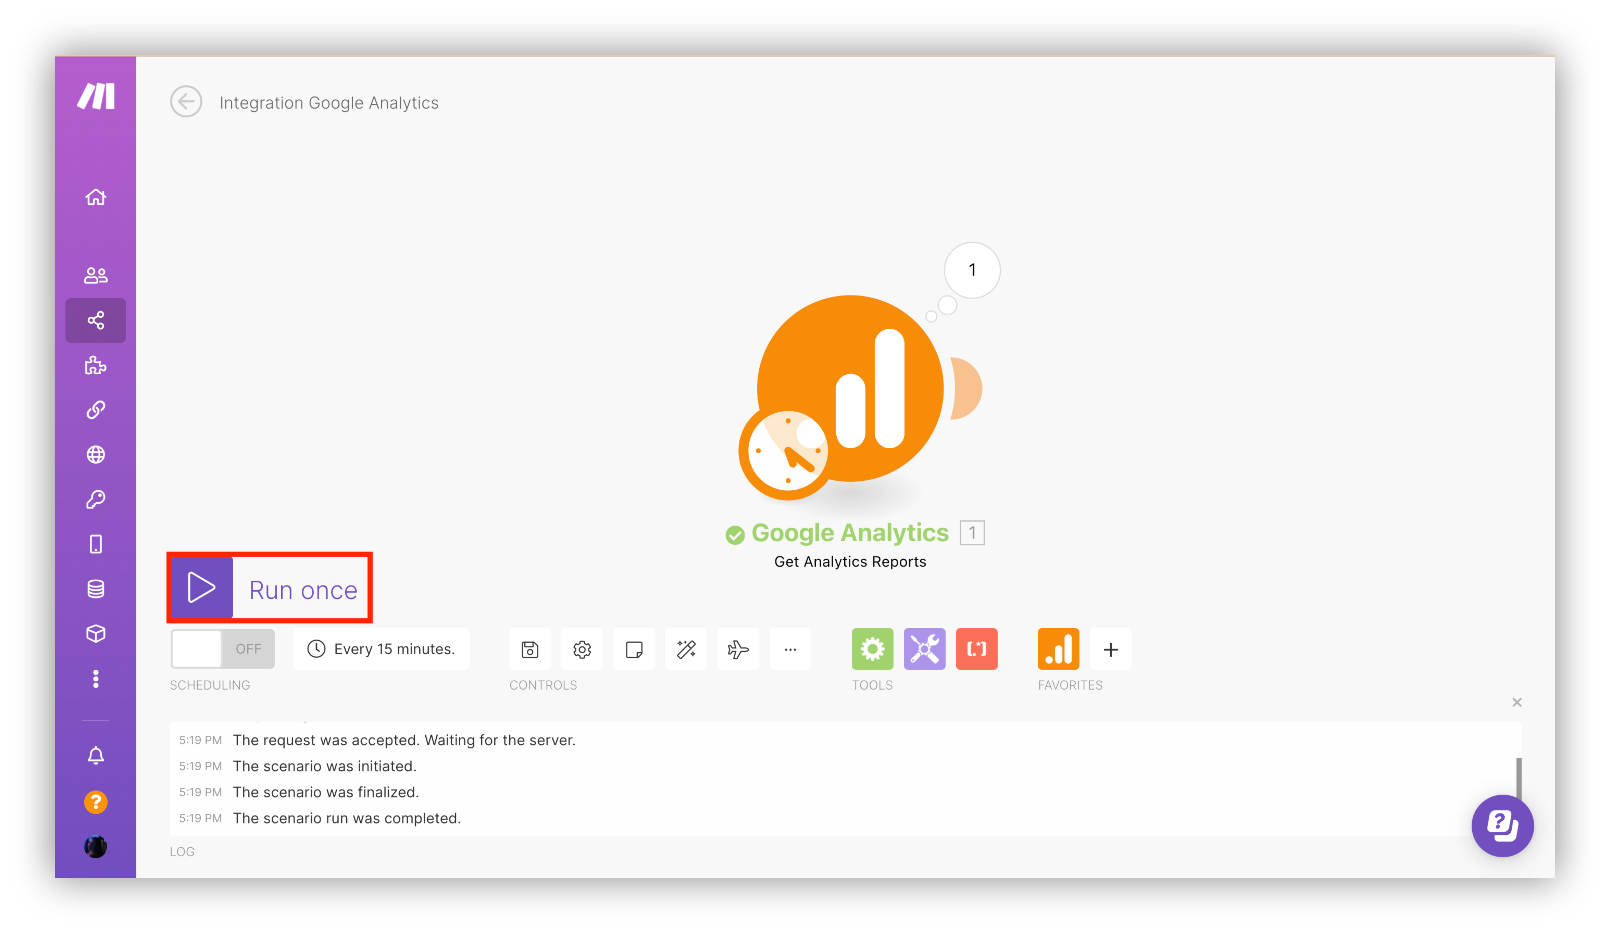
That would be it for connecting Make and Google Analytics. To make sure everything runs smoothly click “Run Once” to test the scenario.
The next stage of the syncing process is connecting Airtable to Make.
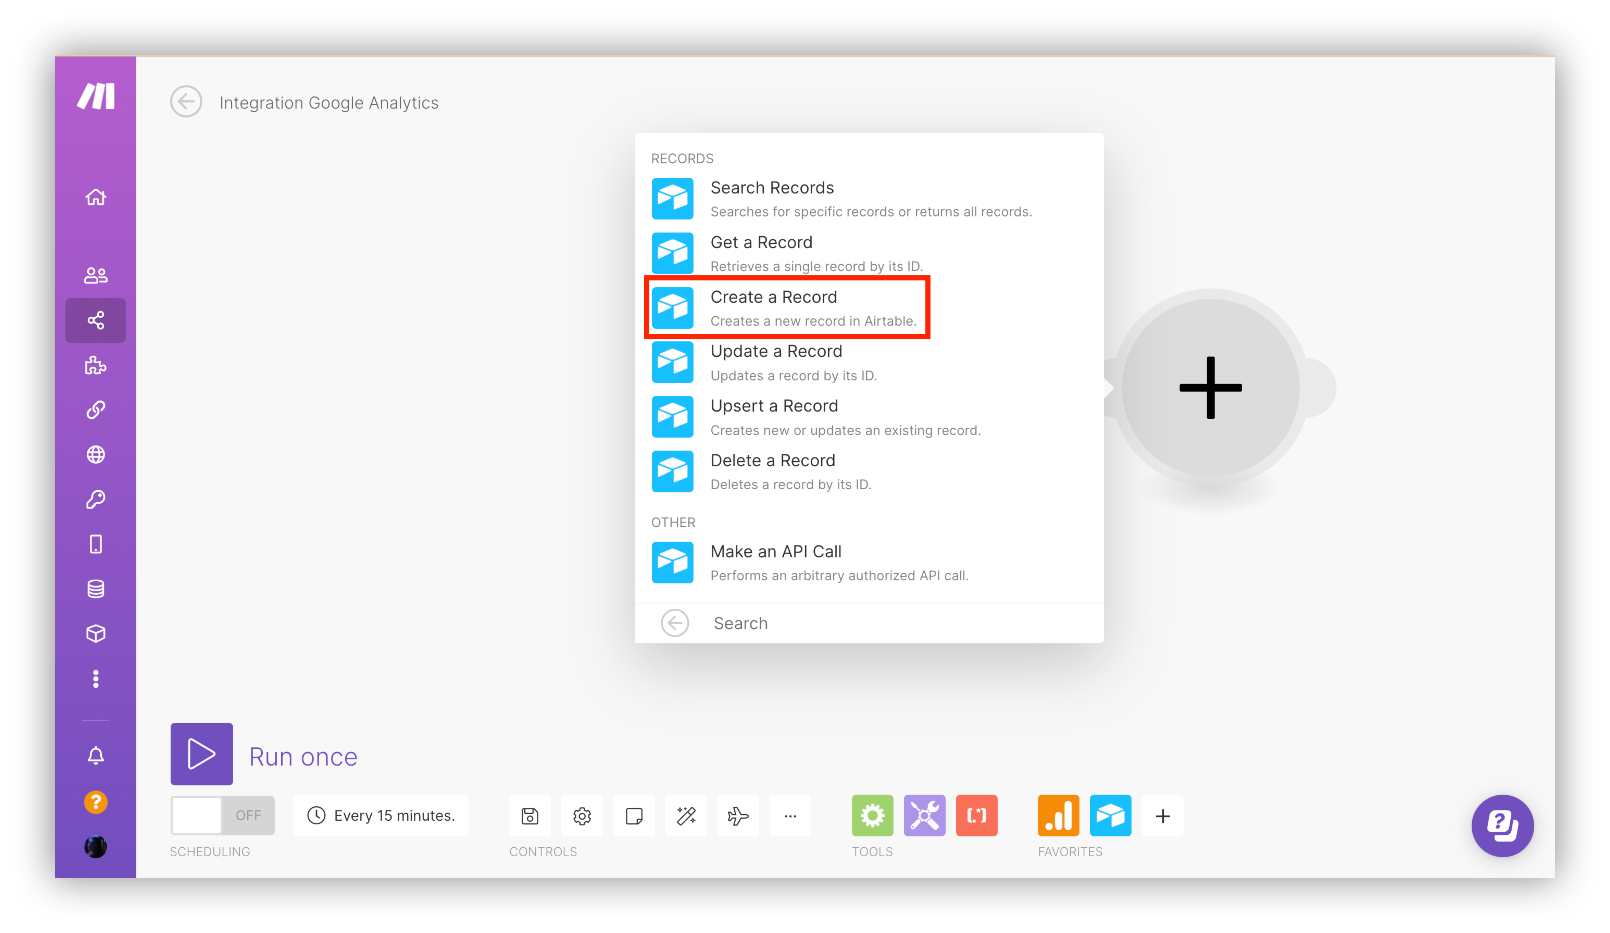
Step 1: Click on the + button on the right corner of the Google Analytics module.
Step 2: From the opened window, we need to find Airtable and select the right action.
We will need to select the “Create a new record” trigger, to have the Google Analytics data be imported to the table automatically.
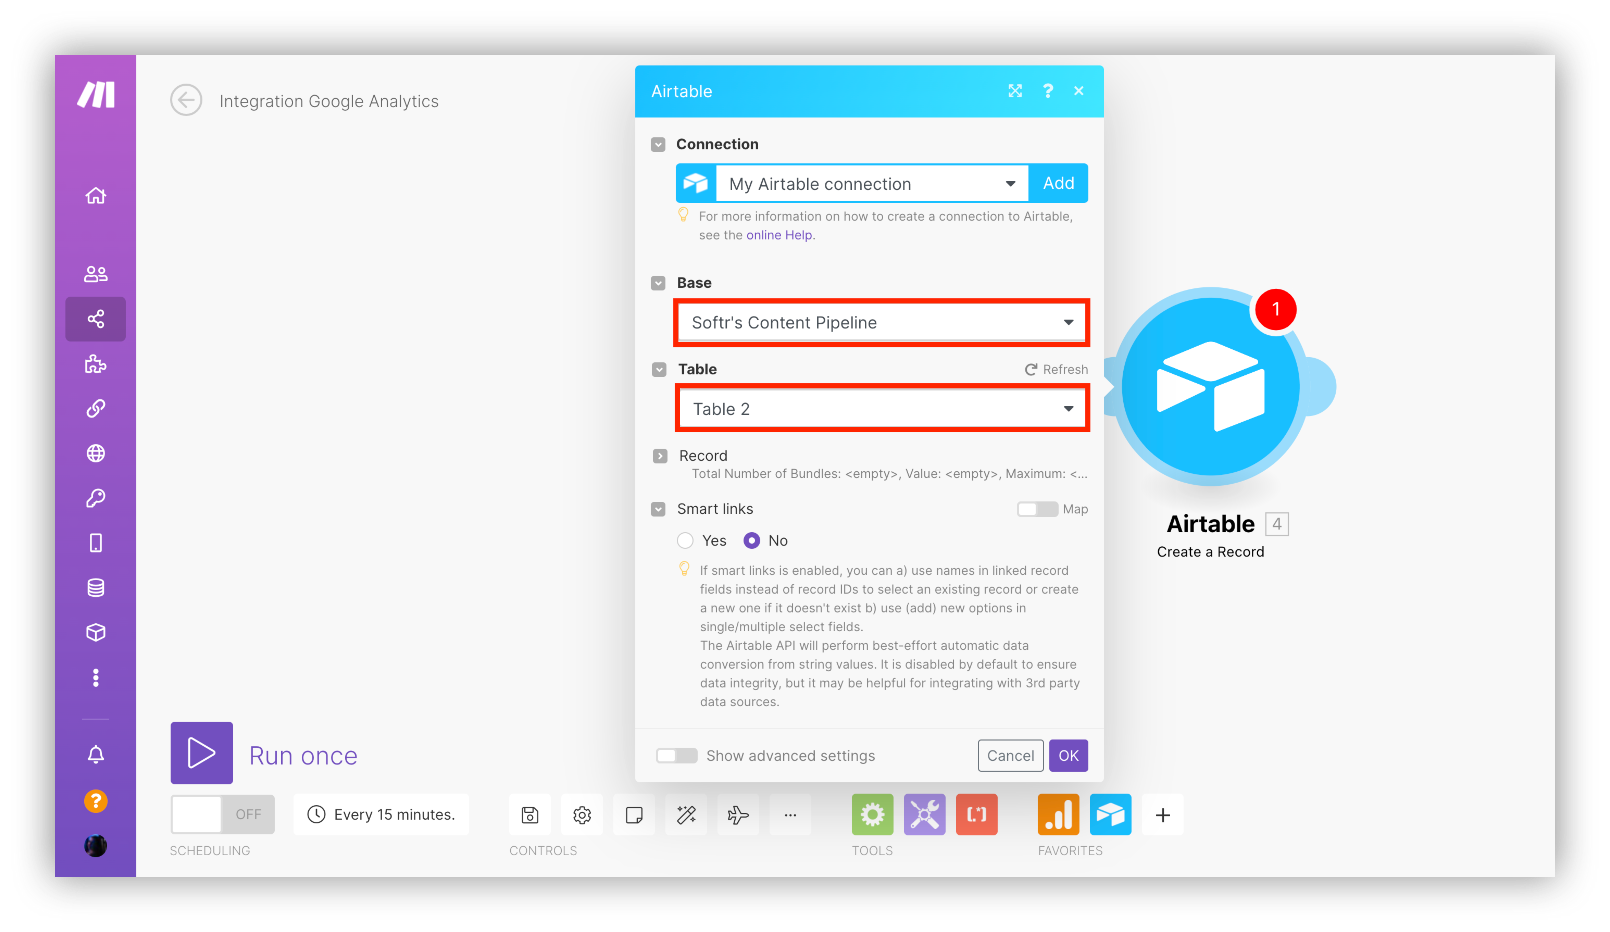
Step 3: Add an Airtable account. Simply click “Add” and fill in your Airtable API key.
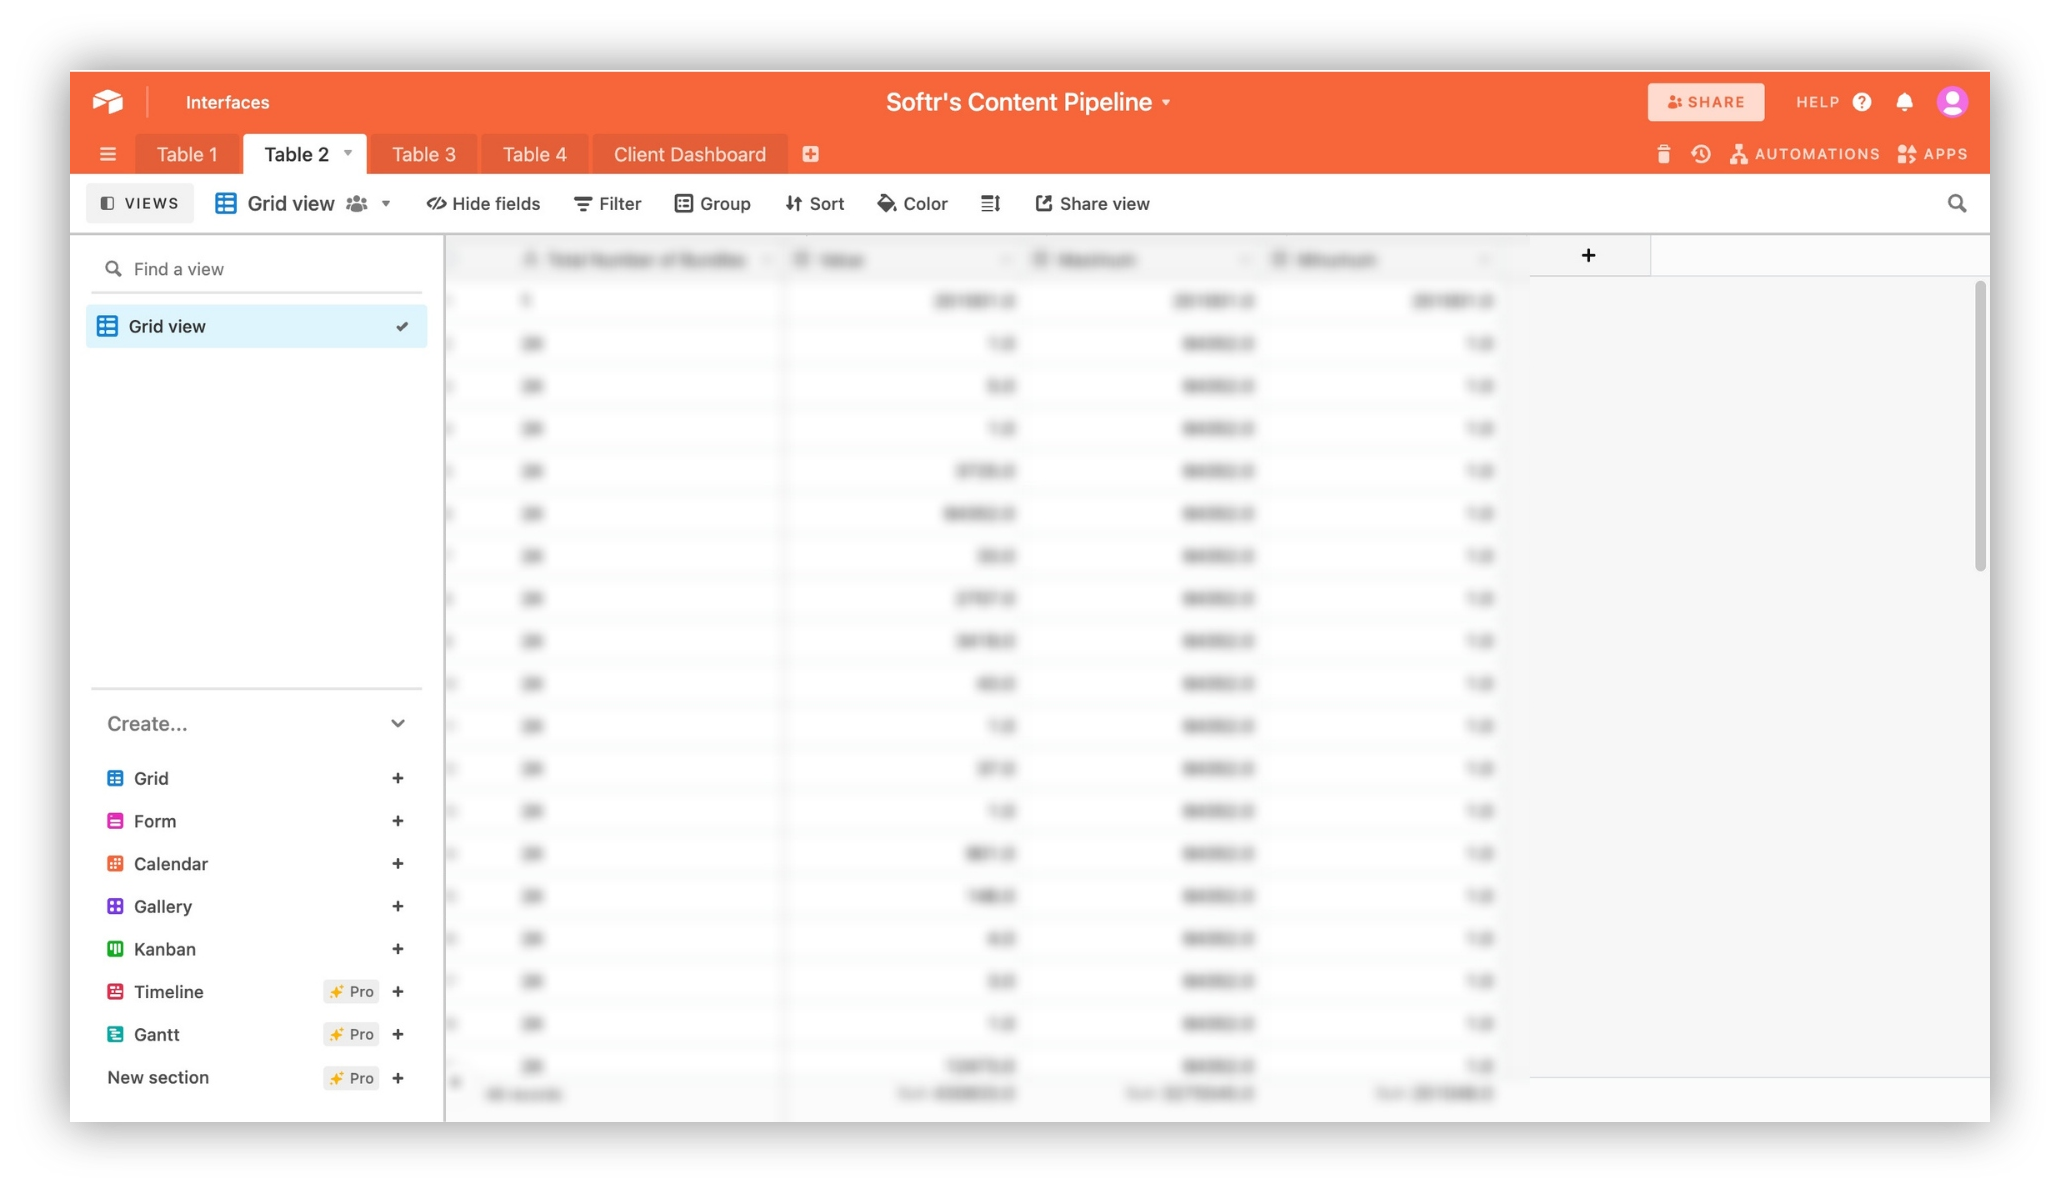
Step 4: Select a Base and a Table to create new records.
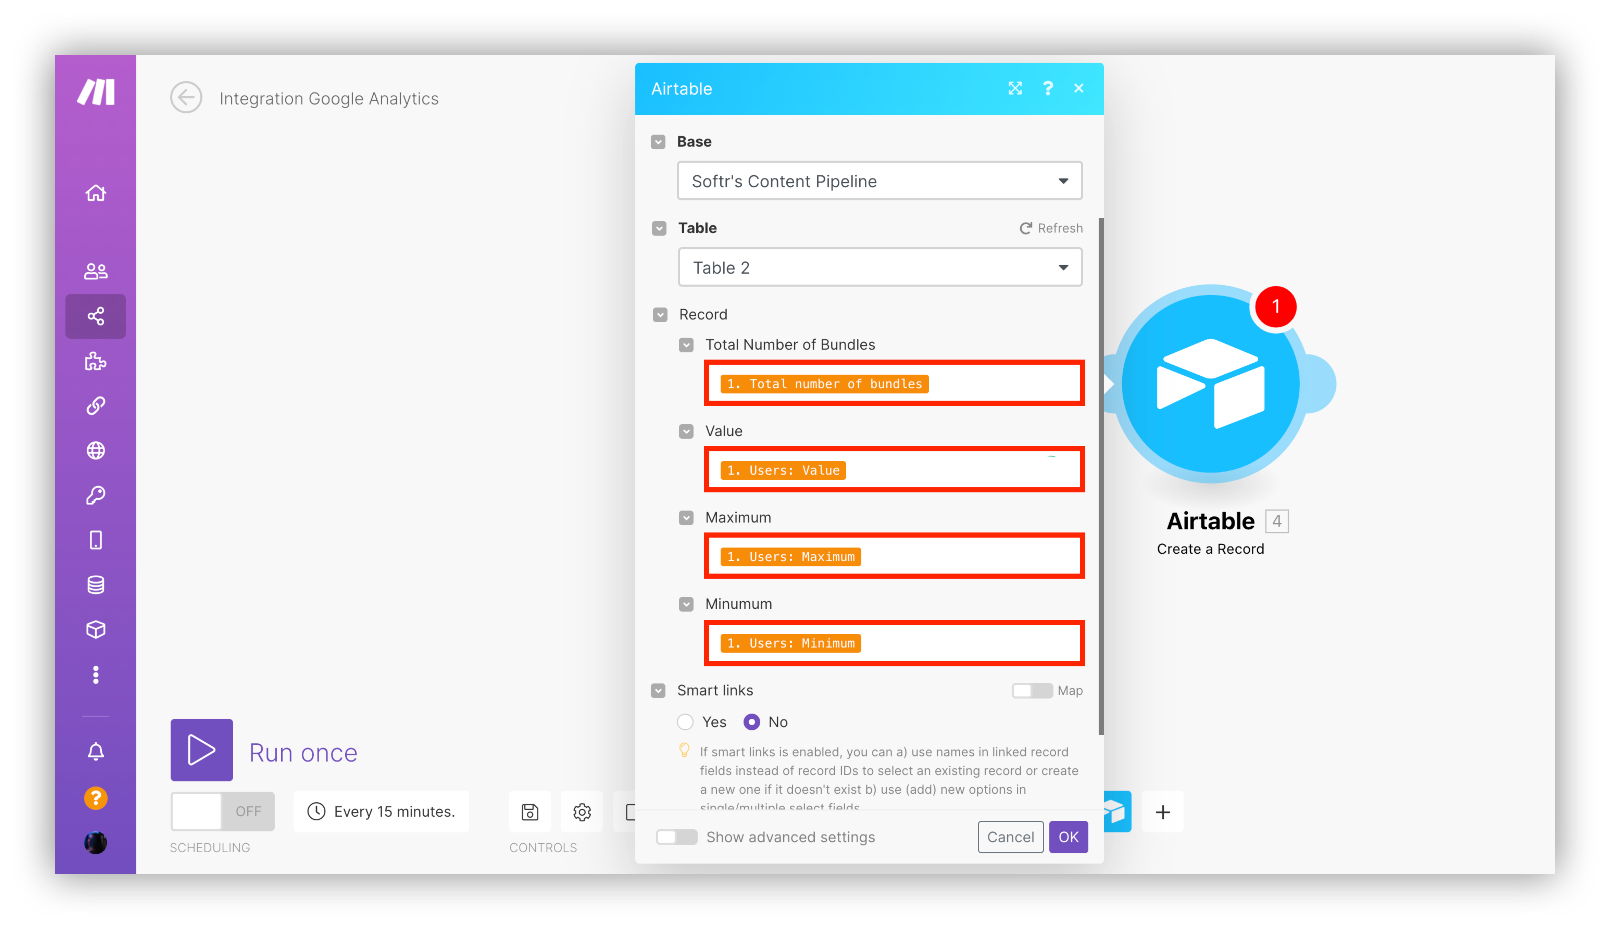
Step 5: Select records to import your Google Analytics data in.
We chose to import The total number of bundles, Users Value, Maximum number of users and Minimum number of users.
Step 6: Run your scenario to make sure you have your data imported to Airtable records successfully.
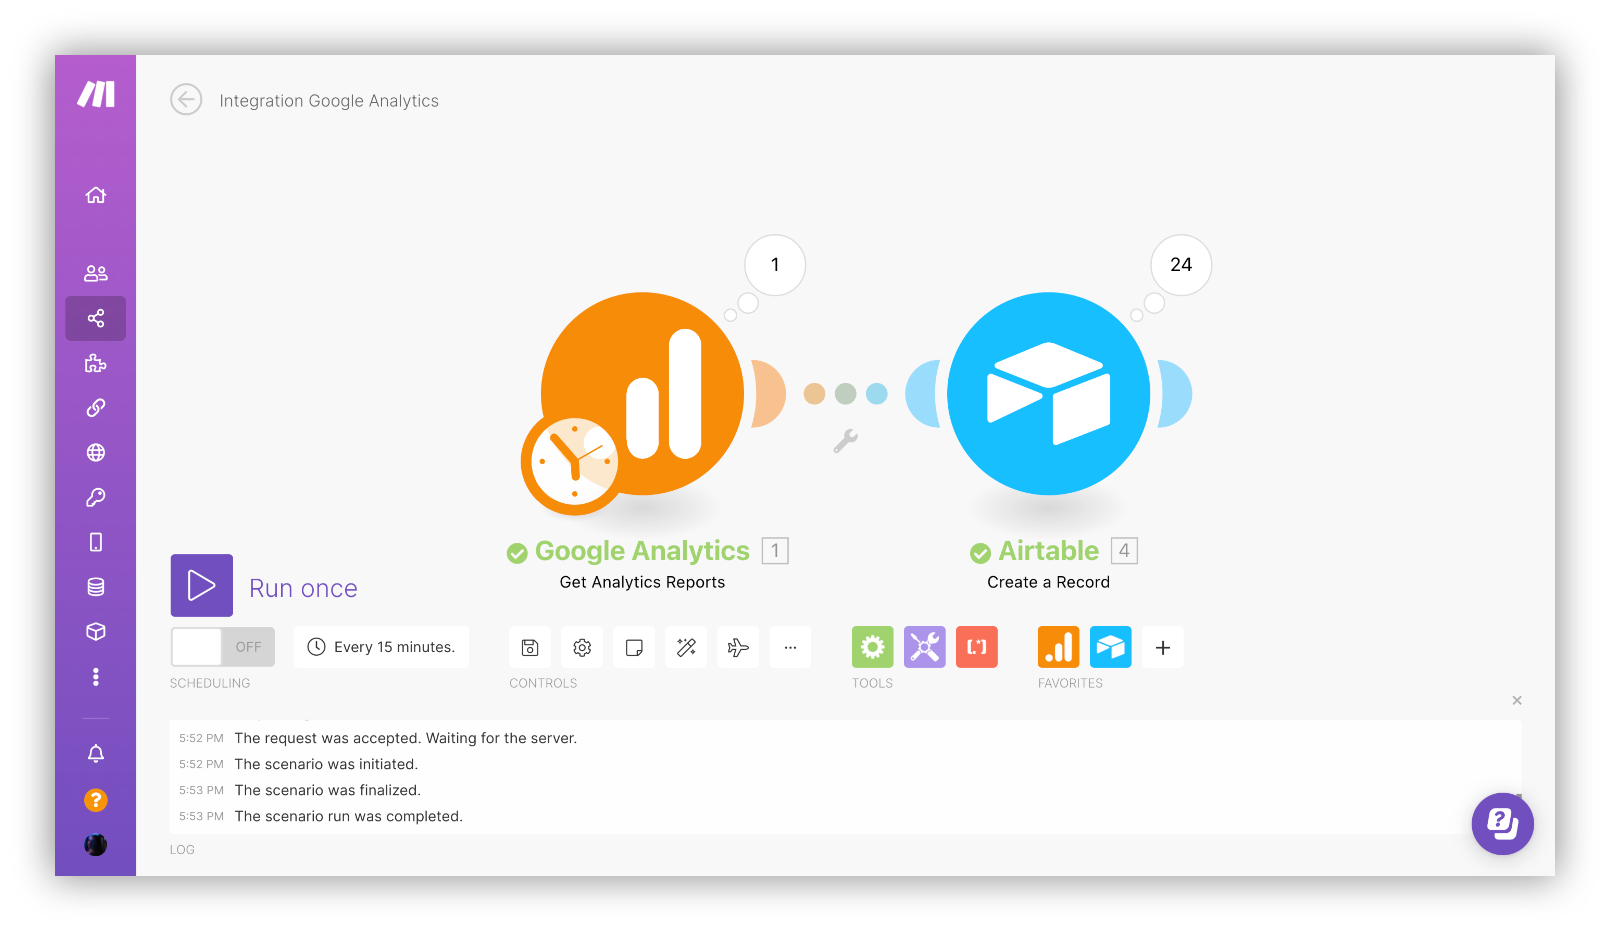
Tada! Now you have your Analytics reports successfully imported to the Airtable table.
Bonus: Syncing Google Analytics and Airtable with Parabola
But, hold up! There’s more.
There is a no-code automation tool, Parabola, which also allows syncing Google Analytics and Airtable. Here is a great video with a step-by-step guide on how to make the GA x Airtable x Parabola function within 30 minutes.
Final Thoughts
In the guide, we’ve demonstrated the most efficient ways you can sync Airtable and Google Analytics to import data. At first, it may seem fairly complicated and time-consuming, but, trust us it won’t take much effort or time if you follow the presented steps accordingly. Good luck!
About Softr
Softr is an easy-to-use no-code platform that turns Airtable bases into powerful web apps, member-only websites, and client portals. Softr offers a way for you to authenticate your end-users, control access to your content and data based on conditional rules like roles, logged-in status, subscription plans, etc. If you're using Airtable as a product catalog you can use a Softr template to build your e-commerce website. Or maybe you'd like to build a custom website for your travel journal, there's a template for that too!
What is Softr
Softr is the easiest way to turn your data into powerful business apps—no code required. Connect to your spreadsheet or database, customize layout and logic, and share with your team or clients.
Join 800,000+ users worldwide, building client portals, internal tools, CRMs, dashboards, project management systems, inventory management apps, and more—all without code.
Join 800,000+ users worldwide, building client portals, internal tools, CRMs, dashboards, project management systems, inventory management apps, and more—all without code.
Get started free

Mariam Ispiryan


Categories


.png)

