


Whether you're managing data for inventory, tracking employees, or handling client projects, Google Sheets offers a simple yet powerful tool to store your information. By creating an app from Google Sheets, you can turn your data into a user-friendly, easy to navigate that provides a seamless user experience.
The easiest and fastest way to build a web app using your Google Sheets data is by using Softr.
In this guide, I’ll show you how to use your Google Sheets for app creation using Softr’s no-code platform. It's fast, efficient, and perfect for anyone looking to streamline operations and get more out of their Google Sheets—without writing a single line of code!
Step 1: Sign in or create a Softr account
First, log in to your Softr account. You can sign up for free if you don’t have an account yet.

To get started, go to the Softr homepage, click "Sign up for free," and follow the easy steps.
Step 2: Create a new application
Once logged in, navigate to your Softr dashboard and click the "Start from scratch" button. You can also click the “All templates” button on the left to choose from one of Softr’s customizable app templates.

Softr’s flexible no-code platform means you can build almost any type of app your business needs. Softr offers a variety of templates to help you develop your app, like the Inventory Management, Employee Directory, or Sales CRM app templates.

For this guide, I’ll use the Client Portal Template. Select your preferred template and click "Use Template" to proceed.

Related resource: Read our blog on how to use Google Sheets as a database to prepare your data
Step 3: Connect to Google Sheets
After choosing your template, you’ll be prompted to select a data source. Since we’re creating an app using Google Sheets, choose Google Sheets from the list of available source data, then click "Continue."

Next, connect Softr to your Google Sheets account. A window asking you to sign in to your Google account will pop up.

Choose the account where your data is stored, and then grant Softr access to your Google Sheets by clicking "Select All" and "Continue."

This connection allows Softr to access your spreadsheet data to power your app.
Once your Google account is connected, click “Go to application.”

Step 4: Choose your Google Sheets file and map data
Once Softr and Google Sheets are connected, you’ll need to choose the file you want to use for integration. Open one of the template blocks. On the right-side panel, under the Source tab, click the “Document” dropdown menu to select your Google Sheets file.

Choose the appropriate sheet and map the columns to the correct blocks of your app, connecting data to the proper places.
Step 5: Customize your new app
Now that integration is complete, it’s time to customize your new app to match your brand’s style and needs.
Modify your app's user interface by clicking “Theme” on the left menu to customize your font, colors and app styles.

Adjust the block paddings, margins, colors, add a logo and more by clicking on any block to open a sidebar with style options.

You can also add new blocks to create additional sections in your app. Just click the "+" icon in the top-right corner and search for the block you need.
An app can contain several pages. For example, our Client Portal Template includes a user login page, a password reset page, a client list, a project list, and more. You can include as many blocks as needed on each page.
Make sure to connect any new blocks to the appropriate Google Sheets data set and map the fields.
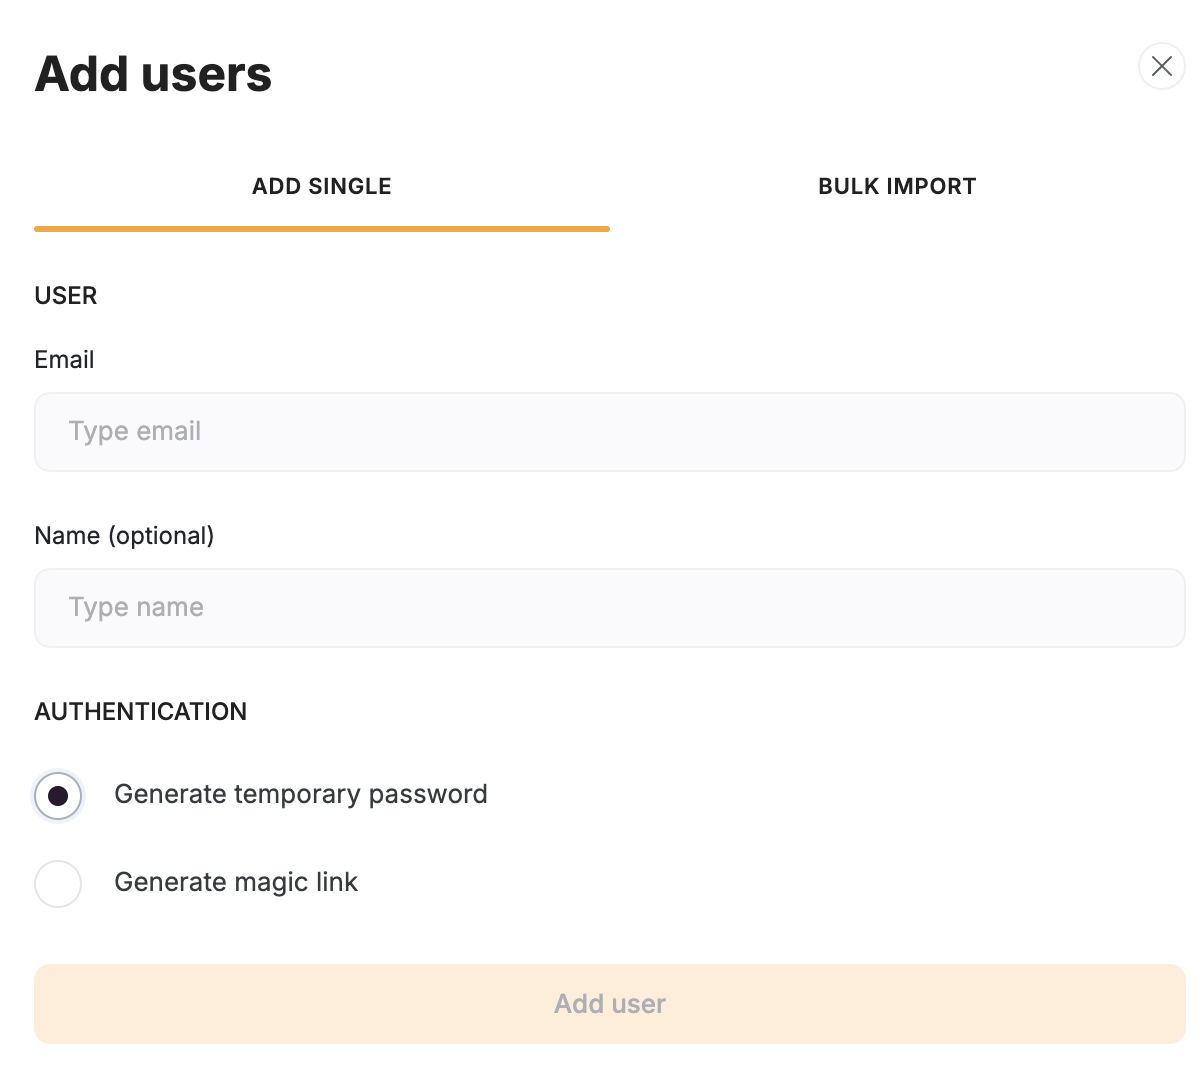
Step 6: Add users and adjust visibility
To add users like team members or clients, navigate to the Users panel from the left menu and click "Add Users."

You can manually add their details or import users by uploading a CSV file with user data.
Once you’ve added users, you can assign them different permissions to control what they can see or do within the app.
You can also create user groups, to which you can add multiple members and assign the same permissions to each group of users.
To create user groups, click on the User Groups tab and then on “Add user group.” Name the group and add the users manually or based on certain conditions.
Before you deploy your app, you can customize views to control which users or groups can view specific pages or blocks. In the Visibility tab for each page or block, app creators can set the permissions based on user roles or groups.
Click on the cog icon at the top left, then open the Visibility menu to define which users or user groups can see that page.
To change the visibility of a specific block, click on it to open the sidebar on the right side. Then, open the Visibility tab to define access for users or user groups.
Step 7: Publish your app
Once you’re satisfied with your app’s design and data setup, it’s time to deploy your app.
Click the "Publish" button in the top-right corner of the page. A confirmation popup will appear; hit "Publish" again, and your new app will be live for users to access.

You can also turn your web app into a PWA (Progressive Web App) with just one click for desktop or mobile device access.
Now you're ready to share your app! As your needs grow, you can keep refining and adding advanced features.

Build more no-code apps with Google Sheets
From managing internal operations to building client-facing tools, Softr makes app creation easy—no coding required.
Here are just a few of the use cases and different types of apps you can create with Softr:
1. Internal tools and dashboards
Turn your business data into internal tools and dashboards to monitor critical metrics. Create live dashboards that update in real time as your business data changes to track sales data, employee performance, project management, and more. Display information in charts, graphs, grids, lists, and more, making it easier to make data-driven decisions.
2. Custom client portals
With a custom client portal, you can give clients secure access to a specific data set stored in your Google Sheets. Customize views and permissions for a tailored user experience. Clients only see what’s relevant, so you can share invoices, project updates, documents, and more.
3. Inventory management system
With Softr, you can turn your inventory tracking spreadsheet into a fully functional inventory management app. Create views for different team members or departments, and track and manage products and inventory—all using spreadsheet data.
Related resource: How to use Google Sheets for inventory management
4. CRM apps
Build a CRM app with your Google Sheets data and customize it to your sales process. Your sales team can manage leads, track customer interactions, and follow up on sales opportunities all in one place.
Related resource: How to use Google Sheets as a free CRM
5. Vendor portal
Using Google Sheets as a backend, you can create vendor portals to keep all vendor data organized and easily accessible, with custom permissions for each vendor.
6. Employee portal
Create an employee portal app for onboarding, managing employee information, sharing internal documents, and more.
7. Team intranet
Use Softr’s no-code platform to build a team intranet that improves internal communication and collaboration. Your team can access documents, announcements, and project information, keeping everyone connected and informed.
Try Softr’s AI App Generator to automatically generate apps with a few simple prompts for faster app creation.
Conclusion
Now that you know how to create an app from Google Sheets, it’s time to start building. Whether you're a small company or a large organization, Softr makes app creation simple and scalable.
Try Softr for free and turn your Google Sheets data into a functional app today!
What is Softr
Softr is the easiest way to turn your data into powerful business apps—no code required. Connect to your spreadsheet or database, customize layout and logic, and share with your team or clients.
Join 800,000+ users worldwide, building client portals, internal tools, CRMs, dashboards, project management systems, inventory management apps, and more—all without code.
Join 800,000+ users worldwide, building client portals, internal tools, CRMs, dashboards, project management systems, inventory management apps, and more—all without code.
Get started free

Hugo Nunes


Categories


